

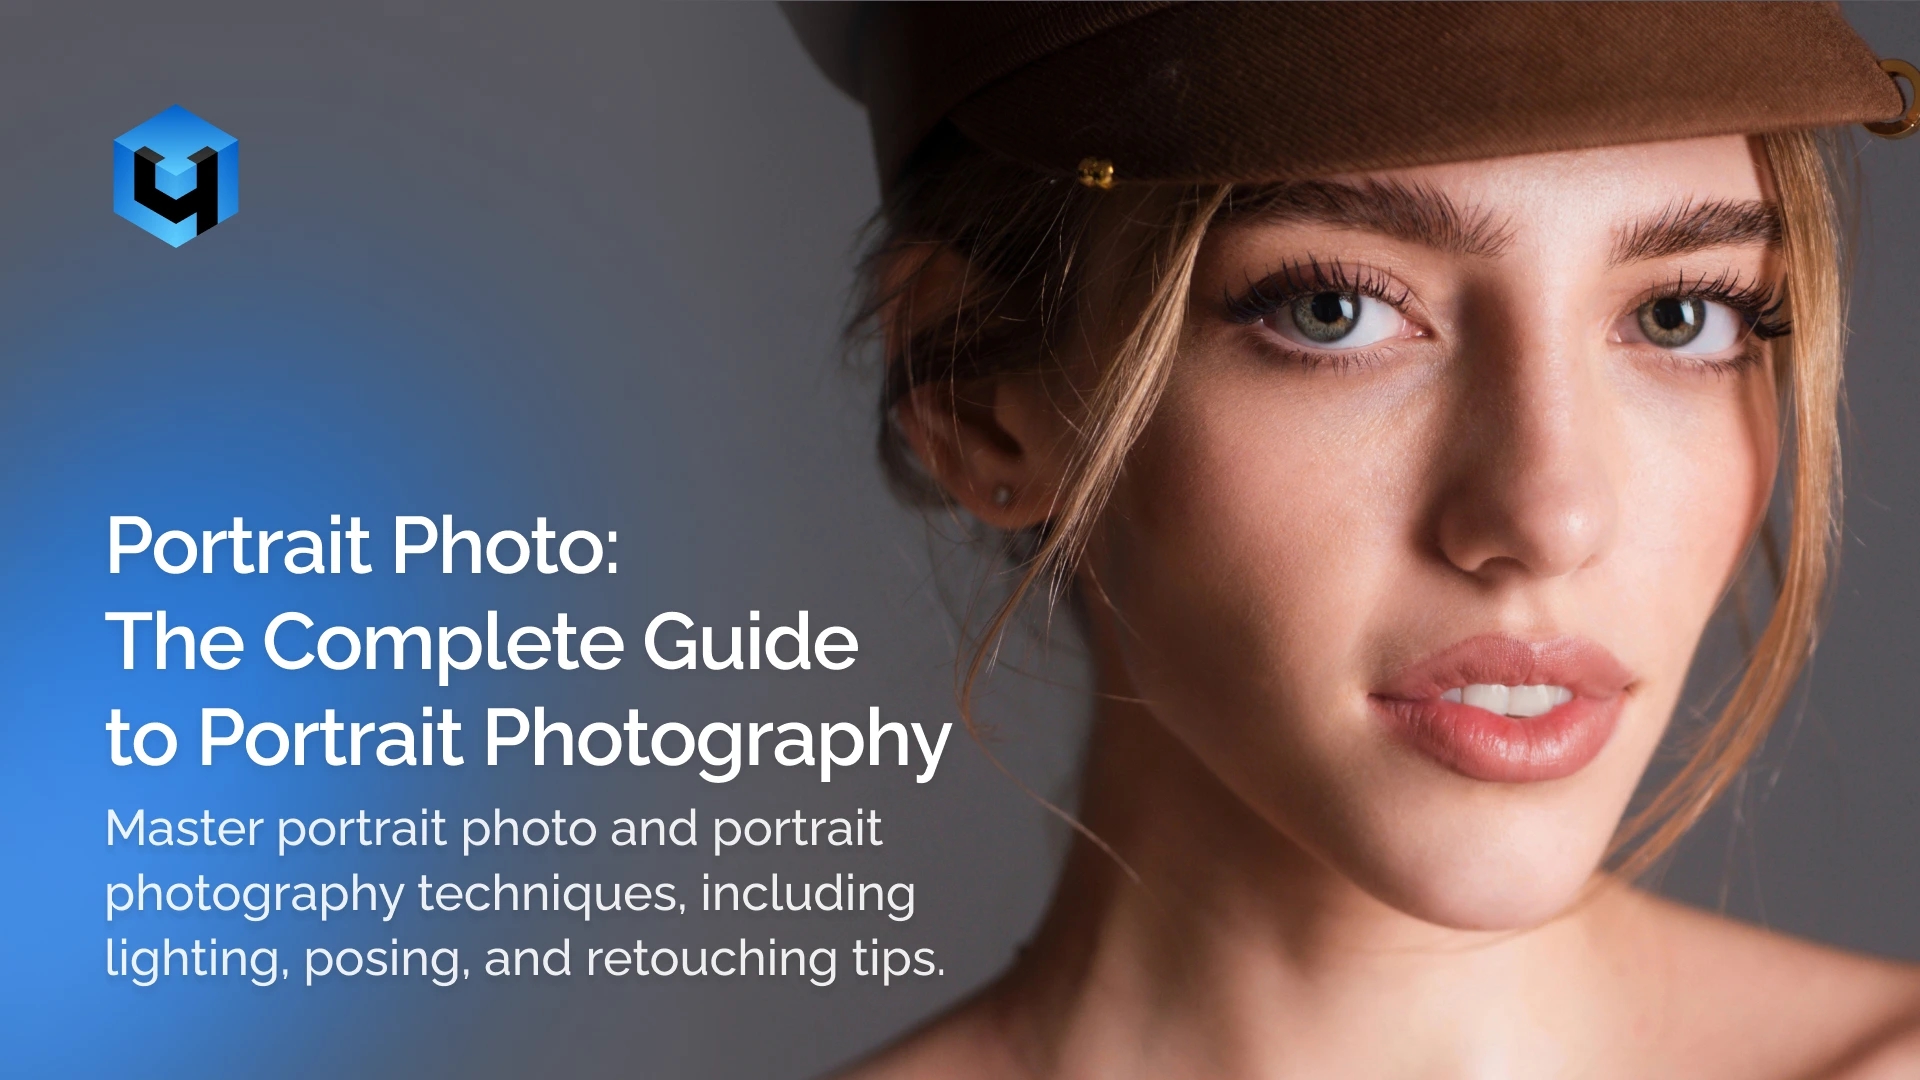
A strong portrait photo does more than show what someone looks like. It gives the viewer a sense of who that person is, or at least how they felt in that moment. That is what makes portrait photography so compelling. It sits somewhere between technique and instinct. You need to understand light, framing, focus, and editing, but you also need to notice expression, tension, body language, and timing.
That combination is exactly why portrait work can be harder than it first appears. A technically correct image is not always a convincing portrait. A face can be sharp, well exposed, and beautifully lit, yet still feel empty. On the other hand, a portrait with a tiny imperfection can feel alive if the expression, mood, and connection are right.
In this guide, we will break down portrait photography into the parts that matter most. You will learn what defines a portrait photo, how portrait styles differ, what lighting patterns actually change in a face, how to work with camera settings, how to direct people in a natural way, and how to edit portraits without stripping out realism.
We will also look at post-production in more practical detail than most portrait guides do. That includes both manual retouching and modern AI tools that can help photographers work faster while still keeping skin texture, tone, and facial character believable.
What Is a Portrait Photo?
A portrait photo is a photograph built around a person as the main subject, with the goal of showing not only their appearance but also something about their expression, character, energy, or mood.
That intention is what separates a portrait from an ordinary photo of a person. A portrait is not just taken — it is shaped. The photographer makes choices about angle, crop, light, lens, background, pose, and timing so the final image says something deliberate about the person in front of the camera.
Portraits can be tightly cropped or quite wide. They can show only the face, half the body, or the whole figure. What matters is not the crop itself, but the role of the person inside the frame. If the image is built around representing that person in a thoughtful way, it is functioning as a portrait.
What makes a photo a portrait?
A photo becomes a portrait when the person is clearly the center of attention and the image is designed around them. The frame may include clothes, surroundings, gestures, or details from their environment, but those elements should support the person rather than compete with them.
Portrait vs snapshot
A snapshot usually records a moment quickly, with little preparation or control. A portrait may look casual, but it is still intentional. Even a natural-looking portrait often involves decisions about where the person stands, how the light falls, or what background helps the image feel stronger.
Portrait vs headshot
A headshot is one branch of portrait photography, not a separate category altogether. It is usually tighter, cleaner, and more purpose-driven. Most headshots are made for practical use, such as business profiles, speaker bios, team pages, or casting materials. Portrait photography is wider in scope and can be formal, expressive, creative, commercial, or deeply personal.
Portrait vs selfie
A selfie is generally taken by the subject, often in a spontaneous way and most often with a phone. A portrait photo can also be self-made, but it usually involves much more control over composition, light, distance, and presentation.
Why portrait photos matter
Portraits matter because people constantly need images that represent them well, whether that need is personal, professional, emotional, or commercial.
People use portrait photos for:
- Professional branding
- Business websites
- Social media profiles
- Creator platforms
- Family and couple sessions
- Maternity portraits
- Graduation photos
- Weddings
- Editorial work
- Advertising and campaigns
In simple terms, a portrait photo is an intentional image of a person, created to show more than surface appearance alone.
A Brief History of Portrait Photography
Portrait photography began as a faster and more accessible alternative to painted portraiture, but over time it became something much larger: a visual language for identity, memory, status, storytelling, and self-presentation.
Looking back at its history helps explain why portrait photography still works the way it does. Many of the choices photographers make today, controlled lighting, careful posing, shallow depth of field, background separation, retouching, did not appear out of nowhere. They evolved through earlier photographic traditions and technologies.
From painted portraits to early photography
Before cameras existed, portraiture belonged mostly to painting. Painted portraits were expensive, slow, and often reserved for people with wealth or status. Photography changed that. It made likenesses quicker to produce and easier to repeat.
Early photographic portraits, especially daguerreotypes, required long exposures. Because of that, people had to stay still, which is one reason older portraits often look formal, rigid, or serious.
The rise of the portrait studio
As cameras improved, portrait studios became more common and far more practical. Exposure times shortened, equipment improved, and more people could afford a professional portrait sitting.
That studio era shaped many of the habits that still define portraiture now: controlled light, deliberate posing, and simplified backdrops designed to keep attention on the subject.
Film photography and more natural portraiture
Film cameras brought more mobility and more freedom. Smaller bodies, faster film stocks, and better lenses gave photographers the ability to leave the studio and work in real places.
That shift mattered. Portraits became less stiff and more observational. It became easier to photograph people in settings that reflected their lives, work, or personalities.
Editorial, fashion, and cultural influence
In the 20th century, portraits moved far beyond family keepsakes or formal commissions. They became central to magazines, advertising, politics, celebrity culture, journalism, and public image-making.
At that point, portraiture was no longer only about recording a face. It became a way to shape identity and tell stories.
The digital transformation
Digital photography changed portrait work from capture to delivery. Photographers could review files instantly, adjust exposure on the spot, and move from shoot to edit much faster than before.
Retouching also became a normal part of the process. Color correction, skin cleanup, tonal refinement, and batch consistency turned into standard steps in portrait production.
Smartphones and AI
Smartphones made portrait photography part of everyday life. Suddenly, almost everyone had a camera, editing tools, and a publishing platform in the same device.
More recently, AI has begun changing portrait workflows again. It can help with culling, masking, skin cleanup, tonal balancing, background distractions, and consistency across large batches of images.
Why this history still matters
Technology keeps changing, but the purpose of portrait photography has stayed surprisingly stable. It is still about representing a person in a deliberate way. Understanding the history helps modern photographers see that today’s tools are part of a longer tradition, not a complete break from it.
Types of Portrait Photography
Portrait photography includes many styles, and each one leads to different choices before the shutter is even pressed. A headshot, a family portrait, and a fashion image may all focus on people, but they are built for different outcomes and rarely succeed with the exact same approach.
Knowing the main portrait types makes planning easier. It helps you choose the right location, lighting, lens, pose, framing, and editing style before the session starts, instead of trying to solve everything halfway through the shoot.
Traditional / Studio Portraits
Traditional studio portraits are built around control. The light is intentional, the background is usually simple, and the subject is directed with more precision than in most other portrait styles. The result tends to feel polished, formal, and built to last.
Best for: Professionals, family portraits, school photos, formal commissions, graduation sessions.
Shooting tips: Keep the setup clean and resist the urge to overcomplicate it. In studio portraits, tiny adjustments in posture, chin height, and eye direction often matter more than dramatic posing.
Retouching note: Keep the finish refined but believable. Even skin tone, remove small distractions, and shape contrast carefully without making the portrait look overly polished.
Environmental Portraits
Environmental portraits work because the setting helps explain the person. The background is not just there to fill space, it gives the viewer clues about the subject’s work, identity, or daily world.
Best for: Artists, makers, chefs, founders, professionals, editorial features.
Shooting tips: Choose a space that genuinely belongs to the subject or says something real about them. Good environmental portraits feel specific, not decorative.
Retouching note: Stay realistic. Subtle cleanup, tonal control, and selective background refinement usually matter more here than noticeable skin retouching.
Candid Portraits
Candid portraits often succeed in the split second when people stop trying to look good. That is what gives them their energy. The body relaxes, the expression lands naturally, and the frame feels less arranged.
Best for: Weddings, events, family sessions, documentary work, real-life storytelling/
Shooting tips: Watch what happens between posed moments. Some of the strongest expressions show up right after direction ends, not during it.
Retouching note: Edit lightly. Too much smoothing or polishing can strip away the spontaneity that made the image work in the first place.
Lifestyle Portraits
Lifestyle portraits are planned, but they are meant to feel unforced. They borrow some of the structure of a directed shoot, yet still aim for the ease and movement of real life.
Best for: Couples, families, personal brands, bloggers, creators, small business owners.
Shooting tips: Give the subject actions instead of stiff poses. Walking, talking, adjusting clothes, making coffee, or looking out a window usually produces more natural frames than asking someone to “just stand there.”
Retouching note: Keep the edit warm, clean, and easy to believe. The final image should look finished, not manufactured.
Editorial / Fashion Portraits
Editorial and fashion portraits are less about casual realism and more about visual intention. Styling, wardrobe, pose, makeup, and mood all work together, and if one part feels off, the whole image can lose impact.
Best for: Magazines, campaigns, model books, fashion brands, portfolio work.
Shooting tips: Decide what the image is supposed to communicate before the shoot starts. These portraits work best when the styling and lighting feel connected to the same idea.
Retouching note: This is usually a more polished category, especially when fabric, skin, and color all need to feel controlled. Even so, the portrait should still feel designed, not plastic.
Glamour Portraits
Glamour portraits are built around flattery. Every choice, angle, light, expression, posture, styling, is pushed toward making the subject look confident, elegant, and visually refined.
Best for: Beauty sessions, portfolio work, personal branding, makeover shoots, luxury portrait sessions.
Shooting tips: Pay close attention to the jawline, shoulders, hands, and eye direction. In glamour work, small posing changes can dramatically improve the result.
Retouching note: More refinement is normal here, but it still needs a limit. The portrait should look elevated, not airbrushed into lifeless perfection.
Fine Art Portraits
Fine art portraits begin with an idea before they begin with a face. They are often shaped by symbolism, mood, color, or emotional atmosphere, which makes them feel more interpretive than descriptive.
Best for: Exhibitions, conceptual projects, artistic series, personal creative work.
Shooting tips: Start with the concept and let everything else follow from it. Props, wardrobe, lighting, color, and setting should all pull in the same direction.
Retouching note: Editing can become part of the artwork here. Stylization, texture, contrast, or compositing can all work well, as long as they support a clear visual purpose.
Self-Portraits
A self-portrait is not just a selfie with better equipment. It is usually more deliberate, more controlled, and more revealing because the photographer has to play both roles at once.
Best for: Artists, photographers, educators, creators, personal storytelling.
Shooting tips: Build the composition before stepping into it. A tripod, timer, or remote helps, but what matters more is treating the shoot like a real portrait session rather than an improvised self-shot.
Retouching note: Let the purpose of the image decide the edit. Some self-portraits benefit from honesty and restraint, while others can lean much further into mood or concept.
Headshot Photography
Headshot photography narrows the portrait down to its essentials. The face does most of the work, so the framing, expression, and lighting all need to stay clean enough that nothing pulls attention away from it.
Best for: LinkedIn, company websites, speaker profiles, actor pages, bios, press kits.
Shooting tips: Keep direction simple and the expression approachable. Strong headshots rarely need visual drama, they need clarity, confidence, and a face that feels present.
Retouching note: Be subtle. Remove temporary distractions, even out transitions carefully, and keep the final result close to how the person actually looks.
For a more detailed workflow, see this guide to consistent headshot retouching, which breaks the process into a practical step-by-step order.
Family & Group Portraits
Family and group portraits are less about one individual and more about how several people sit together inside the same frame. The challenge is not just sharpness — it is balance, connection, and avoiding visual awkwardness.
Best for: Families, reunions, team portraits, holiday cards, friend groups.
Shooting tips: Use enough depth of field to hold multiple faces in focus, and pay attention to spacing, height, overlap, and body direction. Group portraits fall apart quickly when those details are ignored.
Retouching note: Aim for consistency across the frame. Skin tone, exposure, and color should feel unified so one person does not stand out for the wrong reason.
For high-volume portrait sessions, this guide to AI batch photo editing shows how to keep results consistent across large image sets.
Wedding Portraits
Wedding portraits sit in a difficult middle ground: they need polish, but they also happen under pressure. Time is limited, emotions are high, and the best frames often come from mixing clear direction with quick reactions.
Best for: Engagements, couples, wedding days, bridal sessions.
Shooting tips: Work with intention and keep direction efficient. Wedding portraits improve when the photographer knows how to move quickly without making the couple feel rushed.
Retouching note: The final look should feel polished, soft, and consistent across the gallery. Preserve skin detail, dress texture, and believable color rather than chasing an overly processed finish.
If you work with large wedding galleries, this guide to wedding photo editing shows how to speed up delivery while keeping skin texture and tone consistent across the full set.
Newborn / Children Portraits
Newborn and children’s portraits almost never reward rigidity. Patience matters more than control, and the best images usually come from working with the child’s mood rather than trying to force one.
Best for: Newborn sessions, milestone shoots, birthday portraits, family archives.
Shooting tips: Keep the space comfortable and the setup simple. Flexibility usually matters more than sticking to a strict plan.
Retouching note: Stay gentle. Soft tones, realistic skin, and minimal cleanup usually create better results than heavier correction.
Pet Portraits
Pet portraits move fast because the subject rarely waits for you. Expression changes quickly, attention disappears quickly, and the best frame often lasts a fraction of a second.
Best for: Pet families, breeders, keepsakes, pet brands.
Shooting tips: Get down to the animal’s eye level and be ready to shoot in short bursts. Treats, toys, or sound cues can help, but timing matters just as much.
Retouching note: Keep it light. Most pet portraits benefit more from crisp eyes, accurate fur detail, and believable color than from noticeable editing.
Black & White Portraits
Black and white portraits remove color, which means light, contrast, expression, and structure have to carry the image on their own. When it works, the result can feel quieter, stronger, or more timeless.
Best for: Dramatic portraits, timeless work, fine art images, emotionally driven portraits.
Shooting tips: Pay attention to tonal separation before you shoot. In monochrome, the portrait depends much more on light shape and contrast than on color relationships.
Retouching note: Focus on tonal shaping rather than color correction. Dodge and burn, local contrast, and texture control become much more important here.
Want to learn more about color correction? Learn how to correct and grade portrait color step by step in our dedicated guide.
Street Portraits
Street portraits carry some of the unpredictability of the place they come from. They often feel rawer, quicker, and more immediate because the environment is not cleaned up for the subject — the subject is photographed inside it.
Best for: Documentary work, travel series, personal projects, street photography.
Shooting tips: Stay alert and work quickly. Backgrounds change, light shifts, and public spaces rarely hold still long enough for hesitation.
Retouching note: Do not scrub away the atmosphere. A little grit, tension, or visual roughness is often part of what gives street portraits their character.
Why these portrait types matter
Knowing the main portrait categories helps photographers make stronger decisions before and during the shoot. It also helps clients understand what kind of image they are actually asking for, which often prevents mismatched expectations later.
Real sessions often overlap, and that is completely normal. A branding portrait might feel environmental, a wedding portrait might drift into candid territory, and a self-portrait might lean heavily into fine art. The point of these categories is not to box portrait photography in. It is to give you a clearer starting point before you begin bending the rules.
Try AI photo analysis, smart culling and retouching in one tool!
Download Arams
Portrait Lighting Techniques
Portrait photography lighting techniques shape how a face feels in the final image. Light does more than brighten a subject. It changes facial definition, texture, depth, separation, and mood in a single move.
This is why lighting matters so much in portrait work. Shift the light a little, and the same person can look softer, sharper, flatter, more dramatic, or more flattering. Understanding a few core lighting patterns usually matters more than owning a lot of gear.
Natural light
Natural light is often the best place to learn portrait lighting because it teaches you to notice direction, softness, and contrast without overcomplicating the setup. Depending on the time of day and the subject’s position, it can feel gentle, cinematic, harsh, airy, or moody.
Window light
Window light stays popular for a reason: it gives shape without asking for much. One side of the face catches light, the other falls off gradually, and the portrait starts gaining dimension almost immediately.
The setup itself is simple. Place the subject close to the window and turn them slightly toward it. That usually creates a more flattering result than having them face the glass directly, which can flatten the face. Turn them too far away, though, and the shadows start getting heavier than they need to be.
A quick way to judge the setup is to look at the eyes. If they look alive, the light is probably doing its job. If they go dull, the angle usually needs adjusting.
Golden hour
Golden hour is loved for its warmth, but warmth alone is not what makes it useful. What helps is the combination of softer light, lower sun, and a background that often feels more atmospheric than it does in the middle of the day.
Still, it is easy to overrate it. Golden hour does not rescue weak positioning. Backlight can look beautiful, but if the face sinks too far into shadow, the portrait starts feeling unresolved. Side light can sculpt the face nicely, but too much of it may overemphasize texture.
Quite often, the fix is not technical. It is physical. Move the subject a few steps, change the angle, and the portrait improves faster than it would with camera adjustments alone.
Overcast light
Overcast light is forgiving. That is its biggest advantage. Clouds soften the sun, reduce harsh contrast, and make outdoor portraits easier to handle, especially for photographers who do not want to fight strong midday shadows.
The tradeoff is that cloudy light can flatten a face quickly if you stop paying attention. Even then, direction still exists. One part of the sky may be brighter, or a nearby surface may be bouncing light back in a useful way.
The light may be soft, but it should not be treated as neutral. You still need to place the subject with intention.
Three-Point Lighting
Three-point lighting is built around three roles: a key light to shape the face, a fill light to control shadows, and a back light to separate the subject from the background.
That sounds technical, but the idea is straightforward. Start with one strong light source, then add support only where the portrait needs it. Most lighting setups become confusing when photographers add extra lights before the main one is doing anything useful.
Key Light
The key light is the anchor of the setup. It creates the main shape of the face and decides how the portrait reads before anything else is added.
That is why it makes sense to solve the portrait with the key light first. If the main light flatters the subject and creates the right mood, the rest of the setup becomes much easier to control.
Fill Light
Fill light exists to soften the shadows created by the key light. It should support the portrait quietly, not introduce a second competing direction.
This is where many setups go wrong. Too much fill drains the face of depth and makes everything feel flat. Often, a reflector or a very light fill is enough to open the shadows without killing the structure.
Back Light
Back light helps separate the subject from the background, especially when tones start blending together. It can outline hair, shoulders, or the edge of the face and make the portrait feel cleaner.
Used gently, it adds polish. Push it too hard, and it starts announcing itself. Once that happens, the viewer notices the lighting effect before the subject.
Butterfly / Paramount Lighting
Butterfly lighting places the main light above and slightly in front of the subject, creating a small shadow under the nose. It is closely associated with beauty and glamour work because it can flatter symmetry, define cheekbones, and keep the portrait looking clean.
The setup sounds simple, but placement matters. Raise the light too high and shadows build under the eyes in an unflattering way. Lower it too much and the effect loses its structure.
A reflector underneath often helps. It softens the shadows under the chin and lower cheeks without flattening the whole face.
Rembrandt Lighting
Rembrandt lighting is recognized by the small triangle of light that appears on the shadow-side cheek. It is one of the few portrait lighting patterns that people often recognize even if they do not know its name.
What makes it useful is its sense of depth. It gives the face more shape, more mood, and a stronger directional quality than softer front-facing setups. That is why it works well for portraits that need a little weight or psychological tension.
The risk is going too dark. The shadow side should feel intentional, not empty.
Low-Key and High-Key Lighting
Low-key and high-key lighting push portraits in opposite directions. One leans into shadow and selective light. The other leans into brightness and openness.
Low-Key Lighting
Low-key lighting is built around shadow, restraint, and contrast. It is often used when the portrait needs to feel dramatic, intimate, serious, or powerful.
But darkness alone is not enough. That is the trap. A portrait does not become compelling just because most of it is dim. The highlights still need to be placed with care, and the face still needs enough shape to remain readable.
The strongest low-key portraits feel controlled, not merely underexposed.
High-Key Lighting
High-key lighting creates a brighter, cleaner look with lower contrast and a more open visual tone. It shows up often in branding, commercial portraiture, children’s photography, and beauty work because it tends to feel approachable and polished.
The challenge is preserving detail. Bright does not mean blown out. Skin still needs form, and the subject still has to separate clearly from the background.
When high-key lighting works, it feels fresh and deliberate rather than washed away.
Night Portrait Lighting
Night portraits can feel especially striking because they combine the subject with the atmosphere of the scene. Street lights, signs, practicals, neon, and flash all change the image in different ways, which is both the appeal and the challenge.
At night, light is rarely neutral. Different sources carry different colors, different intensities, and different directions. That means you have to be more selective.
Off-camera flash
Off-camera flash gives you the most control after dark because it lets you light the subject separately from the environment. A practical approach is to expose the background first, then bring in flash to shape the face.
That usually produces a stronger result than blasting the subject with flash and leaving the rest of the scene dead. The portrait should still belong to the environment around it.
Neon light
Neon can create portraits with a lot of visual personality, but it works best when the color stays disciplined. One dominant hue or one clear direction is usually enough.
Problems start when the subject gets hit by too many mixed colors from too many angles. Then the portrait stops looking cinematic and starts looking muddy.
Ambient light
Ambient light includes whatever is already there: street lamps, shop windows, headlights, signs, and other practical sources. It often creates a more natural, documentary-like mood than flash-heavy setups.
The trick is not to photograph every light you see. It is to find one useful source and build around it. A subject placed well beside a single stable light often looks better than a subject surrounded by visual chaos.
How to use portrait lighting more effectively
The fastest way to improve portrait lighting is to stop treating setups like diagrams you memorize and start reading what the light is actually doing.
Ask yourself simple things while shooting. Where is the light coming from? How quickly does it fall off? Which part of the face is brightest? Do the eyes still hold attention? Is the background helping or getting in the way?
Once you start answering those questions instinctively, lighting becomes much easier to control and much more expressive.
Best Camera Settings for Portraits
The best camera settings for portrait photos depend on who you are photographing, how much they are moving, what lens you are using, and how much light you have to work with. Even so, the core controls stay the same: aperture, shutter speed, and ISO.
Portrait settings are really a balancing act. You are trying to keep the eyes sharp, control how much of the scene stays in focus, and hold on to clean image quality at the same time. The right balance changes from one situation to the next. A solo portrait, a family group, and an indoor session will not all ask for the same settings.
Aperture
Aperture controls depth of field, which is one of the biggest visual decisions in portrait photography.
For one person, photographers often shoot between f/1.4 and f/2.8 when they want the background to fall away softly and the face to stay dominant in the frame. That said, the widest setting is not always the smartest one. On an actual shoot, f/2 to f/2.8 is often easier to manage because it still gives you subject separation without making focus so fragile.
Once more people enter the frame, the equation changes. Couples, families, and small groups usually need more depth of field, which is why settings like f/4 to f/8 tend to be more dependable.
Shutter speed
Shutter speed matters more in portrait photography than beginners often expect. People may look still, but they are rarely motionless. Eyes shift, shoulders move, hands adjust, and expressions change in small, constant ways.
For calmer posed portraits, 1/125 sec can be enough in some situations. For most handheld shooting, though, 1/200 to 1/250 sec is a safer place to start. If you are photographing children, working candidly, or using a longer lens, faster speeds like 1/320 to 1/500 sec usually give you a better chance of holding crisp detail where it counts.
ISO
ISO controls how sensitive the camera is to light. In portraits, most photographers try to keep it as low as they reasonably can, but not at the expense of sharpness.
That is where people often get stuck. They hesitate to raise ISO, then end up with blur because the shutter speed falls too far. A little noise is usually easier to live with than a soft portrait that cannot be rescued.
In bright conditions, ISO 100 to 200 is common. Indoors or in dimmer settings, ISO 400 to 1600 is often completely normal and, in many cases, necessary.
Focus settings
In most portraits, the eyes should carry the sharpest detail. If the eyes do not feel crisp, the image often feels off even when the rest of the frame is technically fine.
For more controlled portraits, single-point autofocus works well because it lets you place focus precisely. If your camera has reliable eye autofocus, that is often the easiest option. For movement, candid shooting, or subjects who do not stay in one place for long, continuous autofocus is usually the more dependable choice.
Best lenses for portrait photography
Lens choice changes more than framing. It also affects perspective, facial rendering, background compression, and how close you need to stand to the subject.
50mm
A 50mm lens is one of the most flexible options for portrait work. It feels natural, does not exaggerate perspective too aggressively, and works well for half-body portraits, lifestyle sessions, and general-purpose shooting.
85mm
An 85mm lens is a classic for a reason. It flatters facial proportions, creates pleasing background separation, and gives portraits a more dedicated, polished look than wider focal lengths usually do.
70–200mm
A 70–200mm lens is especially useful when you need flexibility without constantly changing position. It works well for weddings, events, and outdoor portraits where you want stronger compression, cleaner backgrounds, and the option to reframe quickly.
Recommended portrait settings by situation
These are not hard rules, but they are practical starting points that work well in many common portrait scenarios.
Solo portrait
A solid starting point:
- aperture: f/1.8 to f/2.8
- shutter speed: 1/200 to 1/500 sec
- ISO: 100 to 400 in good light
This range works well when you want the face to stay sharp while the background softens behind it.
Indoor portrait
A practical starting point:
- aperture: f/2 to f/2.8
- shutter speed: 1/160 to 1/250 sec
- ISO: 400 to 1600
Indoors, the real challenge is usually balancing limited light with enough shutter speed to avoid soft files.
Group portrait
A practical starting point:
- aperture: f/4 to f/8
- shutter speed: 1/200 sec or faster
- ISO: as low as conditions allow
With groups, depth of field becomes more important than maximum blur. Keeping multiple faces sharp matters more than chasing the softest possible background.
How to take portrait photo with phone
Phone portraits still rely on the same basics as camera portraits: soft light, a flattering shooting distance, a background that does not pull attention away, and focus placed where it needs to be.
Portrait mode can help when the subject is separated clearly from the background, but it is not a substitute for good placement. Window light and soft outdoor light usually give the cleanest results. It also helps not to shoot too close with a wide phone lens, since that can distort facial features in an unflattering way.
Common mistakes
A lot of portrait setting mistakes come from pushing one setting too hard while ignoring the others. Shooting too wide open can make focus unreliable. Letting shutter speed fall too low can introduce blur. Refusing to raise ISO in low light often causes more damage than the extra noise would have. And if focus lands somewhere other than the eyes, the portrait usually loses impact right away.
A simple starting point
For a solo portrait, a reliable place to begin is f/2 to f/2.8, 1/200 sec, and the lowest ISO that still gives you proper exposure. For groups, move toward f/4 to f/8. For phone portraits, use Portrait mode carefully, work in soft light, and keep the background simple enough that the subject stays dominant.
Portrait Photography Tips: How to Take a Portrait Photo
To take a strong portrait photo, you do not need an elaborate setup or expensive gear. More often, the result comes down to a few quieter things: how comfortable the subject feels, how clean the frame is, and whether every decision in the image supports the person instead of pulling attention away from them.
Portrait photography sits in an awkward but interesting place. Part of it is technical control — light, focus, framing, exposure. The other part is reading the person in front of you well enough to know when to guide, when to wait, and when to stop overworking the shot.
Build rapport with your subject
A lot of portraits fail before the camera settings become the problem. The subject feels awkward, starts performing for the lens, and the image tightens up immediately.
That is why communication matters so much. People usually look better when they are not trying too hard. Keep the direction simple, keep the tone calm, and do not flood them with corrections. A few steady comments, “hold that,” “turn a little,” “that looks good”, often do more than a long stream of detailed instructions.
Once someone starts feeling less watched and more guided, the expression changes. It softens. That shift is often worth more than any lighting adjustment.
Use composition to support the subject
Composition should help the portrait breathe, not show off. If the viewer starts noticing the arrangement of the frame before noticing the person, something has probably gone too far.
A few compositional tools are especially useful in portrait work:
- Rule of thirds: placing the eyes slightly off-center can make the portrait feel less rigid
- Leading lines: lines in the scene can quietly pull attention toward the subject
- Framing: windows, doorways, branches, or foreground blur can help isolate the face
- Negative space: empty space can make the portrait feel calmer, cleaner, or more deliberate
What matters most is restraint. Composition works best when it supports the subject quietly instead of competing with them.
Guide posing in small adjustments
Most people do not need dramatic posing ideas. They need help making a few small changes that stop them from looking stiff.
That is why subtle direction usually works best. Turn the body slightly. Relax the shoulders. Adjust the chin. Soften the hands. Change where the eyes are looking. These are not big moves, but portrait photography often depends on exactly that kind of small correction.
Once posing becomes too elaborate, people start thinking about every limb at once. That is usually when they stop looking natural.
Keep the background from competing
A weak background can drain a good portrait faster than people expect. You can have strong light, a good lens, and a natural expression, but if the space behind the subject is distracting, the frame starts falling apart.
Before shooting, check for the usual problems:
- bright spots behind the head
- busy patterns
- awkward shapes
- objects that seem to stick out of the subject
The fix is often simple. Shift position. Change your angle. Add distance. A small adjustment in camera placement can clean up the frame more effectively than editing later.
Try simple creative ideas
Creative portraits do not always come from big concepts. In many cases, one simple visual idea is enough to make the image feel more memorable.
That could be:
- a reflection in glass or a mirror
- shadows falling across the face
- a little motion blur
- a single prop that actually adds mood instead of clutter
The important part is order. Make the straightforward portrait first. Once that version works, experiment. Creativity tends to help more when it builds on a strong image instead of trying to rescue a weak one.
Make every choice serve the person
The strongest portrait advice is also the least glamorous: keep asking whether each part of the image helps the subject or gets in the way.
That includes the light, the framing, the pose, the background, and even the pace of the shoot. When those things start working together, the portrait feels clearer and more intentional. It stops looking like a collection of techniques and starts looking like a person.
Portrait Photo Editing and Portrait Photo Retouching
Portrait photo editing and retouching improve exposure, color, crop, skin, and distractions to create a clean, natural final image. The best portrait retouching refines the photo without removing texture, character, or realism.
This is where portrait photography often moves from technically good to professionally finished. A well-edited portrait keeps attention on the subject, strengthens the mood, and improves consistency across a full set of images. At the same time, retouching has to stay believable. The best portrait edits do not erase character or texture, they remove distractions and support the person in the frame.
A basic portrait post-processing workflow
A clear workflow makes portrait editing faster and more consistent. Instead of jumping straight into skin retouching, it is better to fix the global issues first.
A typical portrait workflow looks like this:
- Adjust exposure and overall contrast
- Correct white balance and skin tone
- Refine highlights, shadows, and color
- Crop and straighten the frame
- Clean up small distractions
- Retouch skin and facial details
- Apply final color grading and export settings
This order matters because strong global corrections often reduce the amount of detailed retouching needed later.
Skin retouching: improve, do not erase
Skin retouching is one of the most sensitive parts of portrait editing because it directly affects whether the final result looks polished or artificial. The goal is usually to reduce temporary distractions, such as blemishes, uneven transitions, or tired-looking shadows, while preserving natural skin texture and the person’s real features.
Good retouching should make the portrait feel cleaner and more refined without making the skin look flat, plastic, or unreal.
Dodge and burn
Dodge and burn is a manual retouching technique that uses selective lightening and darkening to even out skin tone transitions and reduce visual distraction. Instead of blurring texture away, it works by smoothing the way light falls across the skin.
This approach is widely respected because it preserves texture well and can produce very natural results. It is especially useful for high-end portrait, beauty, and editorial work where realism matters. The tradeoff is time: dodge and burn takes patience, control, and close attention to detail.
Frequency separation
Frequency separation is a retouching method that separates texture from color and tone, allowing the editor to work on each independently. This can be effective for correcting blotchy color transitions or uneven skin areas without fully destroying texture.
However, it is also one of the easiest methods to overuse. Poor frequency separation often leads to waxy skin, muddy transitions, and an obviously retouched look. When used, it should be handled carefully and in moderation, ideally as one tool within a broader retouching workflow rather than as a shortcut to “perfect” skin.
AI portrait retouching: how it works
AI portrait retouching uses machine learning to detect common portrait elements such as skin, eyes, teeth, background, and subject contours, then applies targeted enhancements automatically or semi-automatically. Instead of retouching every image from scratch, photographers can use AI to speed up repetitive steps and create more consistent results across a full set.
In practice, AI retouching is most valuable when photographers need to process large volumes of portraits or maintain a consistent editing standard across many files. It can reduce routine work, shorten delivery time, and free up more time for final refinements and creative decisions.
The main advantage of AI is not that it replaces taste or judgment. It removes much of the repetitive technical work that slows portrait post-production down.
To go deeper into AI-based portrait workflows, explore this guide to AI portrait retouching, including tools for skin tone, eyes, teeth, and overall portrait refinement.
AI Retouch4me for portrait retouching
This is where Retouch4me fits naturally into the workflow. Rather than offering a single generic portrait filter, Retouch4me includes a range of AI retouching plugins designed for specific portrait tasks. Depending on the image and the level of refinement needed, photographers can use tools such as Heal for skin imperfections, Dodge & Burn for tonal refinement, Skin Tone for color balance, Portrait Volumes for added depth, Eyes Bundle for eye cleanup and enhancement, White Teeth, Mattifier, and Stray Hairs for finishing details. For photographers who prefer a more unified workflow, Apex brings many of these retouching tools into one all-in-one plugin.
A practical way to use Retouch4me is after global adjustments such as exposure, color, and crop are complete, but before final creative grading. This helps preserve skin texture, facial structure, and a natural overall look while making portrait retouching faster and more consistent across multiple images. Retouch4me also offers cloud-based retouching and a Photoshop panel, which makes the workflow more flexible for different editing setups and team needs.
For photographers who want a faster, more scalable, and more natural-looking retouching workflow, Retouch4me offers specialized tools instead of forcing one editing approach on every image.
Give your portraits a final polished, natural look.
👉 Explore AI Portrait Retouching
Before-and-after examples: what should change
Before-and-after portrait examples are most effective when the difference is visible but believable. A strong “after” image usually looks cleaner, more polished, and more focused without making the subject look like a different person.
In a good portrait retouch, before-and-after changes often include:
- more balanced exposure on the face
- cleaner and more accurate skin tone
- reduced temporary blemishes and distractions
- softer under-eye transitions
- improved separation between subject and background
- better overall consistency and polish
The best before-and-after examples do not show transformation for its own sake. They show refinement.
Common portrait retouching mistakes
The biggest retouching mistakes happen when editing becomes more visible than the portrait itself.
Over-smoothing
Over-smoothing removes too much texture and makes skin look artificial. It is one of the fastest ways to make a portrait feel cheap or outdated.
Uncanny valley effect
When retouching goes too far, the face can start to look almost human, but not fully believable. This “uncanny valley” effect often comes from excessive smoothing, unnatural eye enhancement, over-whitened teeth, or changes that disconnect the portrait from real human texture.
Uneven skin tone correction
Some portraits look technically retouched but still feel wrong because the skin tones become patchy, gray, orange, or overly magenta. Color accuracy matters just as much as skin cleanup.
Retouching without context
A close-up beauty portrait, a corporate headshot, and a wedding portrait should not all be retouched the same way. The level of refinement should match the purpose of the image.
The best portrait retouching looks invisible
Strong portrait retouching supports the image without drawing attention to itself. A polished portrait should still feel human, with believable skin, natural detail, and enough texture to preserve personality.
The best editing workflow combines careful global corrections, selective manual retouching, and efficient modern tools where they make sense. When done well, portrait retouching does not hide the subject, it helps the viewer see them more clearly.
Famous Portrait Photographers for Inspiration
Famous portrait photographers such as Irving Penn, Richard Avedon, Annie Leibovitz, and Yousuf Karsh helped shape the genre through their distinct approaches to light, expression, and storytelling. Studying their work can sharpen your eye for composition, mood, and the different ways a portrait can reveal character.
Looking at great portrait photographers is useful not just for inspiration, but for pattern recognition. You start to notice how different artists use light, distance, styling, timing, and emotional tone to shape a person’s presence in the frame. The photographers below offer a compact but strong foundation for understanding portrait photography from both classic and modern perspectives.
Irving Penn
Irving Penn is known for elegant, restrained portraits with precise composition and strong attention to form. His work often feels minimal, but never empty.
What photographers can learn from Penn is the power of simplicity. A clean setup, thoughtful framing, and careful observation can reveal just as much as a complex production.
Richard Avedon
Richard Avedon’s portraits are instantly recognizable for their clean backgrounds, sharp psychological intensity, and strong sense of presence. He often stripped away visual distractions so the subject’s expression carried the image.
His work is a reminder that portrait photography can be both simple and confrontational. Avedon shows how clarity, timing, and directness can create unforgettable portraits.
Annie Leibovitz
Annie Leibovitz is known for cinematic, highly styled portraits that blend personality, concept, and visual storytelling. Her work ranges from intimate celebrity portraits to large-scale editorial productions.
She is especially valuable to study for photographers who want to understand how portraiture can go beyond likeness and become narrative. Her images show how styling, location, and mood can strengthen character.
Steve McCurry
Steve McCurry is known for portraits with strong color, human emotion, and a deep sense of place. Many of his best-known images combine portraiture with documentary storytelling.
What stands out in his work is how the environment and expression support each other. He shows that a portrait can feel powerful not only because of the face, but because of the context surrounding it.
Yousuf Karsh
Yousuf Karsh became famous for formal portraits of political leaders, artists, and cultural figures. His portraits are carefully lit, dignified, and psychologically composed.
He is an excellent reference for understanding classic portrait lighting and presence. Karsh shows how control, patience, and respect for the subject can create timeless results.
Platon
Platon is known for bold, close, high-impact portraits of public figures, often photographed with dramatic perspective and strong eye contact. His style feels immediate, graphic, and emotionally direct.
Photographers can learn from his confidence in framing and connection. His work proves that a portrait can be simple in setup but still feel powerful and unmistakable.
Peter Lindbergh
Peter Lindbergh is celebrated for portraits that feel honest, elegant, and human. Even in fashion and celebrity work, he often avoided excessive polish in favor of emotional presence and natural character.
His work is especially useful for photographers who want to create refined portraits without making them feel artificial. He shows the value of authenticity, restraint, and trust in the subject.
Erik Madigan Heck
Erik Madigan Heck is known for painterly color, rich visual styling, and portraits that blend fashion, fine art, and editorial aesthetics. His images often feel lush, stylized, and visually immersive.
He is a strong source of inspiration for photographers interested in color and atmosphere. His work shows how portraiture can become highly expressive while still keeping the person at the center.
What these photographers can teach you
These photographers matter not because their styles should be copied, but because each of them demonstrates a different strength of portraiture. Some show the power of simplicity, others the value of drama, context, intimacy, or concept.
Studying them side by side makes one thing clear: there is no single formula for a great portrait. What matters is using light, composition, expression, and direction in a way that feels intentional and true to the subject.
Portrait Photo Ideas for Your Next Shoot
Portrait photo ideas for your next shoot can begin with something simple: a place, a mood, or a season. You can plan a portrait in a studio, outside, in the city, or at home, then shape it further through a visual direction like moody, bright and airy, cinematic, minimalist, winter, autumn, holiday, or graduation.
A portrait idea does not need to be elaborate to work. In fact, sessions often get stronger once the photographer stops chasing too many directions at once and commits to one clear approach. The ideas below can help you plan a portrait session by location, style, or occasion without making the concept feel overcrowded.
Portrait ideas by location
Location changes more than the background. It affects the light, the way the subject moves, what they wear comfortably, and how the image feels before the camera is even raised.
Studio portraits
A studio portrait strips away most distractions, which is exactly why it works so well. With the environment reduced, expression, pose, skin, and light start carrying much more of the image.
You can go classic with a seamless backdrop, lean dramatic with side light, or keep things very close and beauty-focused. Studio portraits usually work best when the simplicity is treated as a strength, not as empty space that needs filling.
Outdoor portraits
Outdoor portraits give you room to breathe. They bring in natural light, background depth, and a less controlled atmosphere, which can make the final image feel softer, freer, or more alive depending on the location.
A field, park, beach, garden, or quiet street can all work. What changes is the mood. Golden hour is a common choice for softer portraits, while stronger directional light can produce something more graphic and defined.
Urban portraits
Urban portraits usually feel sharper and more contemporary because the environment already brings lines, surfaces, contrast, and movement into the frame.
Concrete walls, staircases, storefronts, parking garages, alleyways, and neon-lit corners can all push the image toward a more editorial or fashion-aware look. The setting does a lot of work here, so the challenge is using it without letting it overwhelm the person.
At-home portraits
At-home portraits often feel the most believable because the subject is not performing in an unfamiliar place. The surroundings are already theirs, which can relax the body language before the session even begins.
A kitchen, bedroom, hallway, balcony, living room, or a blank wall near a good window can all become a portrait setting. The strongest at-home shoots are usually not the busiest ones — they rely on clean corners, soft light, and details that feel lived-in rather than staged.
Portrait ideas by style
Once the setting is chosen, style gives the portrait its emotional direction. It changes the way the image is read, even when the subject and location stay the same.
Moody portraits
Moody portraits lean into shadow, contrast, and restraint. They do not need to be dark for the sake of darkness, but they usually work best when some part of the frame feels held back rather than fully revealed.
This style suits portraits that should feel intimate, cinematic, serious, or emotionally layered. A single window, controlled indoor light, or a darker environment often gives enough to work with.
Bright and airy portraits
Bright and airy portraits go in the opposite direction. They feel open, soft, and light on the eyes, often because the tones stay gentle and the frame is allowed to breathe.
This look is common in family work, beauty portraits, branding, and spring or summer sessions. It tends to fall apart when the frame gets cluttered or the light becomes too harsh, so simplicity matters more here than people sometimes expect.
Cinematic portraits
Cinematic portraits are less about one effect and more about atmosphere. They usually suggest that something is happening just outside the frame, which is why they feel closer to a scene than to a straightforward photo.
That atmosphere can come from color contrast, movement, weather, dramatic light, or location choices that imply story. The good news is that cinematic does not have to mean overproduced. One clear mood and one strong light source can already push a portrait in that direction.
Minimalist portraits
Minimalist portraits remove almost everything nonessential. That makes the face, body language, and light carry more weight, because there is very little else in the frame asking for attention.
A plain backdrop, simple clothing, quiet color, and spare composition are often enough. This approach works especially well when the goal is to make the portrait feel modern, controlled, and calm rather than decorative.
Portrait ideas by season or occasion
Seasonal and occasion-based portraits give the session a built-in reason to exist. They also help people decide what kind of shoot they want when “I just want nice photos” still feels too vague.
Winter portraits
Winter portraits can feel soft, stark, elegant, or moody depending on the weather and styling. Cold air, layered clothing, fog, snow, muted light, and indoor window scenes all lend themselves well to portrait work.
A strong winter portrait usually works because it embraces the season instead of trying to hide it. Breath in the air, cool tones, or the contrast between warm fabric and cold surroundings can all add atmosphere without much effort.
Autumn portraits
Autumn portraits are popular because the season does a lot for you visually. Leaves, layered clothing, earthy colors, and softer sunlight already create texture before the posing even begins.
That said, the portrait still needs direction. Autumn works best when it adds richness to the frame without turning the session into a pile of seasonal props.
Holiday portraits
Holiday portraits can go polished or playful, but either way they work better when the scene feels edited instead of overloaded. A few seasonal details usually do more than trying to put the entire holiday into one frame.
Warm indoor light, coordinated clothing, subtle color accents, or one thoughtfully chosen decoration can be enough. Once the decor starts shouting, the portrait usually gets weaker.
Graduation portraits
Graduation portraits are tied to achievement, but they still need personality to feel memorable. The cap, gown, diploma, flowers, or campus location all help, but they should support the person rather than replace them.
The strongest graduation portraits usually balance milestone and individuality. They feel specific to the graduate, not just to the event.
How to choose the right portrait idea
The right portrait idea is not always the most creative one on paper. It is the one that suits the subject best, how they want to be seen, where they feel comfortable, and what the image is actually for.
A clean studio setup, an urban editorial frame, or a simple shoot at home can all work beautifully when the direction fits the person. Most of the time, one focused idea is enough. Portrait sessions rarely improve by trying to become ten different shoots at once.
Key Takeaways
- A strong portrait photo shows more than appearance. It uses light, framing, expression, and timing to make the person feel present.
- Portrait photography is not one style. Headshots, family portraits, editorial images, and fine art portraits all ask for different choices.
- Lighting has the biggest visual impact. Small changes in direction or softness can completely change the mood of a face.
- Good portrait settings are about balance. You want sharp eyes, useful depth of field, and clean image quality at the same time.
- A relaxed subject almost always gives a better portrait than a tense one. Communication matters as much as technique.
- Composition should support the person, not compete with them. Clean backgrounds and small posing adjustments usually matter more than flashy ideas.
- Editing should refine the image, not erase character. Strong retouching keeps skin believable and removes only what distracts.
- One clear idea is usually enough. Portraits tend to get stronger when the shoot has direction instead of too many competing concepts.
FAQ
How to take a portrait photo?
Start with the basics, but do not stop there. Good light, a simple background, and sharp focus on the eyes all matter, but portrait photography usually works or fails on smaller things: whether the pose feels natural, whether the subject looks comfortable, and whether the frame keeps attention where it should. Strong portraits are usually built through a series of small decisions, not one dramatic trick.
What is the difference between portrait vs headshot?
A headshot is a narrower, more practical format. It is usually cropped tighter and made for clear professional use, such as company pages, LinkedIn, speaker bios, or casting. A portrait is a wider category. It can still be professional, but it can also be expressive, environmental, styled, personal, or more story-driven.
What makes a good portrait photo?
A good portrait does not just show a person accurately — it gives the viewer a reason to stay with the image. Light, expression, pose, framing, and background all need to work together so the subject feels present rather than simply photographed. Technical quality matters, but a portrait usually becomes memorable when it feels intentional and human at the same time.
What is the best lens for portrait photography?
There is no single best lens for every portrait, but a few focal lengths keep showing up for good reason. A 50mm lens is flexible and easy to use in many situations. An 85mm lens is a classic choice because it flatters facial proportions and gives attractive background separation. A 70–200mm lens is especially useful for weddings, events, and outdoor sessions where you want compression, flexibility, and a cleaner background.
How do you take a portrait photo with phone?
Phone portraits improve quickly when you stop relying on Portrait mode alone. Soft light matters more than the feature itself. Use window light or gentle outdoor light, keep the background uncluttered, tap to focus on the face, and avoid getting too close with a wide phone lens. The cleaner the setup, the more believable the result usually looks.
What is the difference between a portrait and a headshot?
The difference is mostly purpose. A portrait can be broad, creative, formal, editorial, or personal. A headshot is more specific. It is usually framed tighter, stripped of distractions, and made to present the person clearly and professionally. In short, every headshot is a portrait, but not every portrait is a headshot.
What is the best lighting for portraits?
Soft directional light is usually the safest answer because it gives the face shape without making it harsh. That is why window light, golden hour, and classic studio patterns like butterfly or Rembrandt lighting are so commonly used. Still, the “best” light depends on the result you want. Some portraits need softness, while others benefit from stronger contrast or a more dramatic setup.
How do you retouch a portrait photo?
Start by fixing the big things first: exposure, white balance, overall tone, crop, and color balance. Only after that should you move into skin cleanup or facial detail. Good portrait retouching does not try to erase the person. It removes distractions, improves consistency, and keeps natural texture in place so the final image looks refined without looking artificial.