Prepare files for delivery
What you will do
Section titled “What you will do”Prepare JPEGs for two common delivery needs: full-size copies for maximum resolution and smaller copies for online use. You will keep the exports separate from your source photographs, choose whether to add them to the current project, and handle a repeated filename without replacing the earlier export.
Before you start
Section titled “Before you start”Import the photographs you want to deliver. See Import photos if they are not yet in the project.
This workflow creates JPEG copies in Local mode with the retouching tools switched off. If metadata or color-profile preservation matters to your delivery, check those requirements separately before sending the files.
Create a separate subfolder for each set of exported files. A clear destination keeps full-size and resized copies apart and protects the originals from accidental replacement. Do not experiment with filename conflicts in a folder that contains a client’s only copy.
Prepare the selected photographs
Section titled “Prepare the selected photographs”- Select the photographs you want to deliver. To select every photograph in the current view, click one and press Ctrl+A.
- Check that the selected counter matches the photographs you intend to export.
- Open the export panel using the upward-arrow icon at the far right.
- Select Local.
- Open All in the tool list and clear every checked tool so this export does not apply retouching.
- Open Export settings.
Choose the destination and filename rule
Section titled “Choose the destination and filename rule”- Under Export to, choose Hard drive — To computer.
- Under Photos to Export, choose the selected photographs and confirm the count.
- Choose Original Files Folder in the folder selector.
- Turn on Put in Subfolder and enter a clear, unused name such as the client name and delivery size. The generated names in the screenshots are only examples.
- Under Naming and Overwriting, choose Add to the Name: -retouched.
- Select JPEG under Format.
- Leave Shut down computer after export unchecked if it is shown.
The -retouched suffix comes from the naming rule, even when the retouching tools are off. Use this rule only when that description is appropriate for the files you are delivering.
Export full-size JPEG copies
Section titled “Export full-size JPEG copies”- Leave Add to Current Project unchecked unless you also want these exported copies in the project.
- Turn Resize to fit off.
- Review the selected count, destination, subfolder, naming rule, and JPEG format.
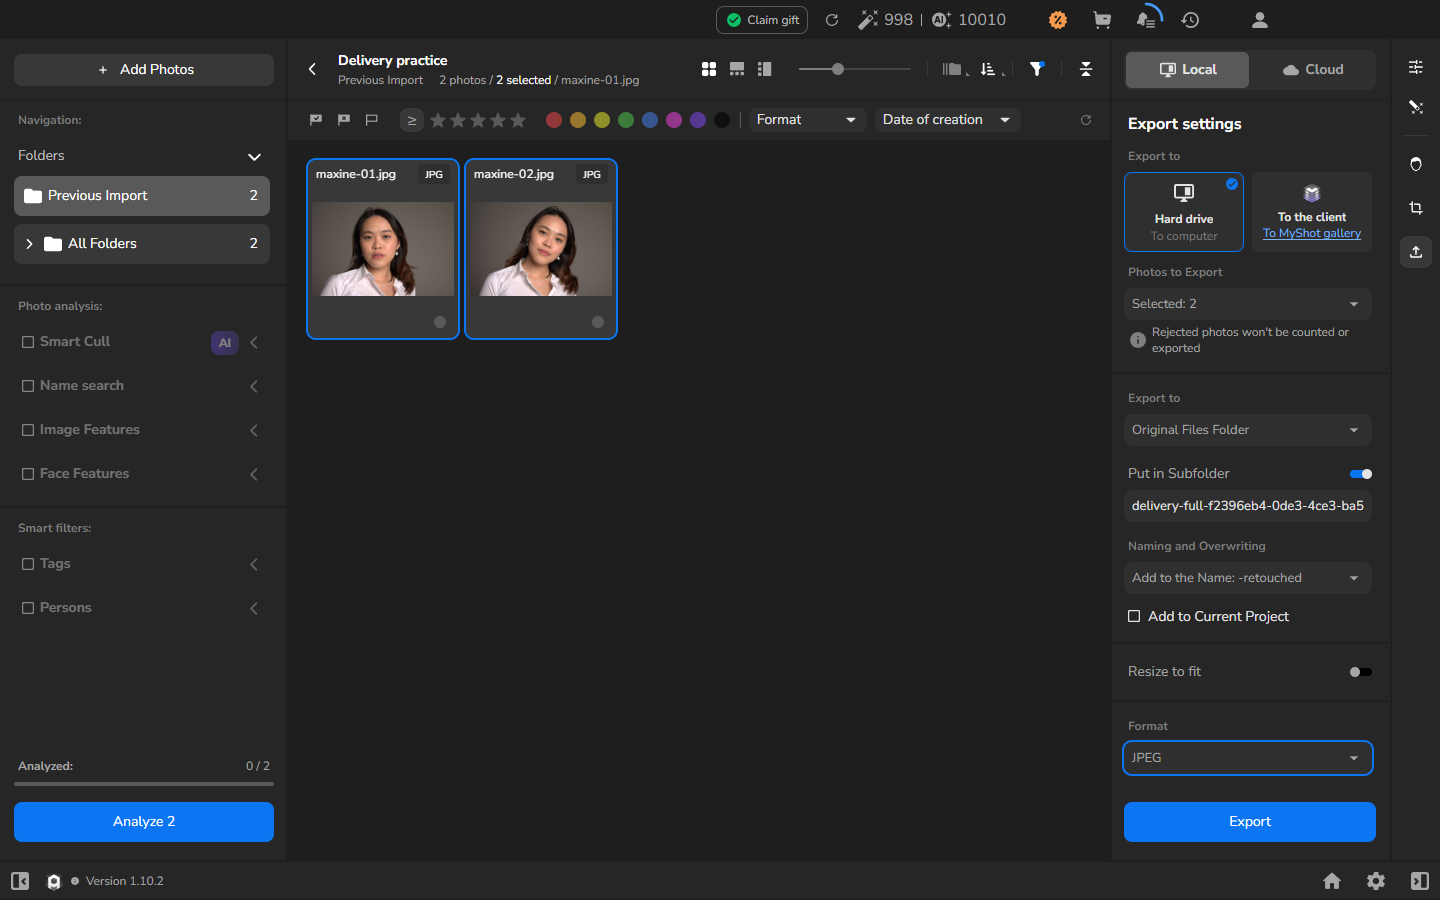
- Click Export.
- Wait for the export to complete before checking the destination folder.
Use this setup when the recipient needs the photographs at their full pixel dimensions. After export, check the dimensions and open a few files before sending the set.
Export resized copies and add them to the project
Section titled “Export resized copies and add them to the project”- Keep the original photographs selected and open Export settings again.
- Enter another new subfolder name so the resized copies stay separate from the full-size set.
- Turn on Add to Current Project if you want the exported copies in the project for comparison or organization.
- Turn on Resize to fit.
- For a 1200-pixel delivery, choose Long edge, enter
1200, and turn on Don’t enlarge. Use the long-edge size required by your client or publishing service; Don’t enlarge prevents a smaller photograph from being scaled up to that value. - Keep JPEG selected and review the other settings.
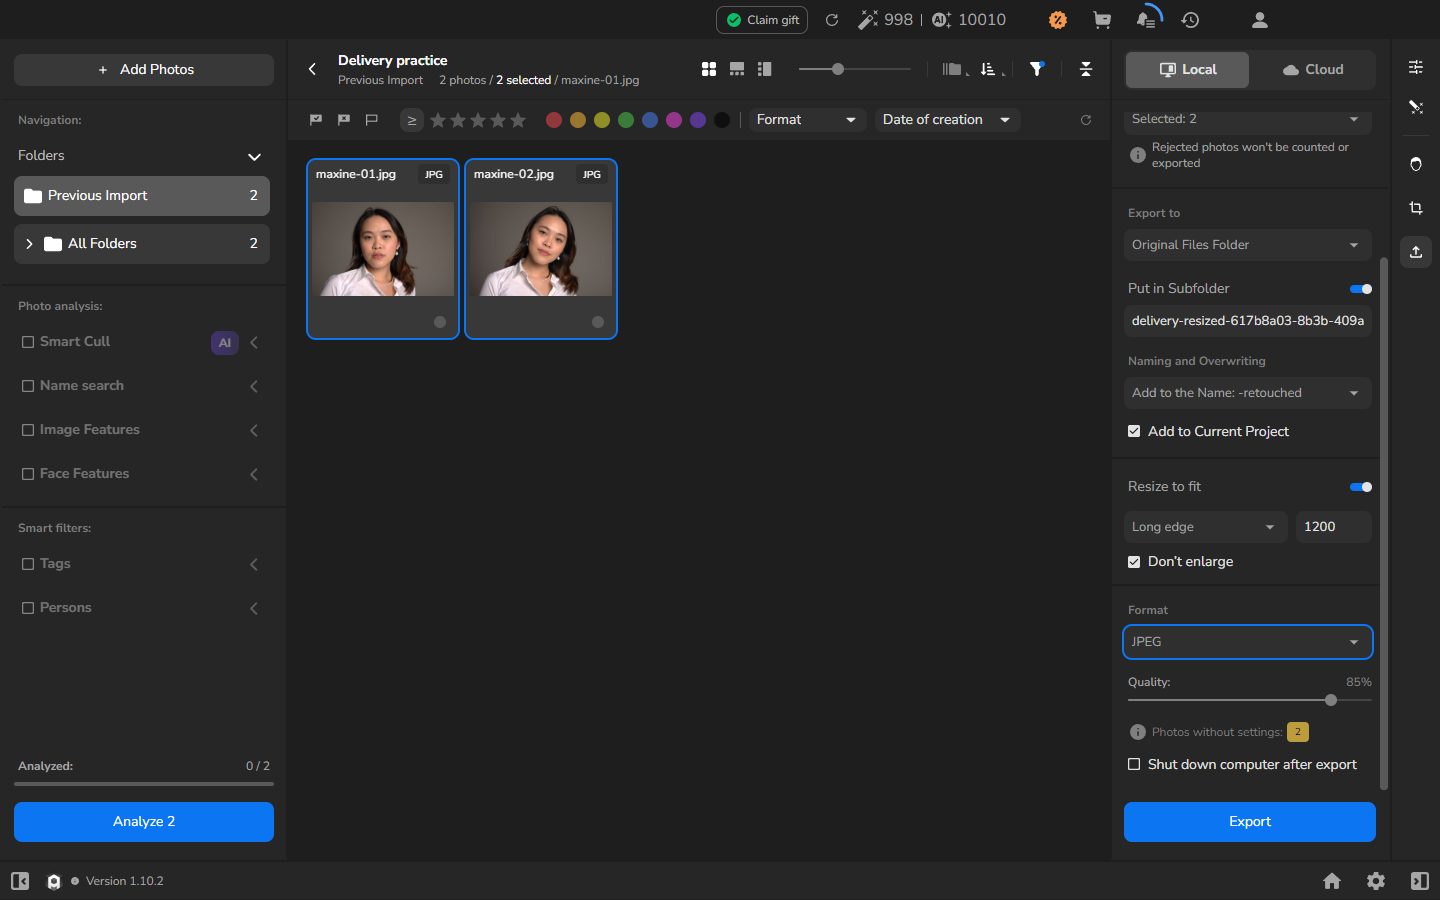
- Click Export and wait for completion.
- If you selected Add to Current Project, open All Folders in the left sidebar to find the exported copies beside the originals.
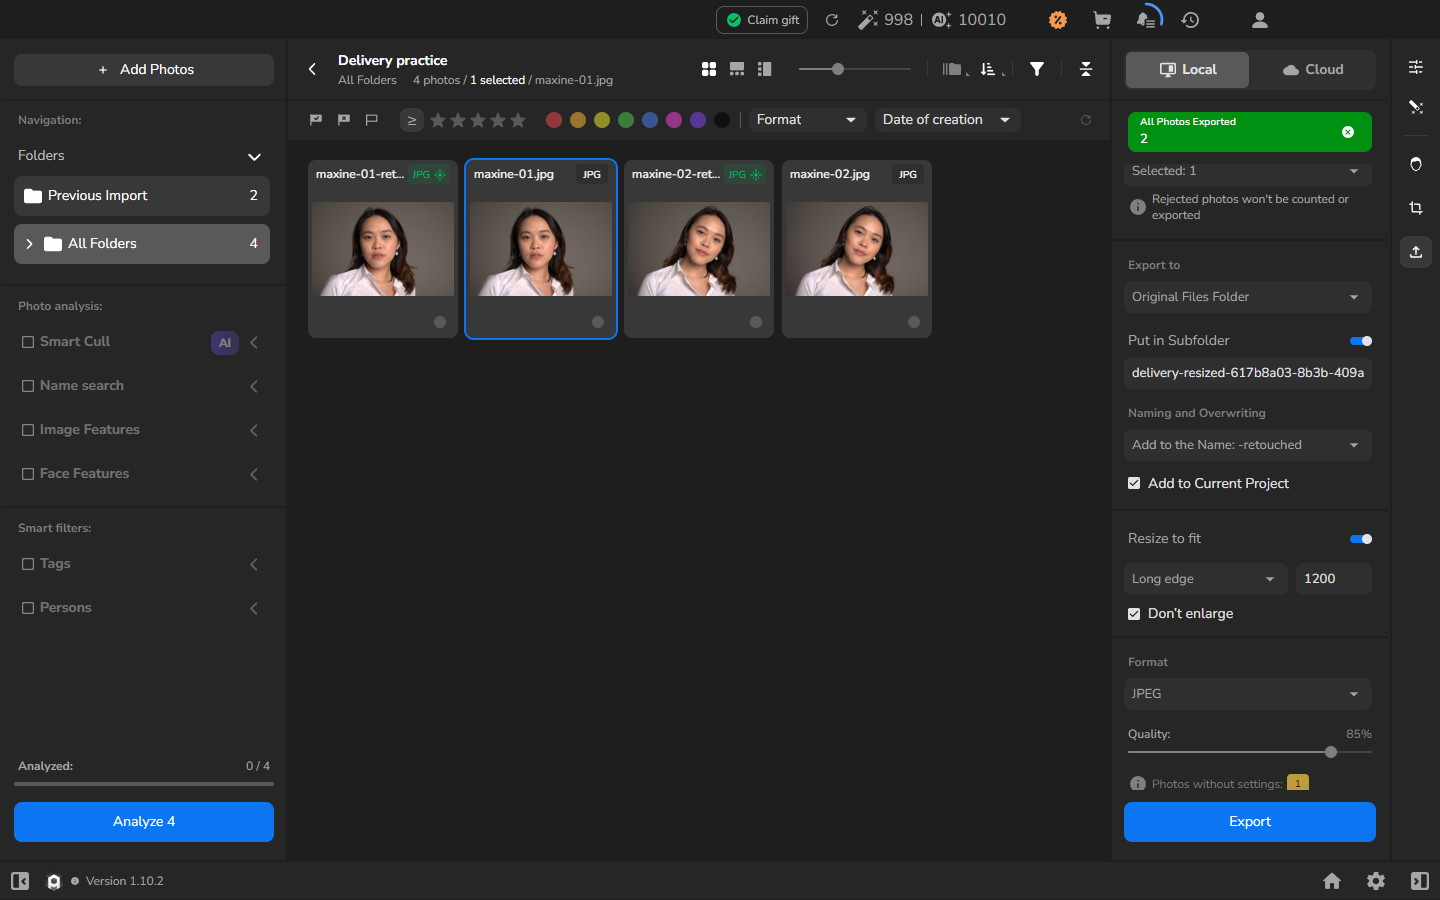
Previous Import continues to show the photographs from the last import, not copies added during export. Use All Folders to check exported copies that you added to the project.
Handle a generated filename conflict
Section titled “Handle a generated filename conflict”If you need to export a photograph again to a destination that already contains its generated name:
- Select the original photograph and open Export settings.
- Choose the same destination and review the naming, resizing, and format settings.
- Click Export and wait for completion.
- If Add to Current Project is on, open All Folders and find the newly exported copy.
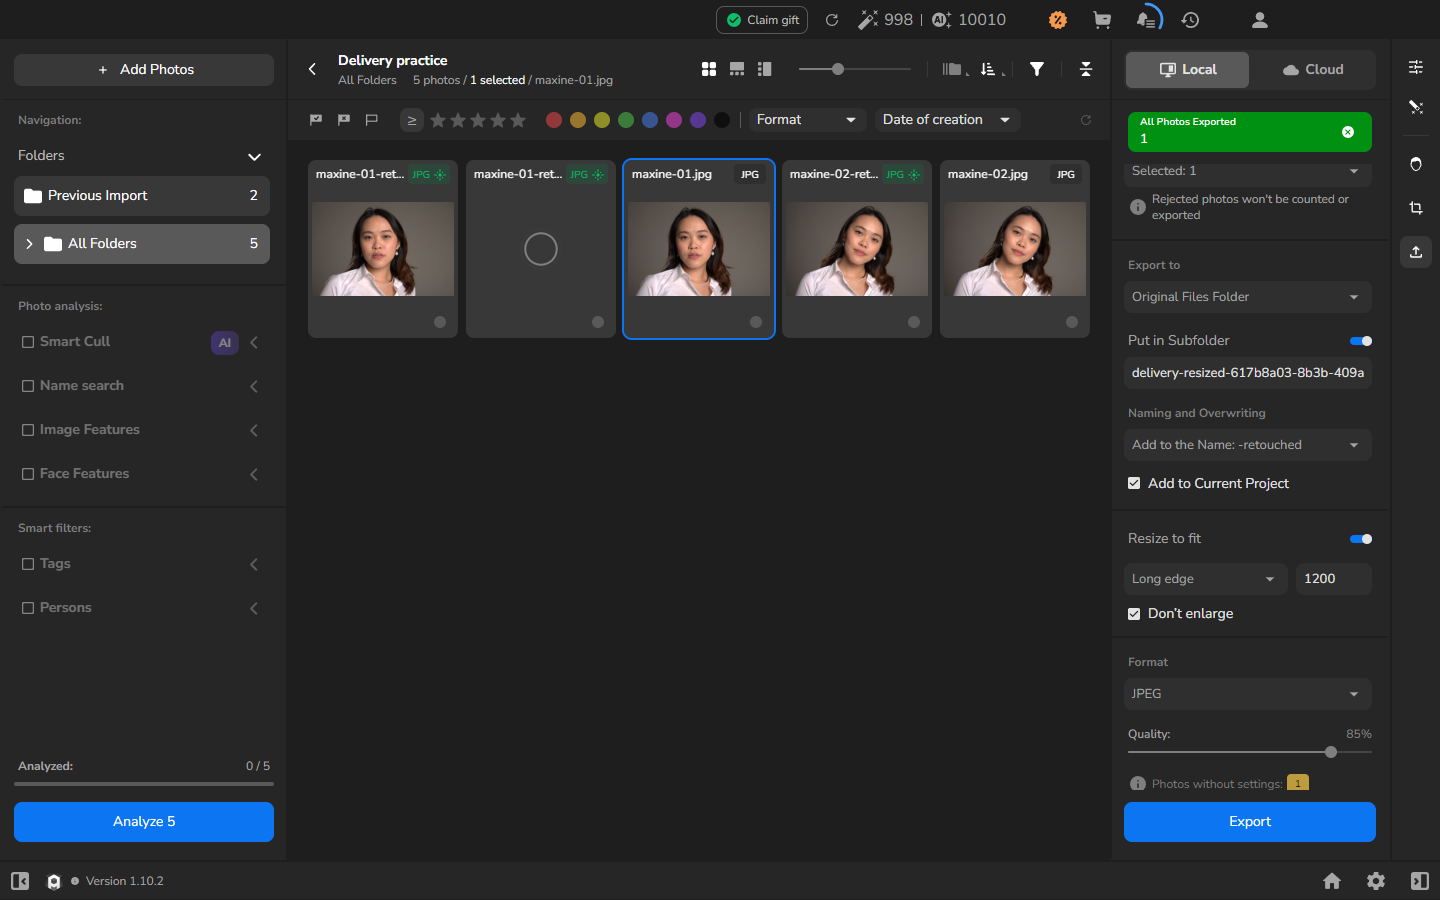
When a file created with Add to the Name: -retouched already exists in the destination, Arams preserves it and adds 1 to the new filename. For example, a second export of portrait-retouched.jpg becomes portrait-retouched1.jpg. This behavior applies to the naming rule shown here and a conflict with an earlier Arams-generated copy. Use a separate folder rather than relying on it for other naming or overwrite choices.
Check the result
Section titled “Check the result”Before sending the delivery, inspect the files on disk as well as any copies added to the project:
- Open each delivery subfolder and compare the saved filenames with the selected naming rule.
- Open representative JPEGs from each set. Check for blank areas, truncation, visible corruption, and unexpected color changes.
- Check that the full-size files retain the intended pixel dimensions and that the resized files match your chosen long-edge limit.
- If you created a filename conflict, confirm that both the earlier file and the numbered copy are present.
- If Add to Current Project was on, open All Folders and match the copies in the grid to the files on disk.
- Confirm that your source photographs remain in their original folder with their original names.
If it does not work
Section titled “If it does not work”- The saved dimensions are unexpected: check whether Resize to fit is on. For this example, choose Long edge, enter
1200, and check Don’t enlarge. - The exported copies do not appear in the project: open All Folders and confirm that Add to Current Project was selected before export. Copies are not added retroactively when the option was off.
- You cannot find the destination: check Original Files Folder, Put in Subfolder, and the exact subfolder name. Do not assume that the project storage folder is the export destination.
- The filename does not match: review Naming and Overwriting before exporting. This procedure uses Add to the Name: -retouched.
- An existing file matters: stop and choose a separate destination. Do not test conflict behavior with a client’s only file.
- An exported JPEG does not open: do not send that delivery. Leave the originals unchanged while you investigate or export a new set to a separate folder.