Activate an existing plugin
What you will do
Section titled “What you will do”Activate an installed plugin to retouch photographs locally on this computer. The screenshots use Heal v.1212; choose the plugin that you want to use.
Before you start
Section titled “Before you start”Sign in to the account that includes the plugin. The plugin must already be installed, with at least one key shown under Activation Keys.
Activation assigns one available key to this computer, so check the Activation Keys count before you continue. You do not need to import a photograph first.
- From the workspace, open Settings using the gear button.
- Select Plugins in the left sidebar.
- Find the plugin in the table. In the same row, make sure its Status is Not activated and Activate is available under Action.
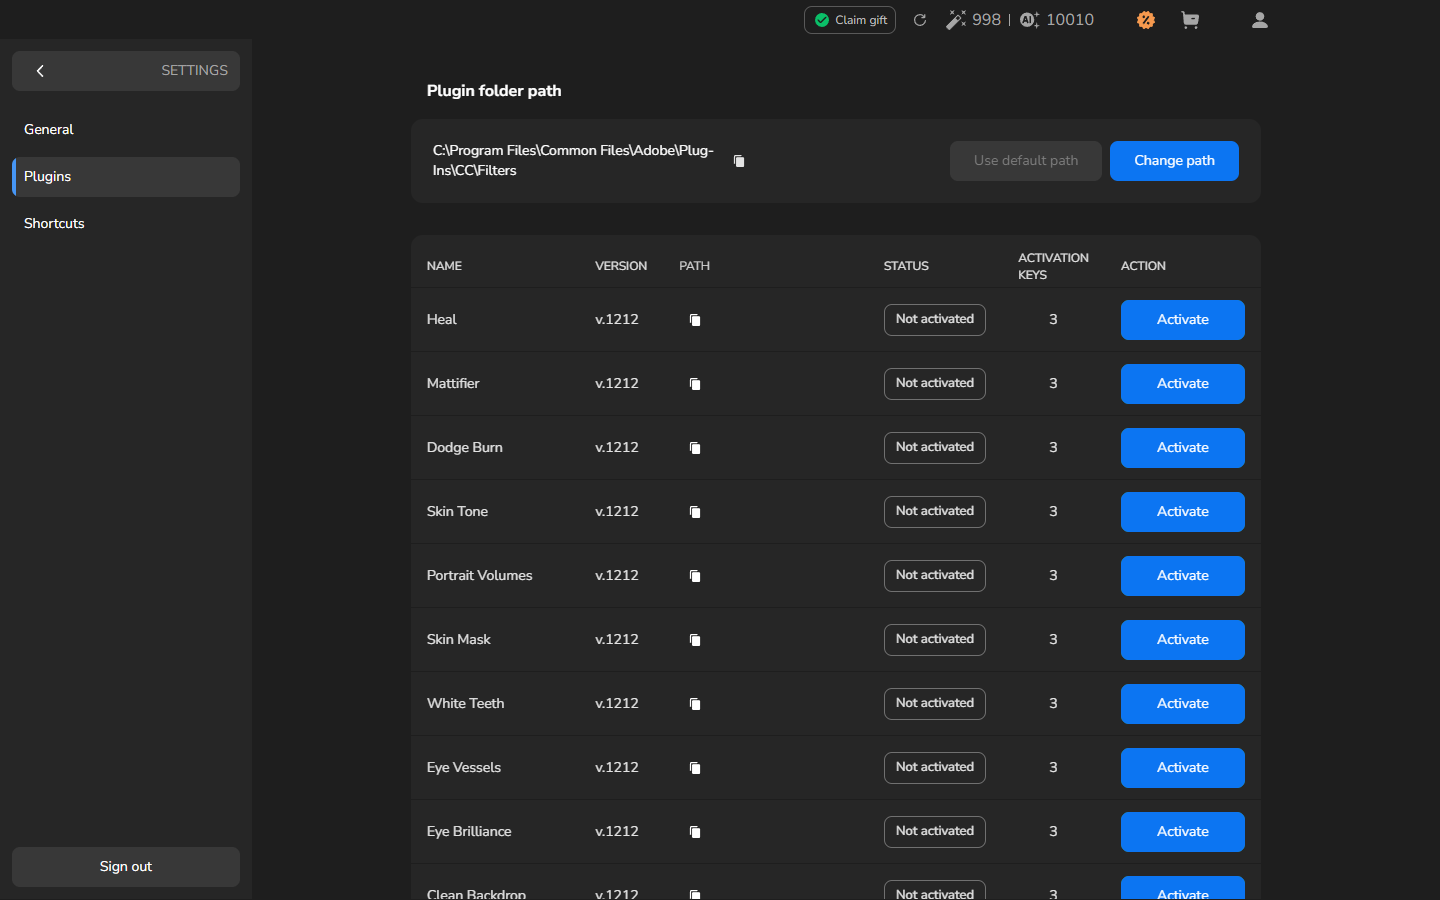
- Click Activate in the plugin’s row.
- Wait for that row to show Activated. Its Activate button becomes disabled, and the available key count updates.
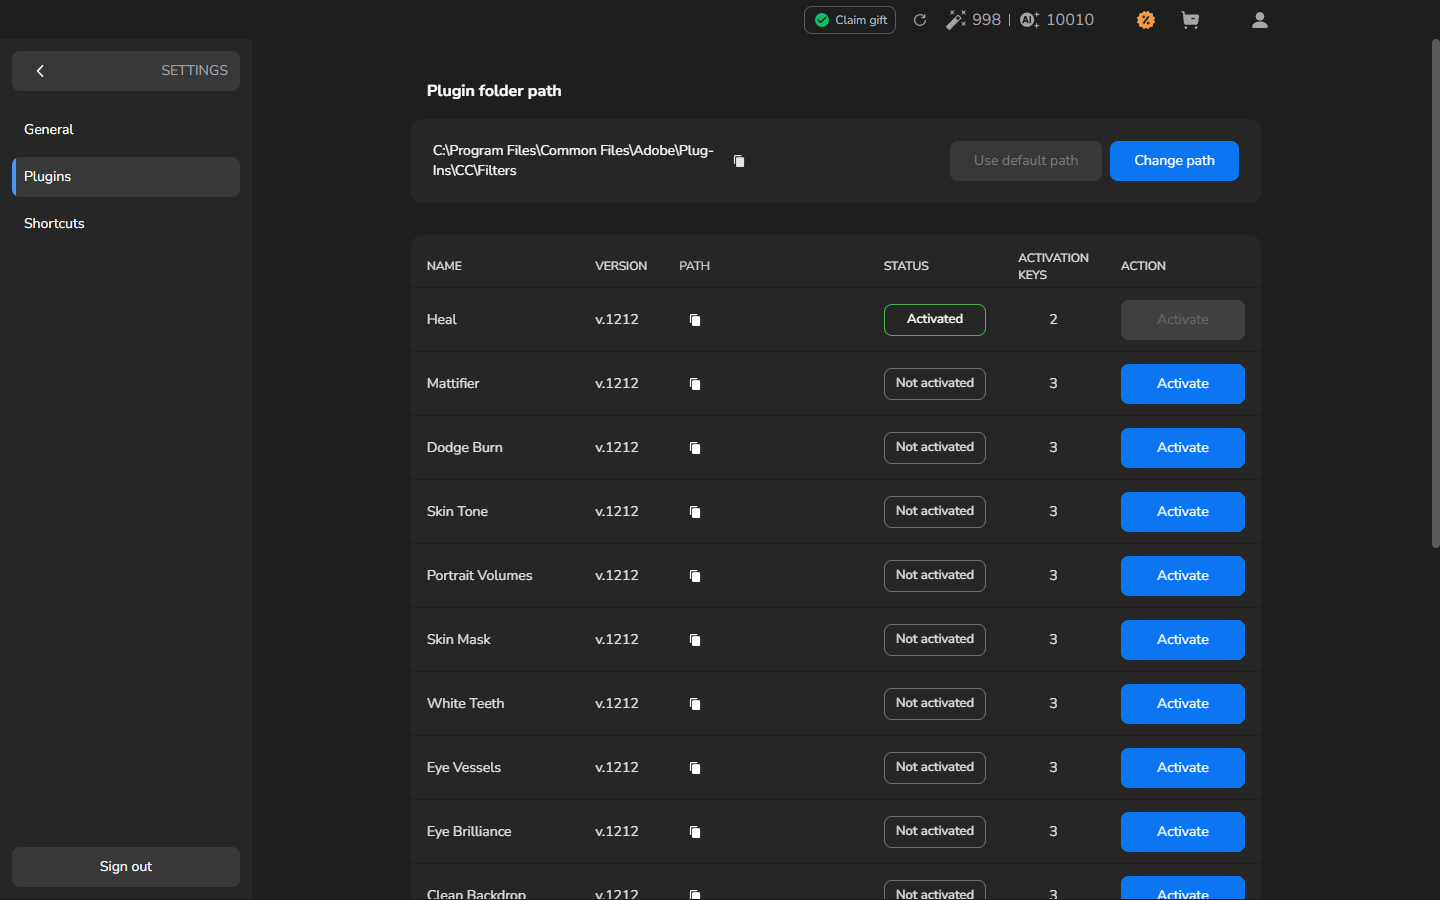
- Use the back arrow at the upper left of Settings to return to the workspace.
Check the result
Section titled “Check the result”The plugin is ready for local retouching. Continue with Process a photograph locally to select it in Local mode, create a preview, and compare the result with the original.
If activation is unavailable
Section titled “If activation is unavailable”- Activated with a disabled Activate button is the completed state. Continue to local retouching; another activation is unnecessary.
- Not installed with Download means that you need to download and install the plugin before following this chapter.
- If the plugin is missing or has no available activation keys, check that you are signed in to the account that includes the plugin.
- If the plugin remains Not activated, use its status and any error message to diagnose the problem.