Apply retouching settings by gender
What you will do
Section titled “What you will do”Use By gender in Local or Cloud mode when you want separate retouching settings for faces that Arams classifies as Male or Female. A third tab, Others, controls the rest of the photograph outside the detected faces, including hands, arms, legs, and other body areas.
Choose Local when the plugins you need are installed and activated on your computer. Choose Cloud when the tools are available through your account and you are prepared to upload the photographs and use the retouch credits shown for processing. The By gender category controls work the same way in either mode.
This guide uses Heal, Dodge Burn, and Portrait Volumes to show the workflow. You will set their strengths on a representative photograph, copy the complete setup to similar portraits, and adjust individual photographs where needed.
Before you start
Section titled “Before you start”- In Settings, turn on Automatic face search. If Arams displays an analysis-consent message, read it and continue only if you agree. The Male and Female tabs depend on face detection.
- Create a project.
- Import your portraits and wait for their thumbnails to appear.
- Choose the mode you plan to use and make sure the example tools are available there. For Local, Heal, Dodge Burn, and Portrait Volumes must be installed and activated on this computer. For Cloud, they must be available to your signed-in account; local installation and activation are not required. Cloud processing also requires an internet connection, permission to upload the photographs, and enough retouch credits for the requested operation.
Choose a reference photograph
Section titled “Choose a reference photograph”Choose a representative photograph from the series. A photograph containing more than one person is especially useful because you can judge the category settings together under the same lighting and color treatment.
- Select the reference photograph, then select the face-outline icon in the narrow vertical toolbar at the far right to open Details and Faces.
- Wait for face search to finish, then review the detected faces and their displayed Gender categories. Credit-consuming face analysis is not required for By gender.
- Return to the retouching panel, choose Local or Cloud, and select By gender. Keep the same mode when you later process the photographs.
- Confirm that the Male and Female counts match the detected faces you expect to retouch.
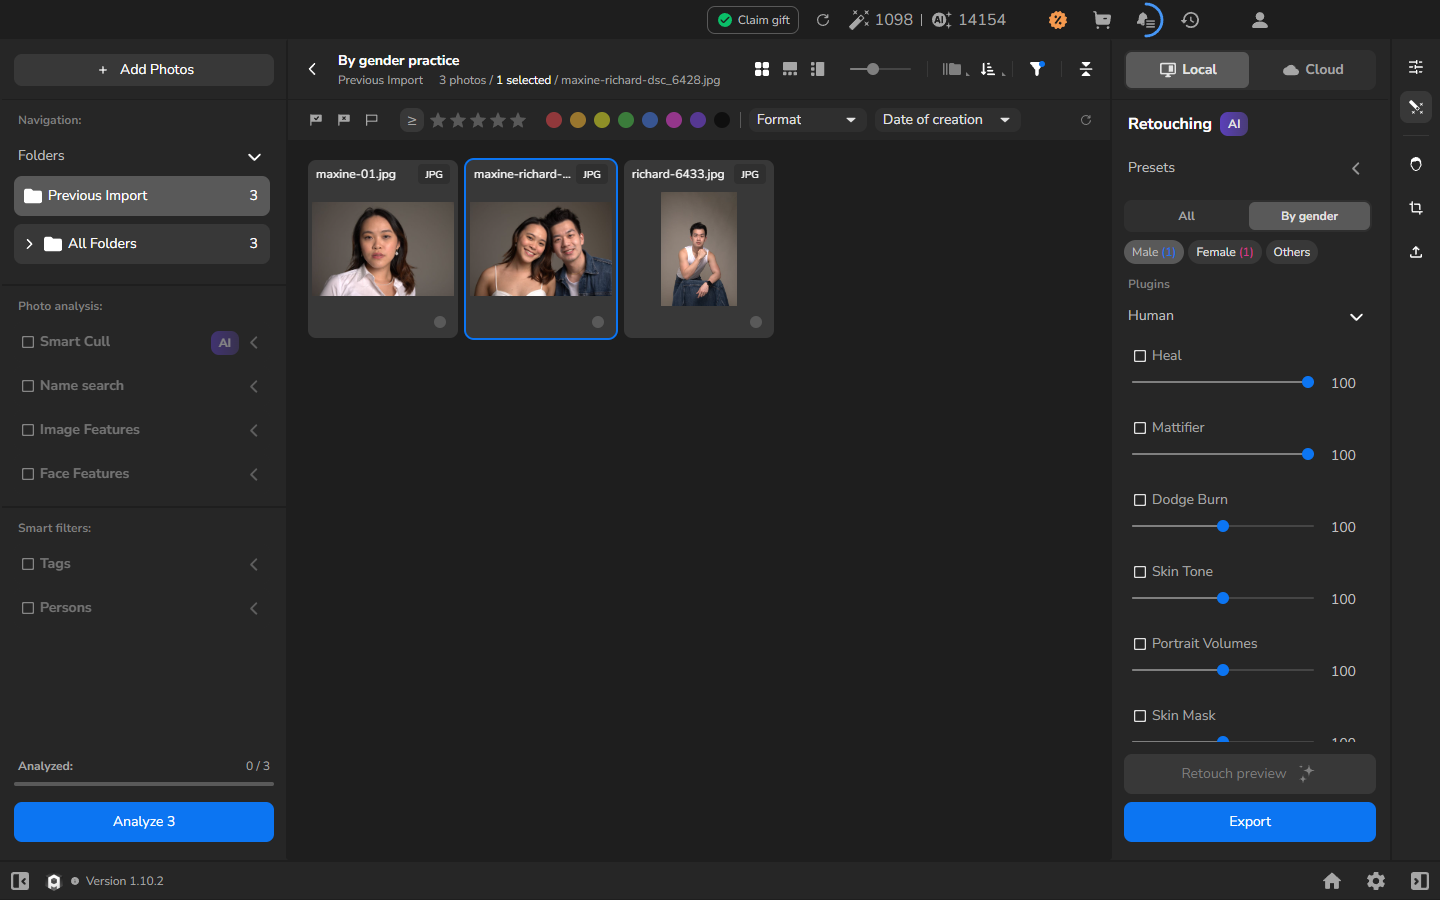
The labels are Arams face classifications. Use them to decide which settings will be applied; they are not aesthetic recommendations.
Correct an incorrect face classification
Section titled “Correct an incorrect face classification”If Arams places a face in the wrong Male or Female category, correct the classification before choosing the category’s retouching settings.
- With the photograph selected, use the face-outline icon in the narrow vertical toolbar at the far right to open Details and Faces.
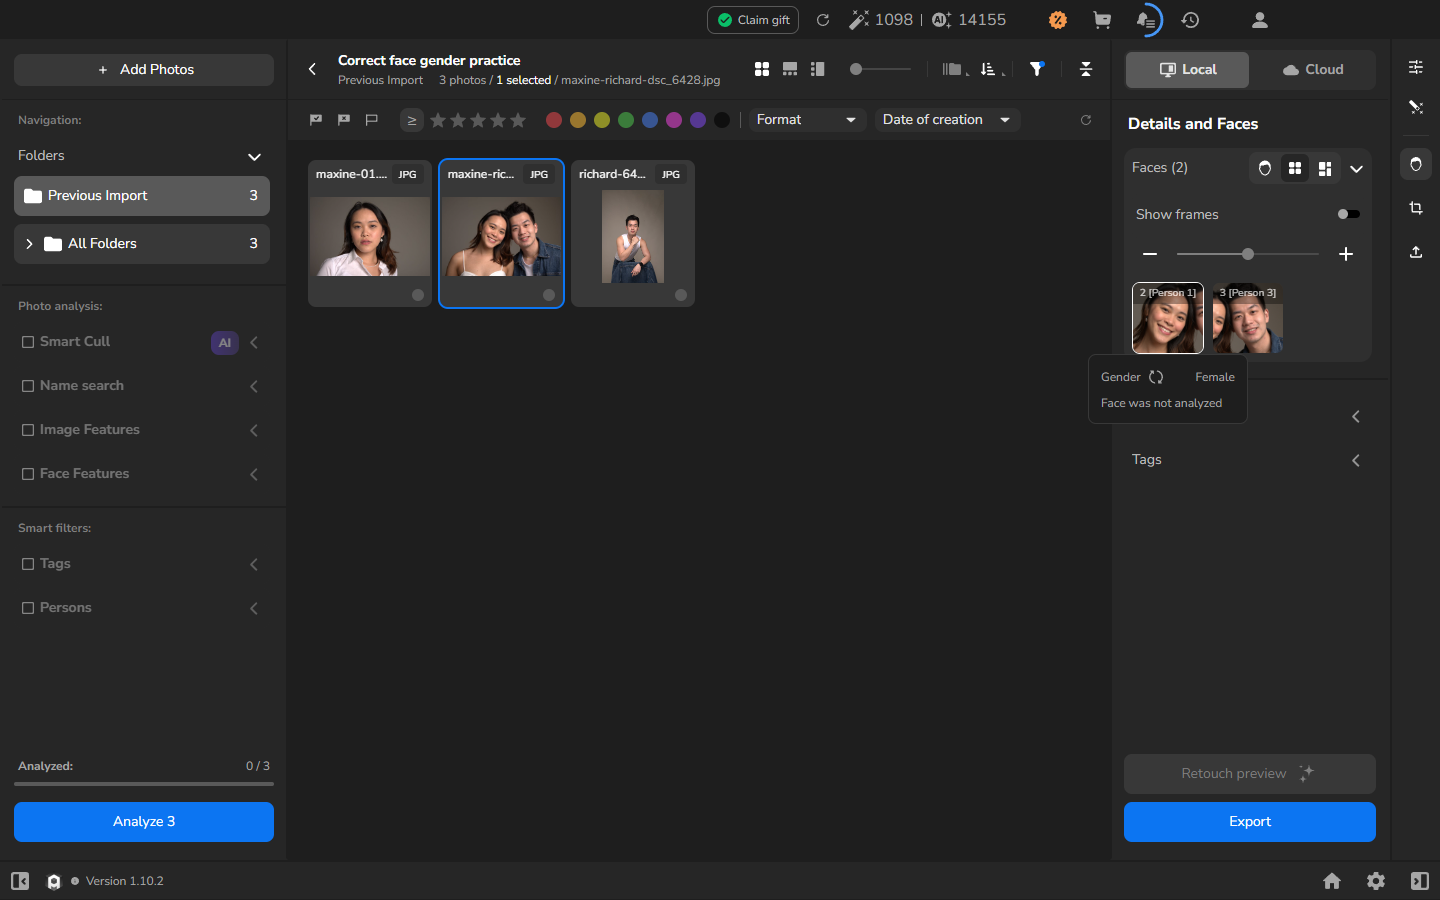
- Under Faces, hover the face you want to correct. In the floating card, find Gender.
- Select the circular arrows next to Gender. This switches that face between Male and Female; it is separate from the Male and Female retouching tabs and does not require Analyze.
- Read the new value in the face card.
- Return to the retouching panel and the mode you chose, Local or Cloud. Open By gender, then check that the Male and Female counts now match the faces in the photograph.
Set the face and body-area retouching
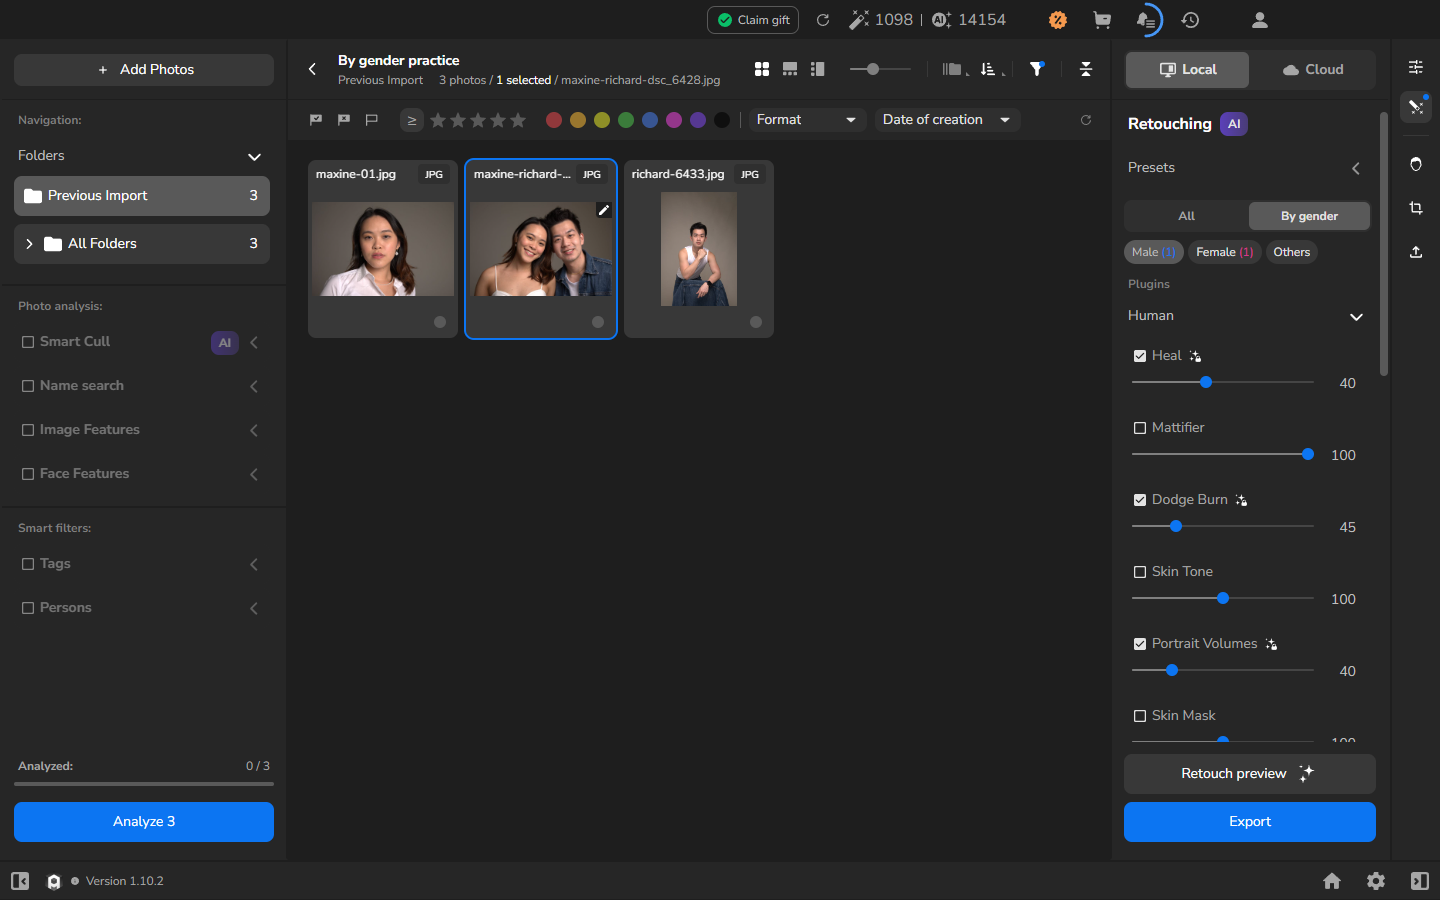
Section titled “Set the face and body-area retouching”Open the Male tab and enable Heal, Dodge Burn, and Portrait Volumes. Adjust one tool at a time while watching the face at a useful magnification. Choose strengths for the finish you want: check skin detail after Heal, tonal transitions after Dodge Burn, and facial volume after Portrait Volumes.
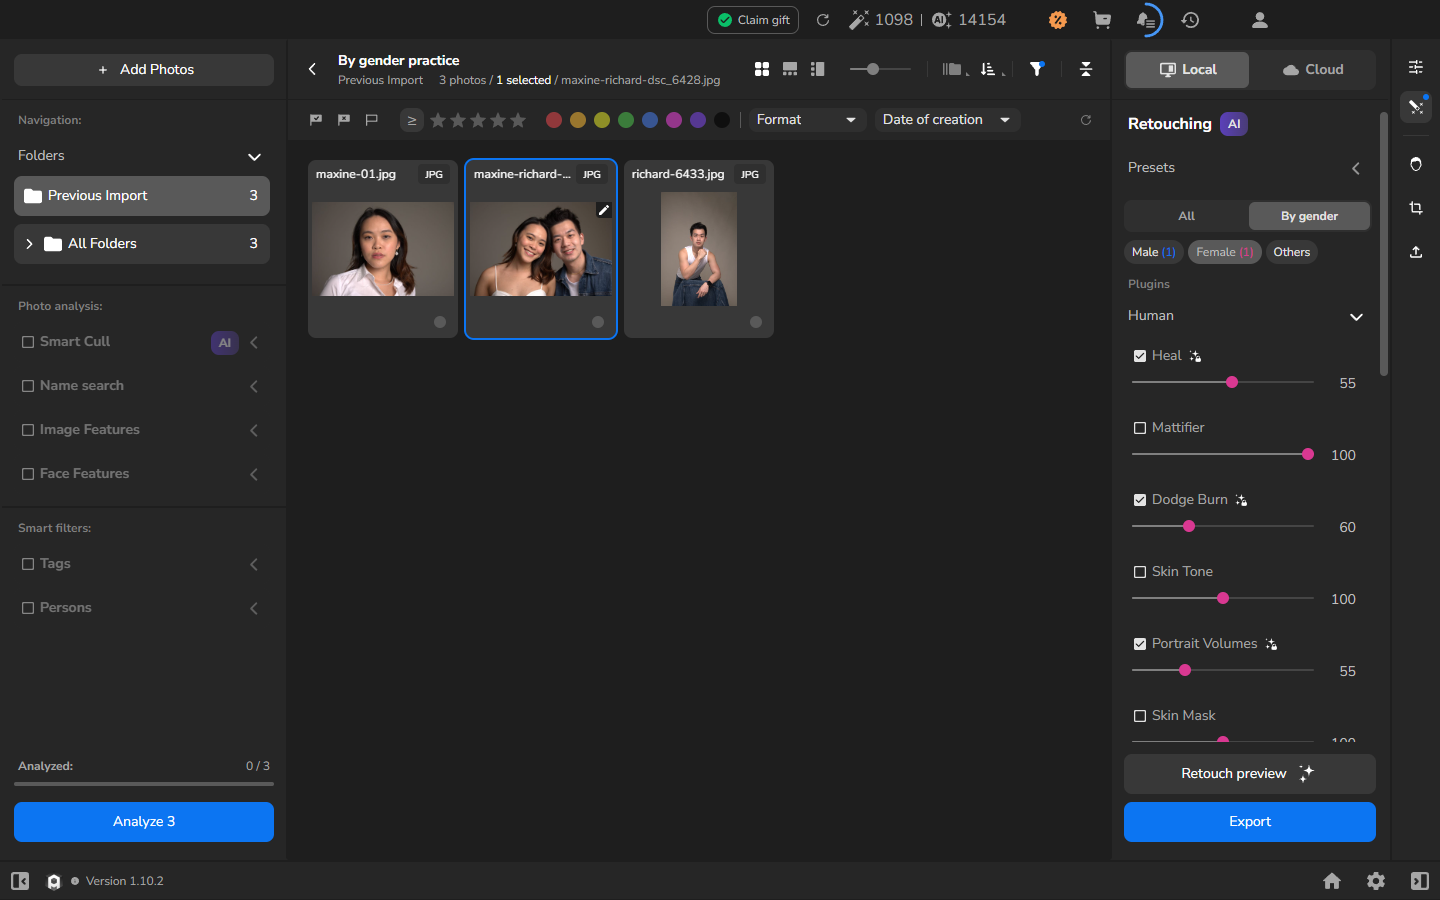
Repeat the process in the Female tab. Set each category for the faces in your photographs rather than treating the categories as a prescribed difference in appearance.
Next, open Others. This tab affects the remainder of the photograph outside the detected faces, including body areas. Leave its tools off when you want to retouch only the detected faces.
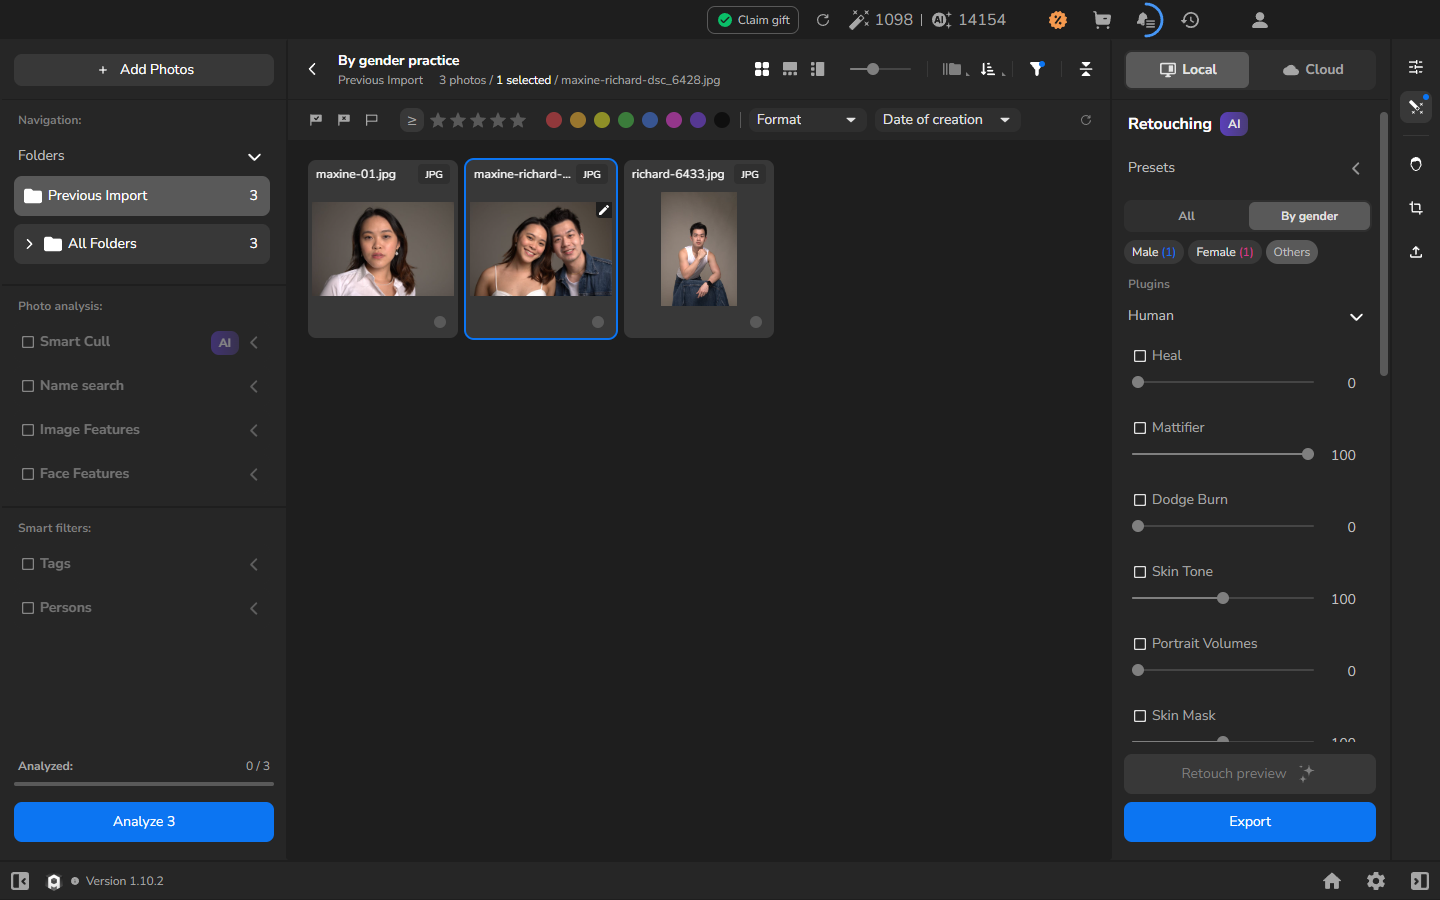
Enable the tools under Others when hands, arms, legs, or other body areas also need the same treatment. Begin with restrained strengths because these settings can also affect clothing, hair, and the background. Inspect those areas at a useful magnification and increase a strength only when it improves the intended area without introducing unwanted changes elsewhere.
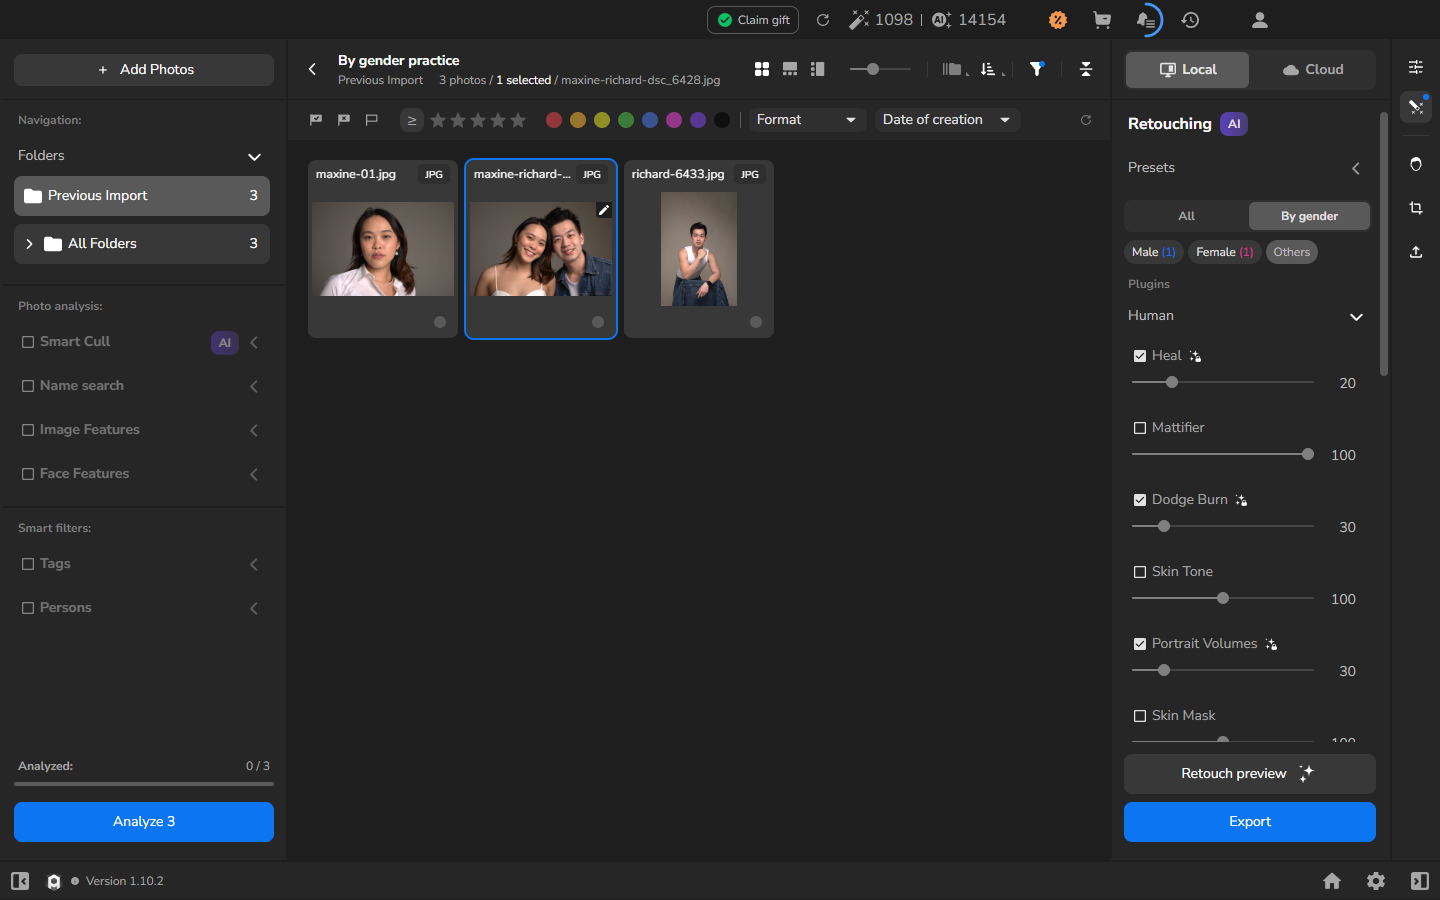
The values in the screenshots are examples. Choose strengths from the visible result on your photographs.
Give one tool a common value with All
Section titled “Give one tool a common value with All”Open All when you want to give one tool the same value in Male, Female, and Others. If Male and Female currently have different values, a blue marker shows the Male value and a pink marker shows the Female value on that tool’s slider.
Moving the slider replaces the three category values for that tool and enables it in all three categories, including Others. For example, moving Heal to 65 when it is 40 for Male, 55 for Female, and off at 0 for Others sets Heal to 65 and turns it on in all three. Other tools keep their existing category settings.
Copy the complete setup to the other portraits
Section titled “Copy the complete setup to the other portraits”Once the reference looks right, apply its complete image settings to photographs that need the same starting point.
- In gallery view, right-click the reference photograph and choose Copy image settings.
- Select the similar photographs that need the same starting point.
- Right-click one of the selected photographs and choose Paste image settings.
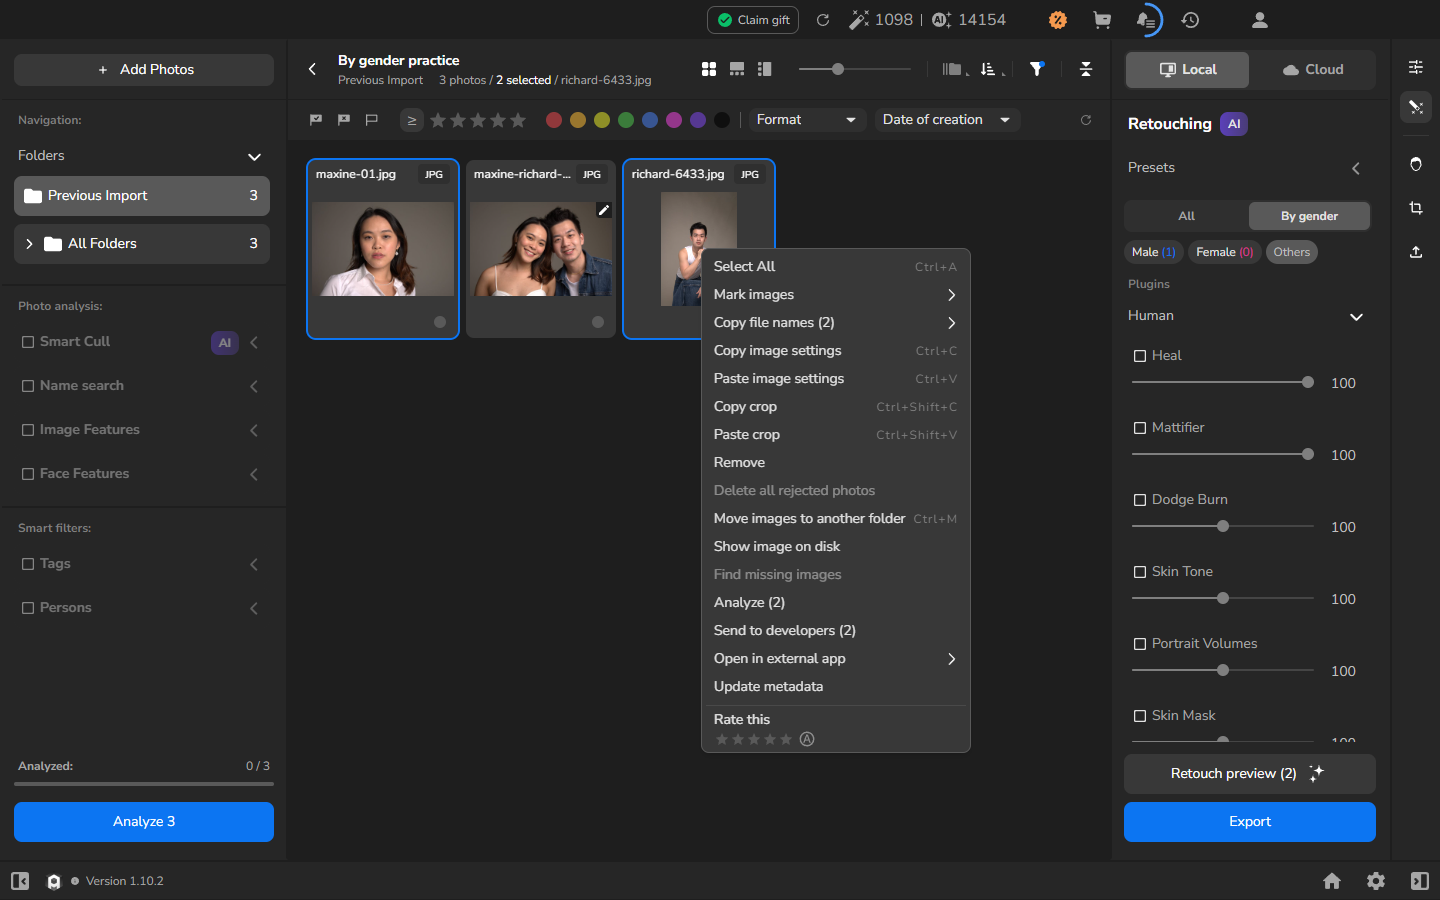
After pasting, each target uses the reference photograph’s complete image setup.
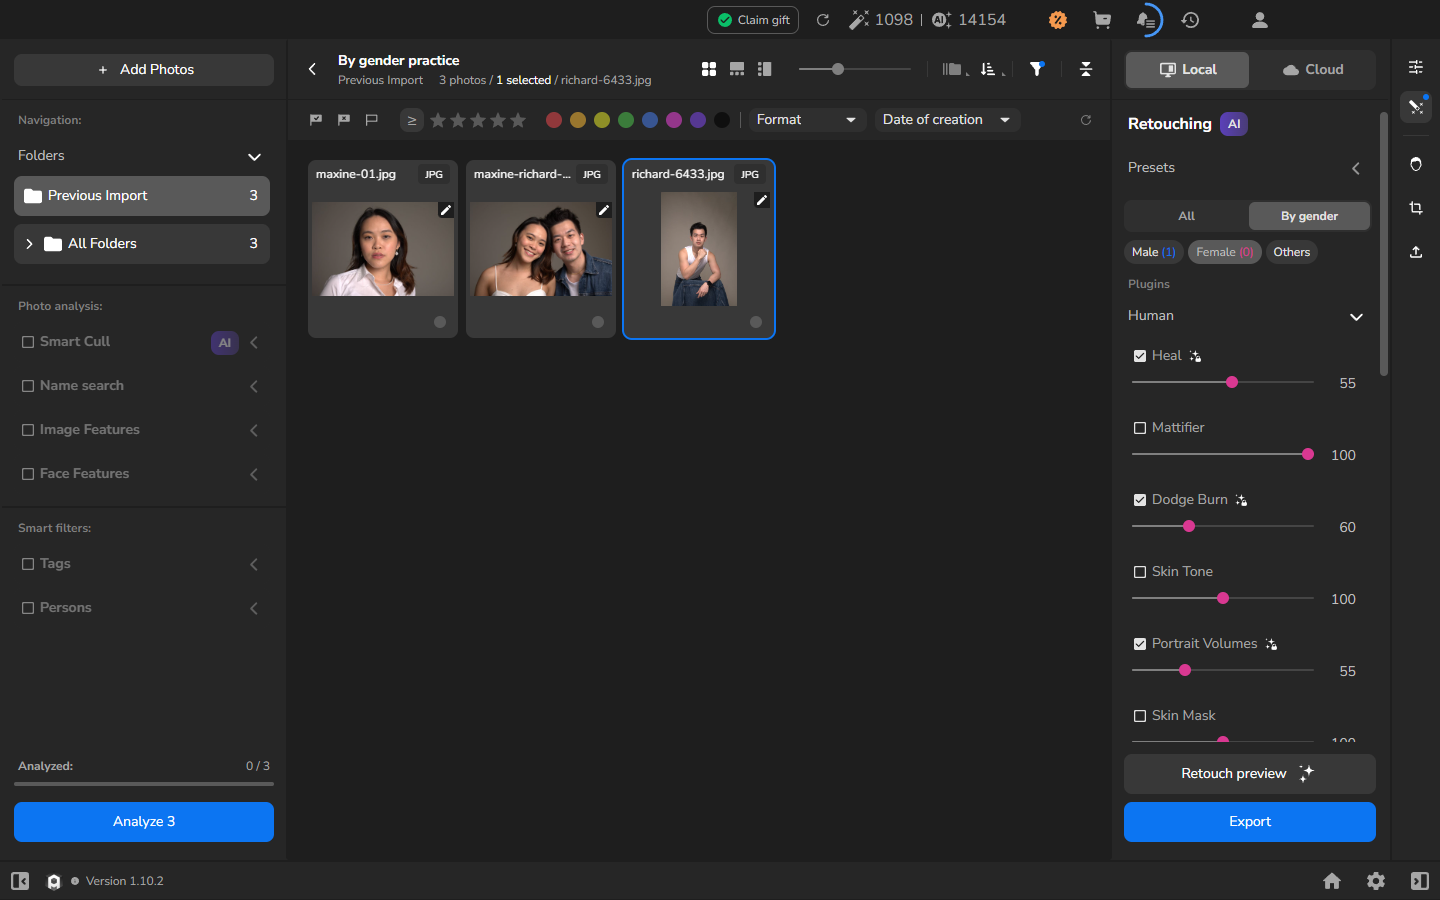
Copy image settings transfers the complete image setup, including the Male, Female, and Others settings, not only the currently visible category. Use a retouching preset instead when you want a named setup that you can reuse later.
Process and inspect the series
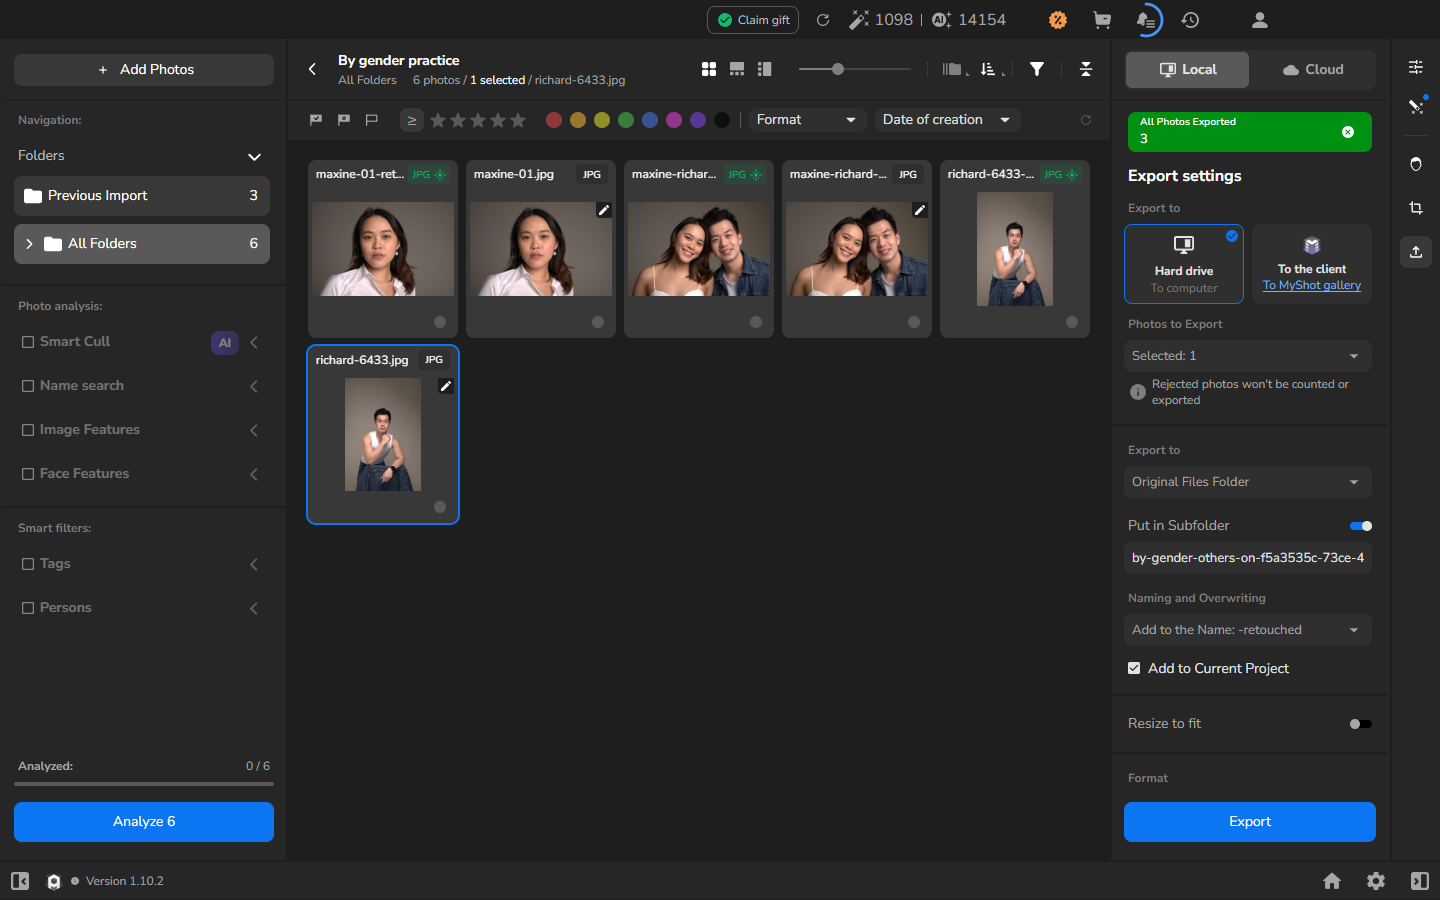
Section titled “Process and inspect the series”- Select the photographs you want to process and open Export settings.
- Choose the destination, file format, filename, and resize options needed for your job. Export to new copies so that your source photographs remain available for comparison.
- Choose Export and wait for processing to complete.
- Review every processed photograph against its source at a useful magnification. Check each face as well as the areas controlled by Others. Look for consistent skin detail and tonal transitions, clean hair and clothing edges, and unwanted changes in the background.
Use Compare retouching with the original when you want a controlled before/after view at the same magnification.
The series should share the intended Male, Female, and Others setup, while each photograph still looks appropriate on its own. Face counts can vary between photographs, so review the detected faces as well as the retouching result.
Optional: make a per-photo exception
Section titled “Optional: make a per-photo exception”If one photograph needs a different treatment, adjust that photograph after reviewing the shared result, then process and inspect it again. This keeps the common setup consistent while allowing for differences in lighting, pose, framing, or visible body areas. See Retouch a consistent photo series for the per-photo workflow.
If it does not work
Section titled “If it does not work”- Faces stays at zero or reports that face search is disabled: return to Settings, enable Automatic face search, and wait for face search to finish.
- Category tabs or counts are missing: select one photograph, confirm that face search completed, and reopen By gender.
- A face appears in the wrong category: correct its Gender under Details and Faces, then reopen By gender and check the category counts.
- A required tool is unavailable: in Local, check that its plugin is installed and activated on this computer. In Cloud, check that you are signed in and that the tool and cloud service are available to your account.
- Settings were pasted onto the wrong photographs: select only the intended targets, repeat the copy-and-paste procedure, and review a target before processing the series.
- The result varies too much across the series: keep the shared setup as a starting point, then make per-photo exceptions where the lighting, pose, or framing requires them.
- Export does not complete: open processing history and review the displayed status or error before trying again.