Understand cloud processing and its requirements
What you will do
Section titled “What you will do”Use Cloud mode to create a Heal preview when you want to assess skin retouching before exporting a portrait. You will choose one photograph, review what will be uploaded and what the preview will cost, then compare the result with the original.
Cloud processing uploads the selected images to Retouch4me servers. You therefore need an internet connection, a signed-in account with cloud processing available, and enough retouch credits for the operation shown in the confirmation.
Before you start
Section titled “Before you start”- Import your photographs and wait for their thumbnails to appear.
- Use photographs that you can upload for processing, and read the Cloud processing notice before agreeing.
- Check the retouch credit counter in the top bar. Hover over it to see Credits for cloud retouching. This is separate from the AI counter.
Select Cloud and one photograph
Section titled “Select Cloud and one photograph”- Select the portrait you want to preview in the photo grid. Make sure it is the only selected photograph so that you do not upload or process other images unintentionally.
- Check the selected filename and selection counter.
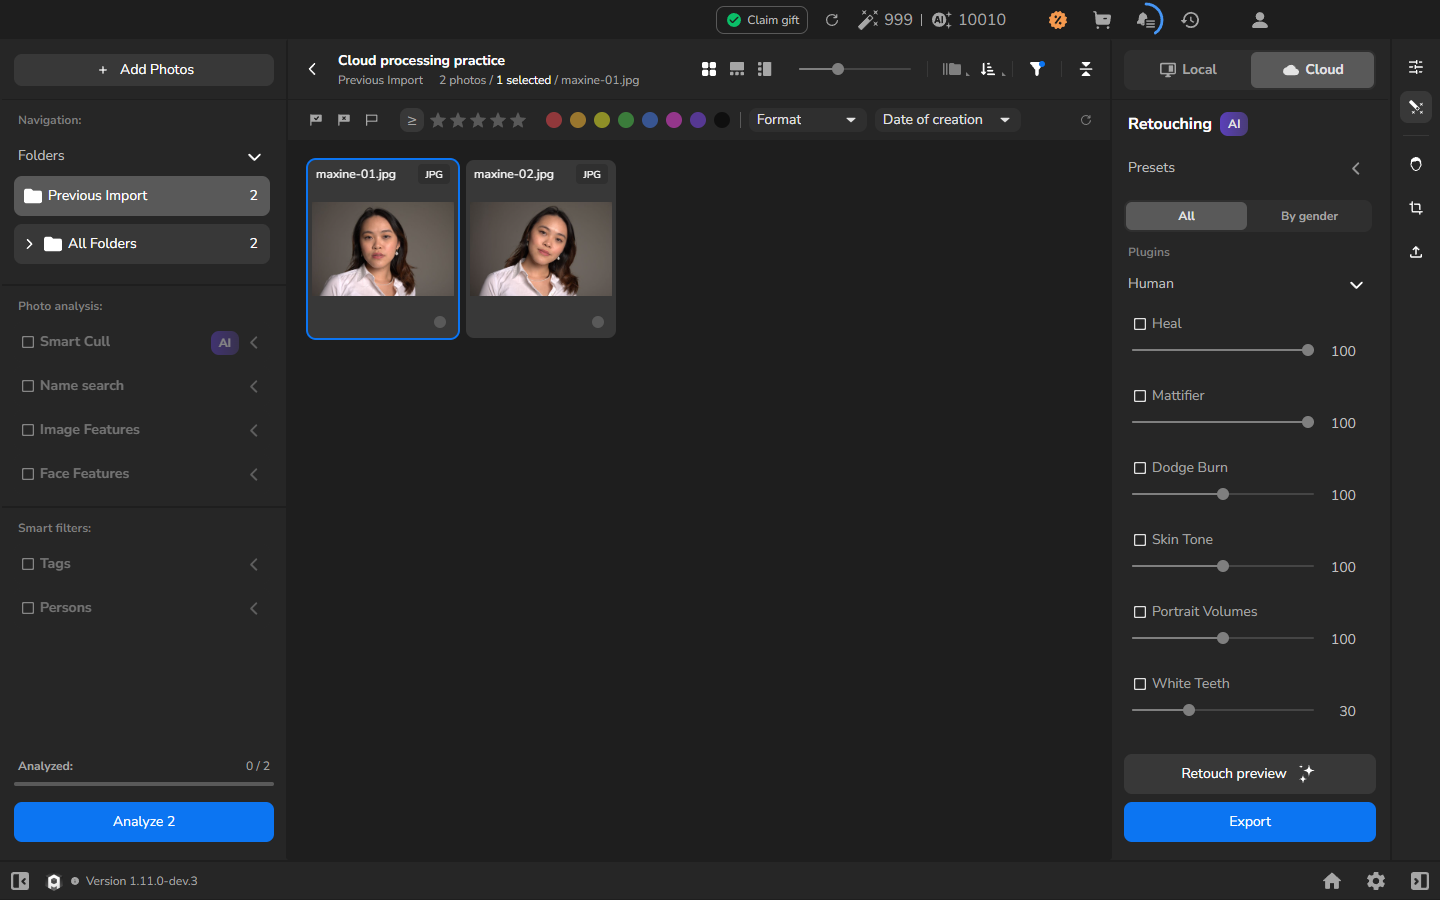
- Click the magic-wand icon at the far right. Its tooltip reads Retouching.
- Click Cloud at the top of the right panel.
- Click All below Presets to show the tool list.
Choose the tool for the preview
Section titled “Choose the tool for the preview”- Clear any tools you do not want to apply. Each checked tool becomes part of the cloud request.
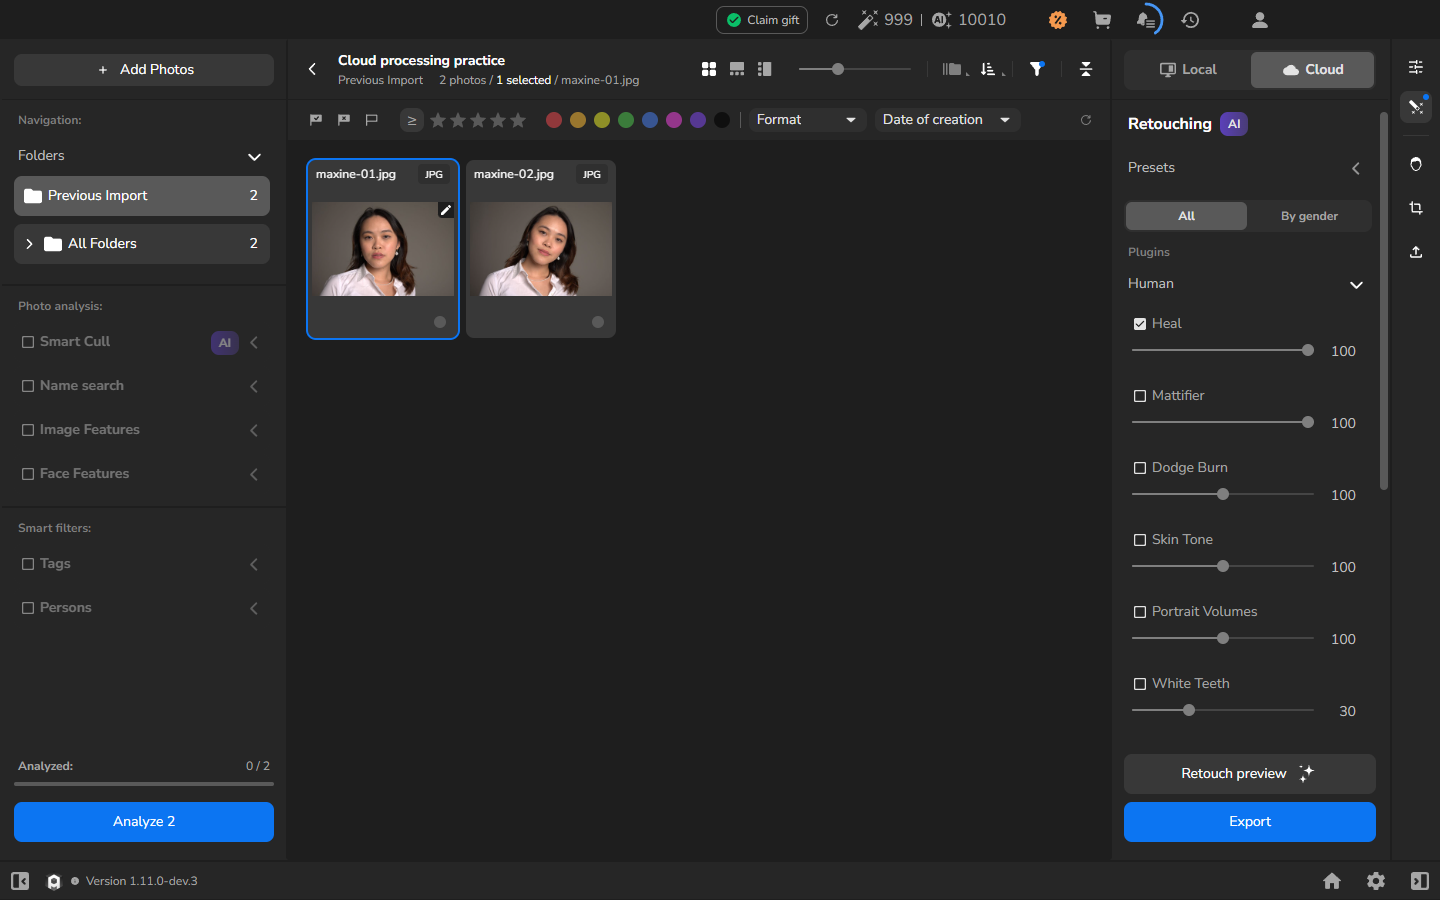
- Check Heal under Plugins → Human and choose a value. The screenshot uses 100; judge the effect on your own portrait rather than treating that value as a requirement.
- Make sure Cloud remains selected and Retouch preview is available.
These choices prepare the request. Processing starts only after you create the preview and accept the confirmations.
Review the upload and credit confirmations
Section titled “Review the upload and credit confirmations”- Click Retouch preview.
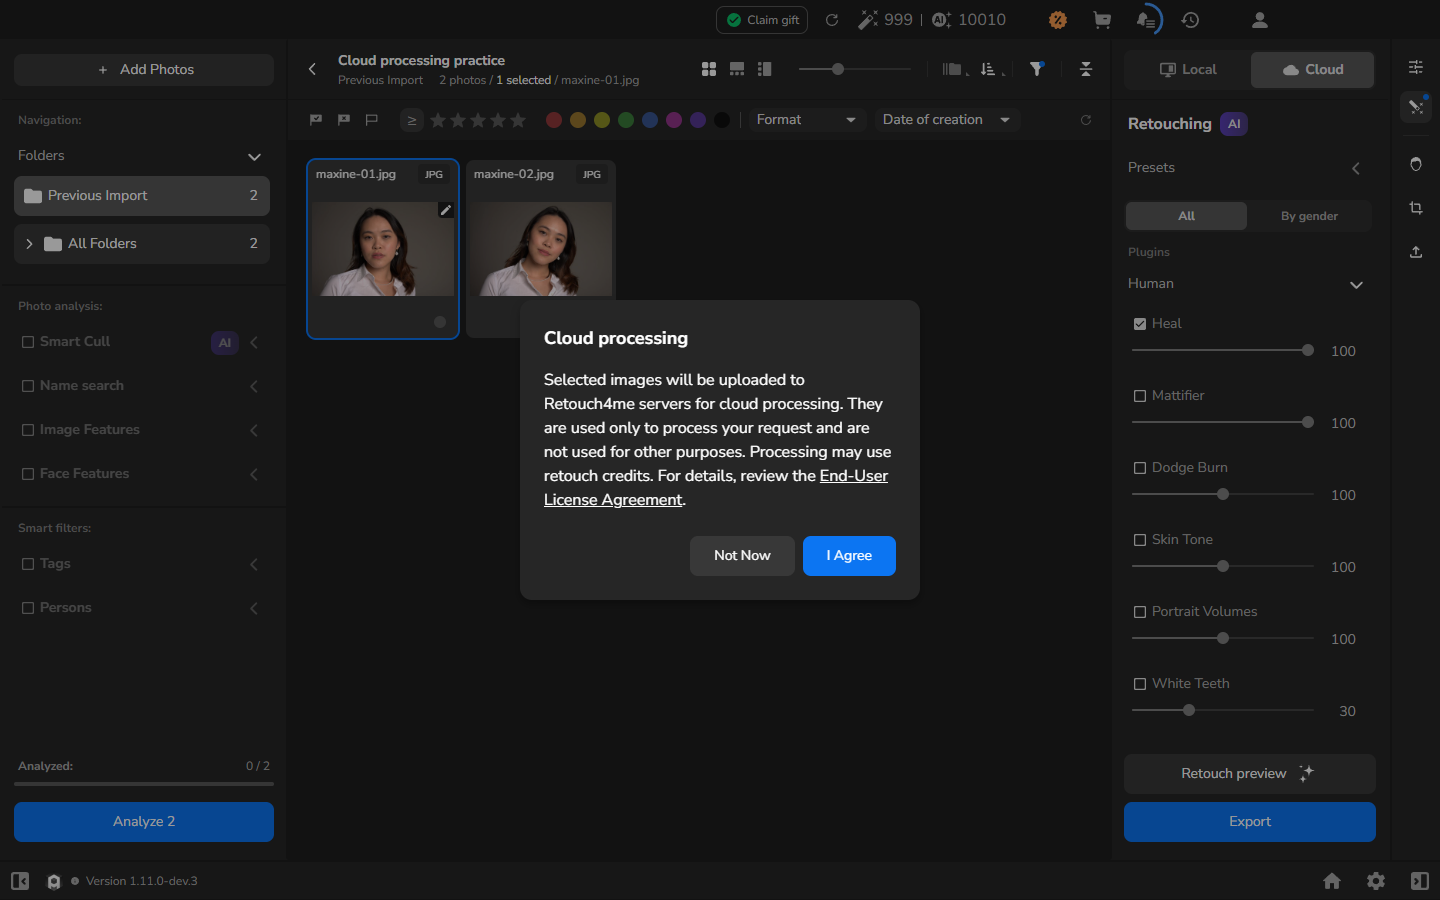
- If the Cloud processing notice appears, read it. It explains that selected images will be uploaded to Retouch4me servers and that processing may use retouch credits.
- Click I Agree if you accept these conditions.
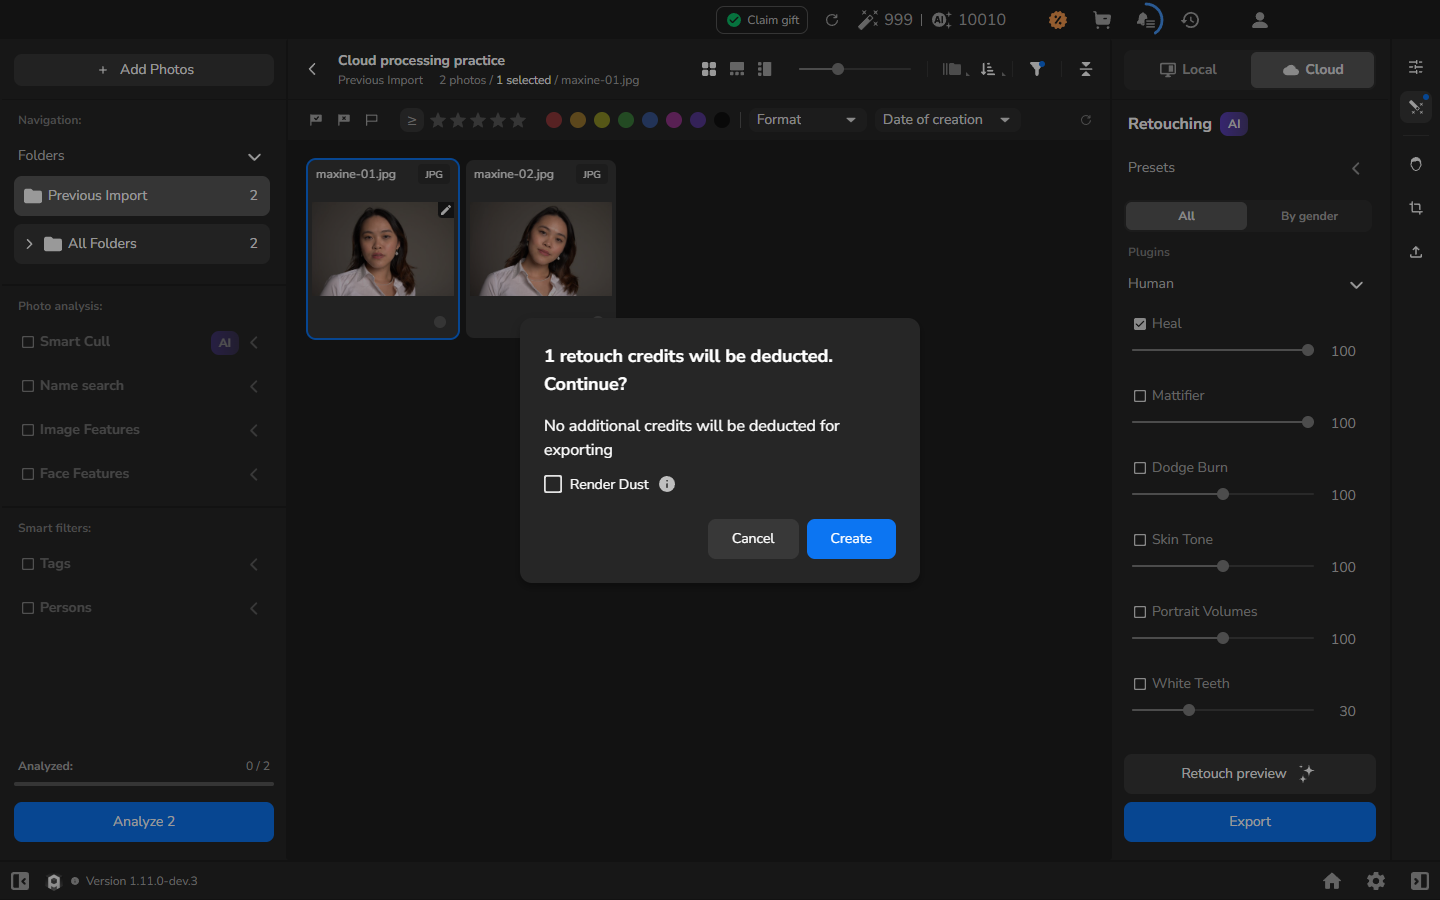
- Review the credit confirmation and check the amount for your request. For the one-photo Heal preview shown here, it reads 1 retouch credits will be deducted. Continue?
- Click Create to start processing if you accept the charge.
The confirmation also states No additional credits will be deducted for exporting. This applies to the confirmed request. Check the amount again whenever you change the selected photographs or tools.
Wait and compare the result
Section titled “Wait and compare the result”- Wait until Retouch preview becomes unavailable.
- To confirm that the preview is ready, hover over the unavailable control. The tooltip reads Preview is already available for all active plugins.
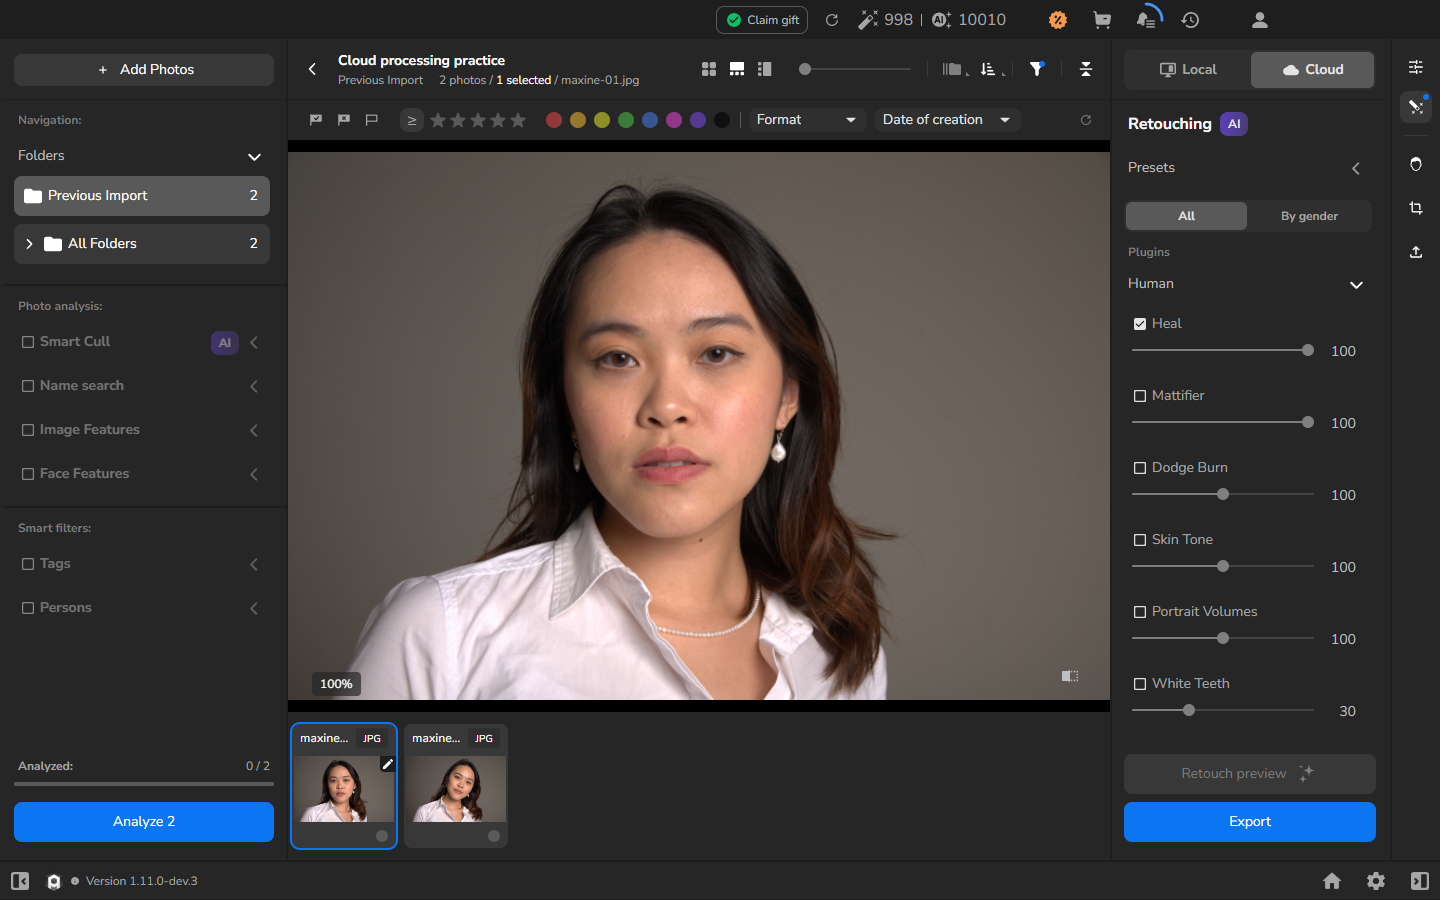
- Double-click the selected portrait to open the photo viewer.
- Inspect the face at a useful zoom level.
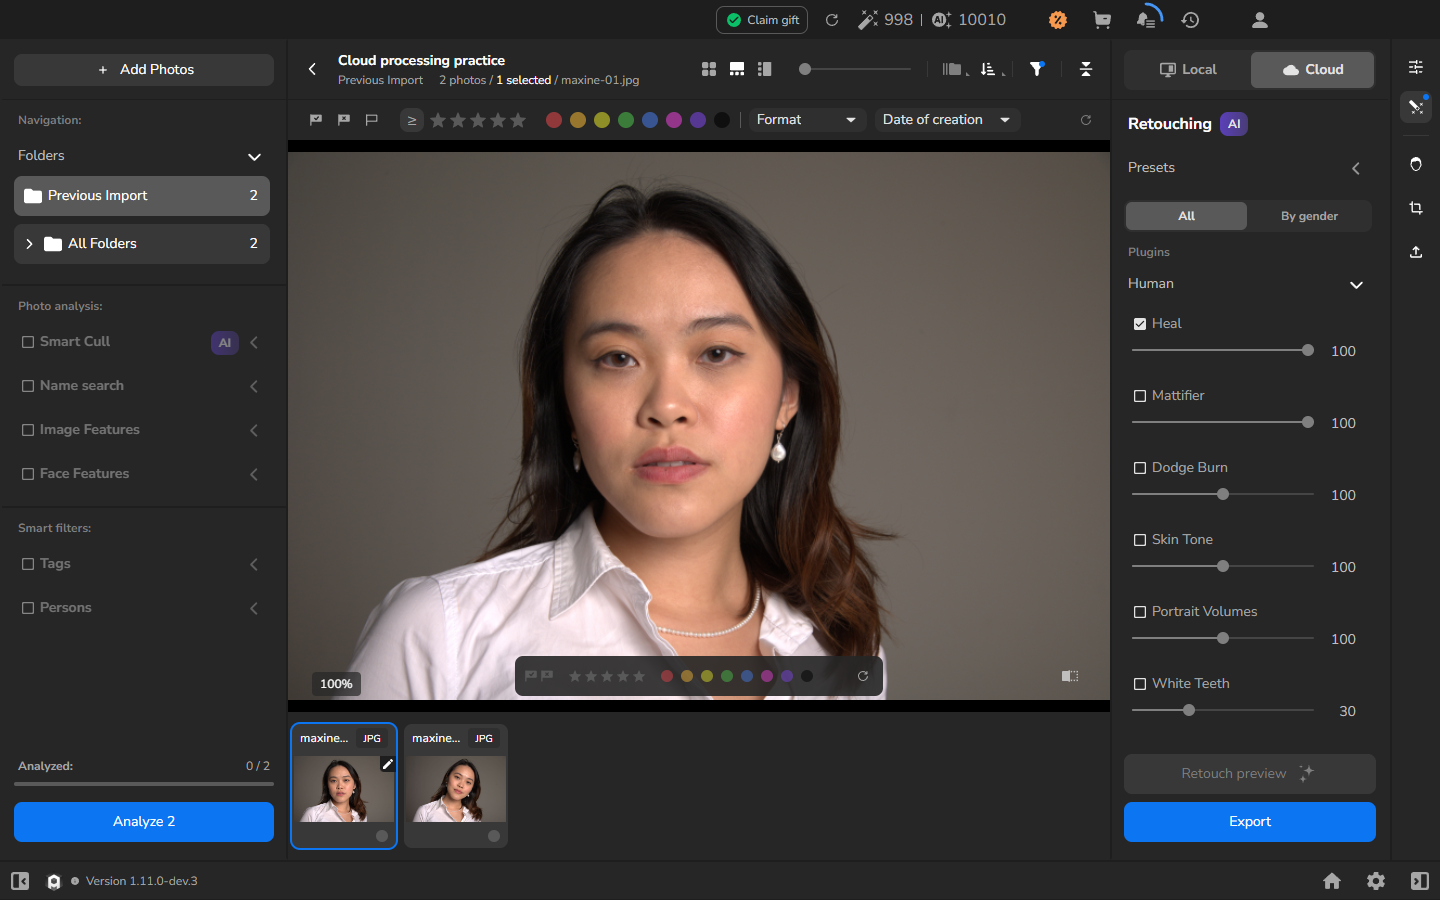
- Press and hold the before/after control near the lower-right corner of the image area to see the original.
- Release the control to return to the retouched preview. Compare the skin detail while keeping the same photo and view.
Check the result
Section titled “Check the result”Compare the same area of skin before and after retouching. Look for a result that removes the distractions you intended to correct without losing detail you want to keep. If you change the tool settings and create another preview, review the new credit confirmation before processing.
The preview is ready to inspect inside Arams. Saving a processed file with Export is a separate task.
If it does not work
Section titled “If it does not work”- The tools are hidden: open Retouching, choose Cloud, then All.
- The wrong photo is selected: check the filename and selection counter before clicking Retouch preview.
- The preview button is unavailable: inspect its tooltip. Preview is already available for all active plugins means the current preview is ready; otherwise, check the selected photograph, cloud mode and active tool.
- Cloud, Heal or the required credits are unavailable: sign in with an account that has cloud processing, Heal and enough retouch credits available.
- Processing does not complete or an error appears: read the message, then check your internet connection and available retouch credits before trying again.