Diagnose stalled processing and export
What you will do
Section titled “What you will do”When processing seems stuck, open Export and Render History to see whether the task is waiting, still running, or has failed for a particular photograph. If a photograph failed, identify it before you retry, correct the cause when it is known, and check the new file after processing finishes.
Before you start
Section titled “Before you start”- Keep your source photographs unchanged. If you start a fresh export, use a new folder or a clearly different filename so that you do not mistake an older file for the recovered result. Restarting a photograph from the history uses the original task’s destination, so check the output there.
- Leave the affected task in the history until you have identified the failed photograph and resolved the problem. The task details may be the only place where Arams shows the failure.
Distinguish queued, running, and failed tasks
Section titled “Distinguish queued, running, and failed tasks”- Open the project in which processing appears to have stopped.
- Click the history icon above the photographs. Its tooltip is Export and Render History.
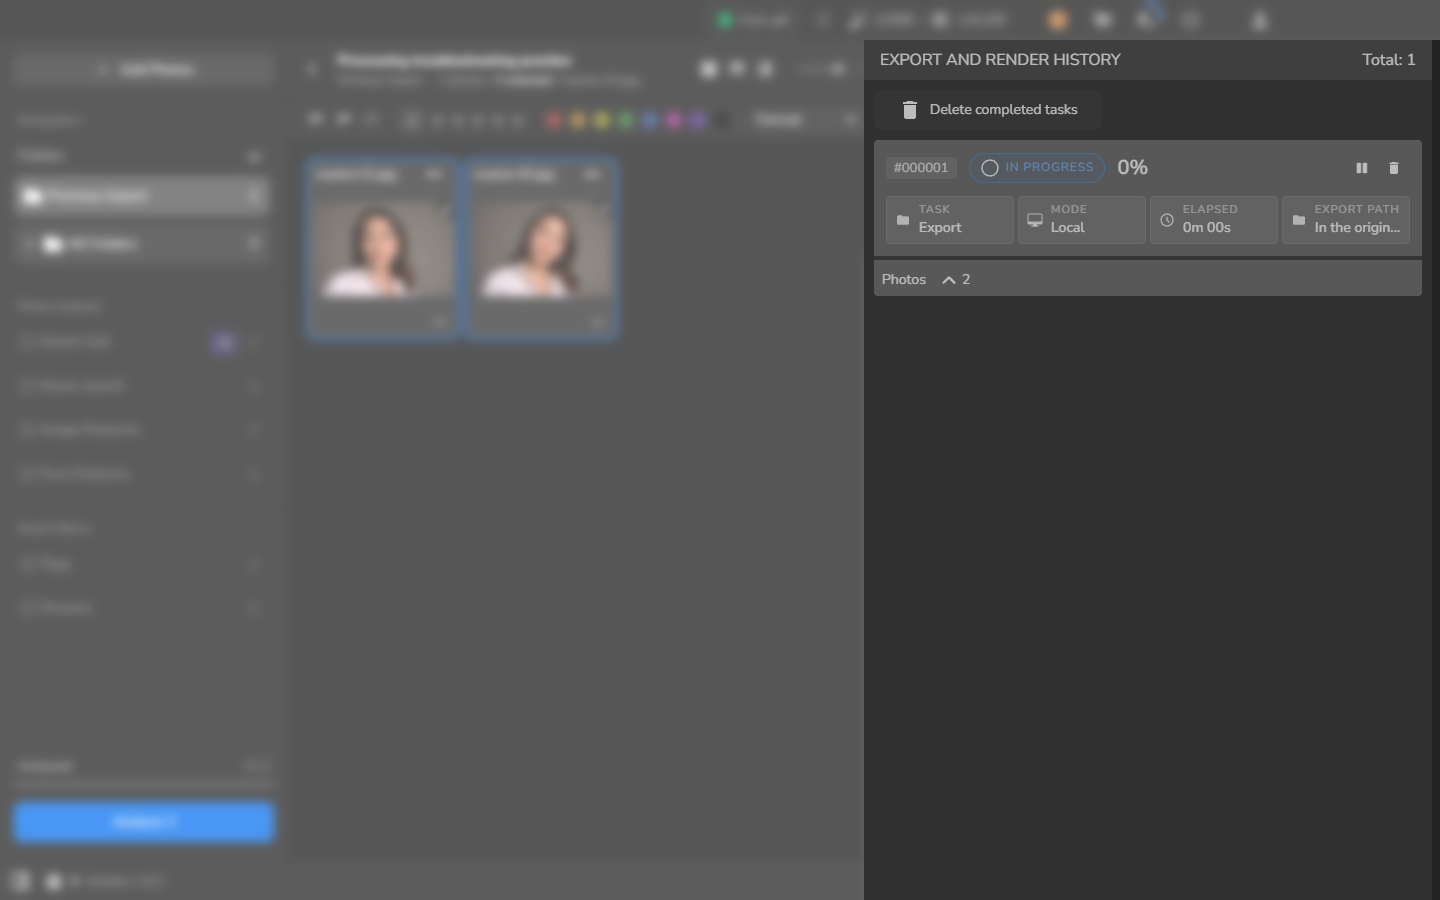
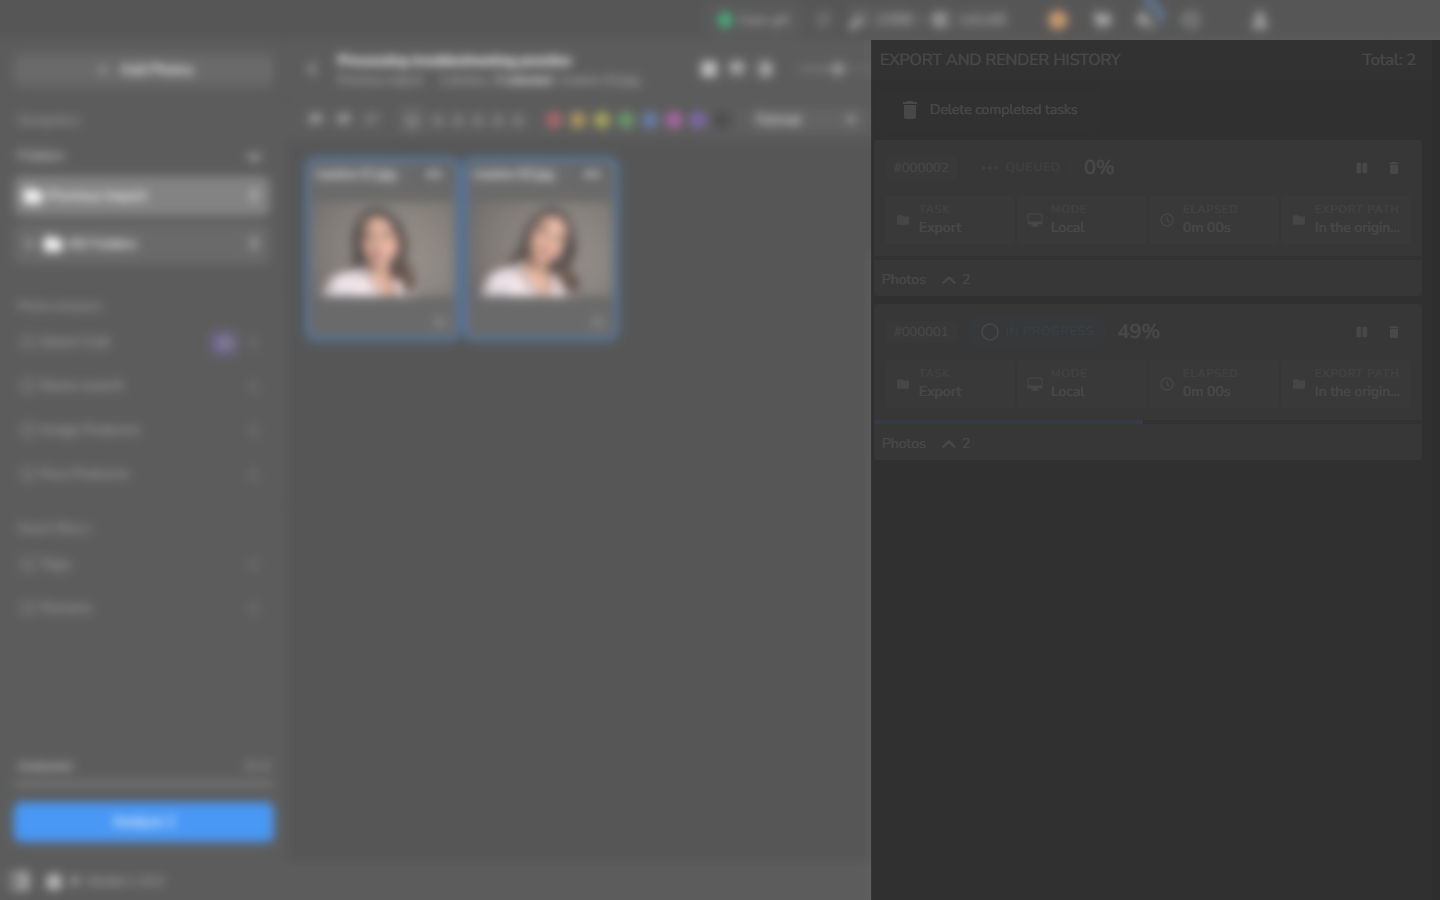
- Find the newest task and read its status. Queued means that the task is waiting behind other work; In progress means that Arams is processing it now.
- Check the progress, elapsed time, and photo count on the same task card. These details help you decide whether the task is waiting its turn or has stopped making progress.
A photograph listed under Failed to export needs attention. Waiting for it will not retry the photograph.
Read the error and identify the affected file
Section titled “Read the error and identify the affected file”- Leave the failed task in the history.
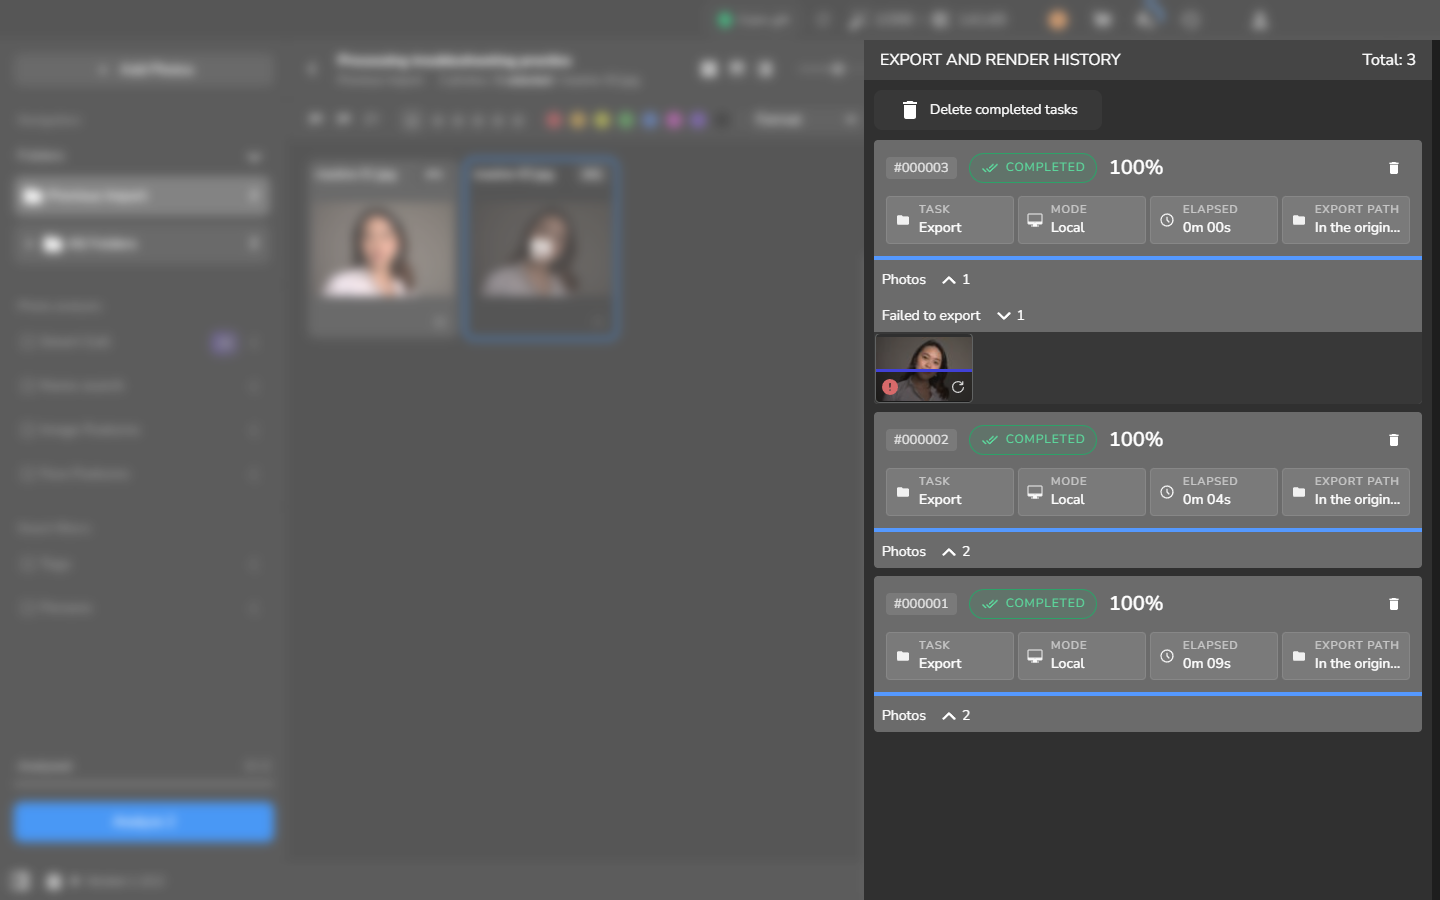
- Expand Failed to export and inspect the failed photograph. Arams may show a red error indicator, a thumbnail, and a restart button without showing the filename or explaining the cause.
- Compare the thumbnail and failed-photo count with the photographs you selected for the task.
- Check whether the likely source file is still at the path from which you imported it, and note the export destination.
- If the history does not show a filename, return to the project and use the selected photographs and task photo count to identify the likely file. Treat this as an inference, especially when several photographs look alike.
The task card can show Completed and 100% while its expanded details still contain Failed to export. Inspect the expanded photo section; do not treat the task-level percentage alone as proof that every file was written.
The screenshot below shows a failure caused by a source file that was no longer available at its imported path. A similar-looking failure may have a different cause. If Arams displays a message about a network service, plugin, account capability, credits, or a damaged file, follow that message rather than the missing-file steps below.
Recover and verify the output
Section titled “Recover and verify the output”- Correct only the condition you can identify. If the source file is missing, restore it to its original name and path.
- In Failed to export, click the circular-arrow restart button on that photograph.
- Keep Export and Render History open until the task returns to work and then reaches Completed and 100%.
- Open the newly written file outside Arams. Check that it is the photograph you expected and that it has no blank or corrupt areas.
- Check that your source photograph is still present and unchanged.
Check the result
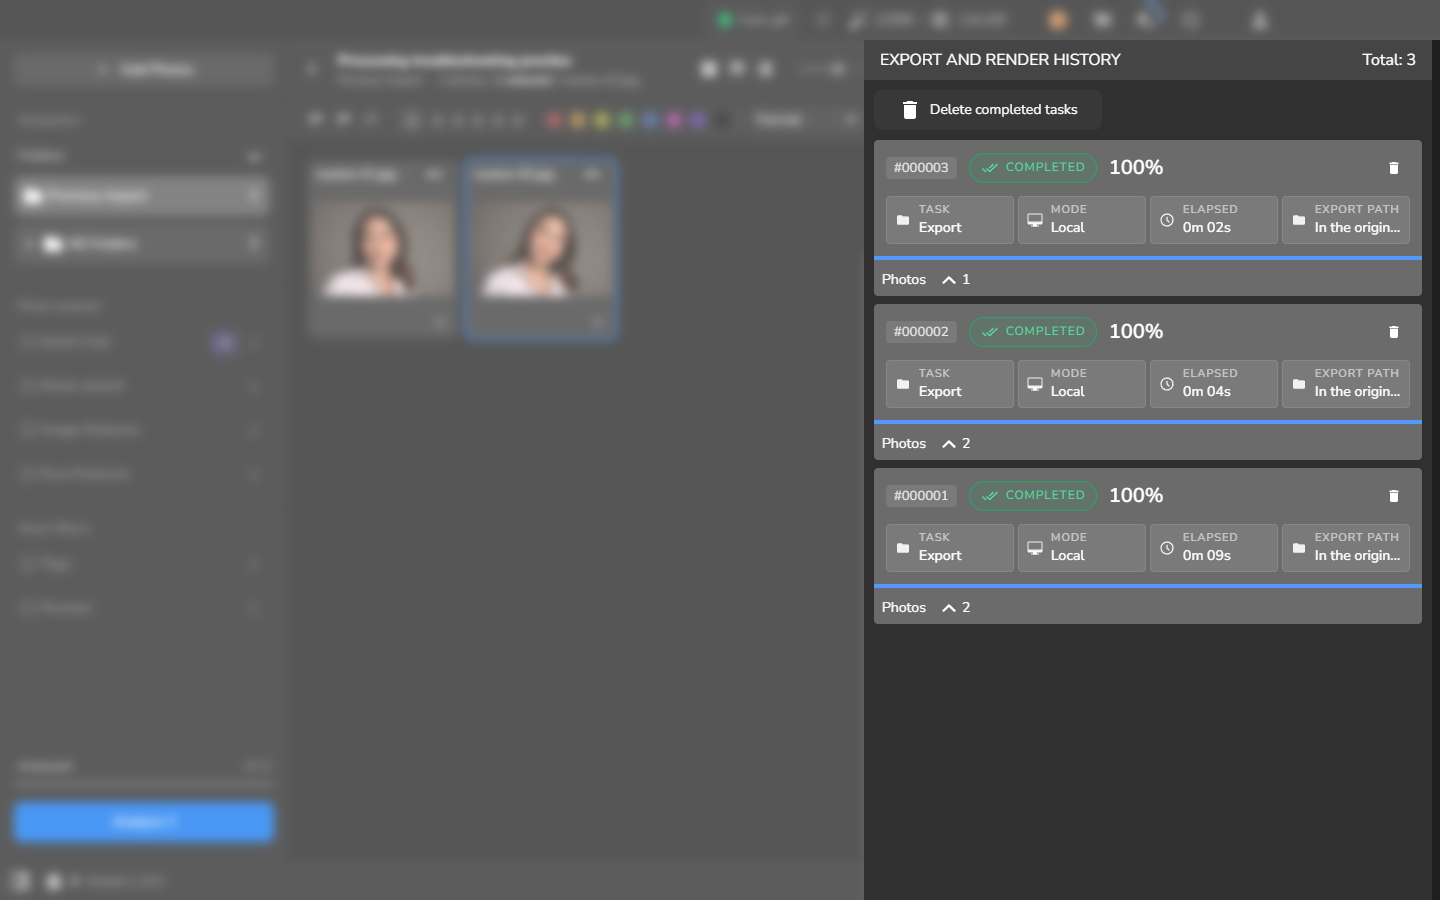
Section titled “Check the result”After the retry, the task should show Completed and 100%, with no Failed to export section. The task’s destination should contain a new, usable file for the affected photograph, while the source photograph remains unchanged.
Always open the output before you consider the problem resolved. A 100% indicator alone does not tell you whether the intended file exists, opens correctly, or came from the latest attempt.
If it still does not work
Section titled “If it still does not work”- The task is waiting: look for another task marked In progress. Let that work finish before assuming that the queued task has failed.
- The task is running: compare its current progress and elapsed time after a reasonable interval. Avoid starting repeated exports while the original task is still active.
- The task failed without a message: use the thumbnail, selection, photo count, and destination to identify the affected photograph. Do not assume a cause that Arams does not show.
- The source file is missing: restore it to the same name and path used by the project, then restart the photograph from Failed to export. This chapter does not cover relinking a moved source through Arams.
- The task completes but no usable file appears: check the destination and filename settings, then open the newest output. Compare its dimensions with the source if a size change would be unexpected.
- The message names a plugin, network service, account capability, or credits: keep the exact message and troubleshoot that service or capability. Restoring a source file will not address those failures.