Organize photographs in a project
What you will do
Section titled “What you will do”Keep a shoot from several folders manageable by focusing on one source folder or returning to the complete set. You can also group the grid by folder and filename, then correct a photograph’s filename without changing its image content.
Before you start
Section titled “Before you start”Sign in to Arams and open a project with photographs imported from more than one folder. Use copies if you want to practice renaming without changing the filenames in your working archive.
Browse source folders
Section titled “Browse source folders”- In the left sidebar, expand Folders, All Folders, and the imported parent folder if needed.
- Select a source folder to show only the photographs imported from it.
- Select another folder when you want to review that part of the shoot instead.
- Select All Folders to return to the complete project grid.
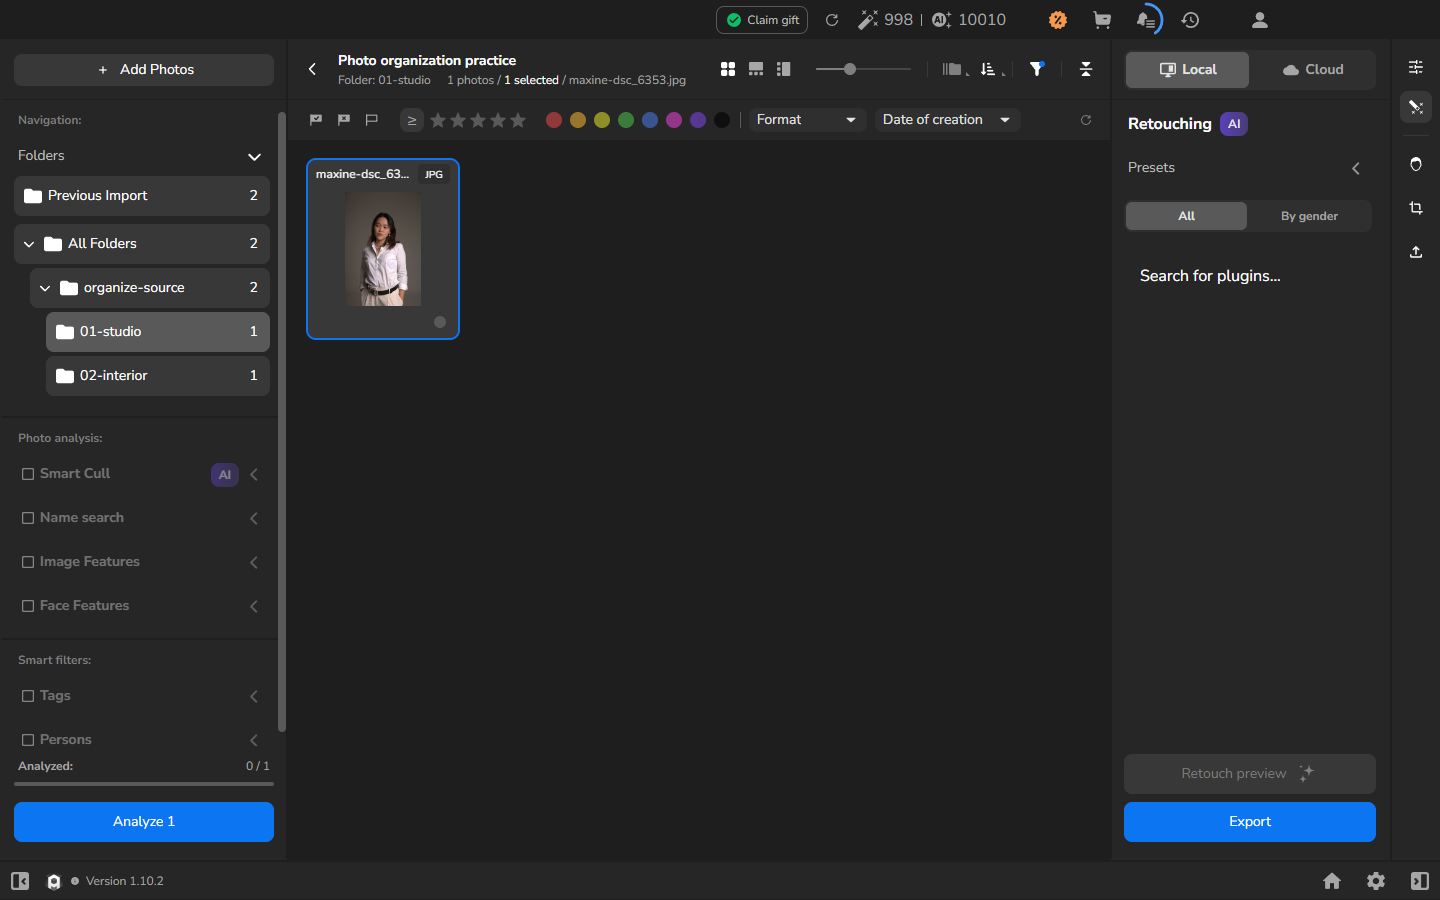
Selecting a folder filters the visible grid; it does not remove photographs from the project.
Change photograph sorting
Section titled “Change photograph sorting”- Select All Folders so the complete project is visible.
- Open the sorting menu in the top toolbar.
- Select By folder, then file name (1–9, 10–99).
- Use the adjacent sort-direction button to switch between ascending and descending order.
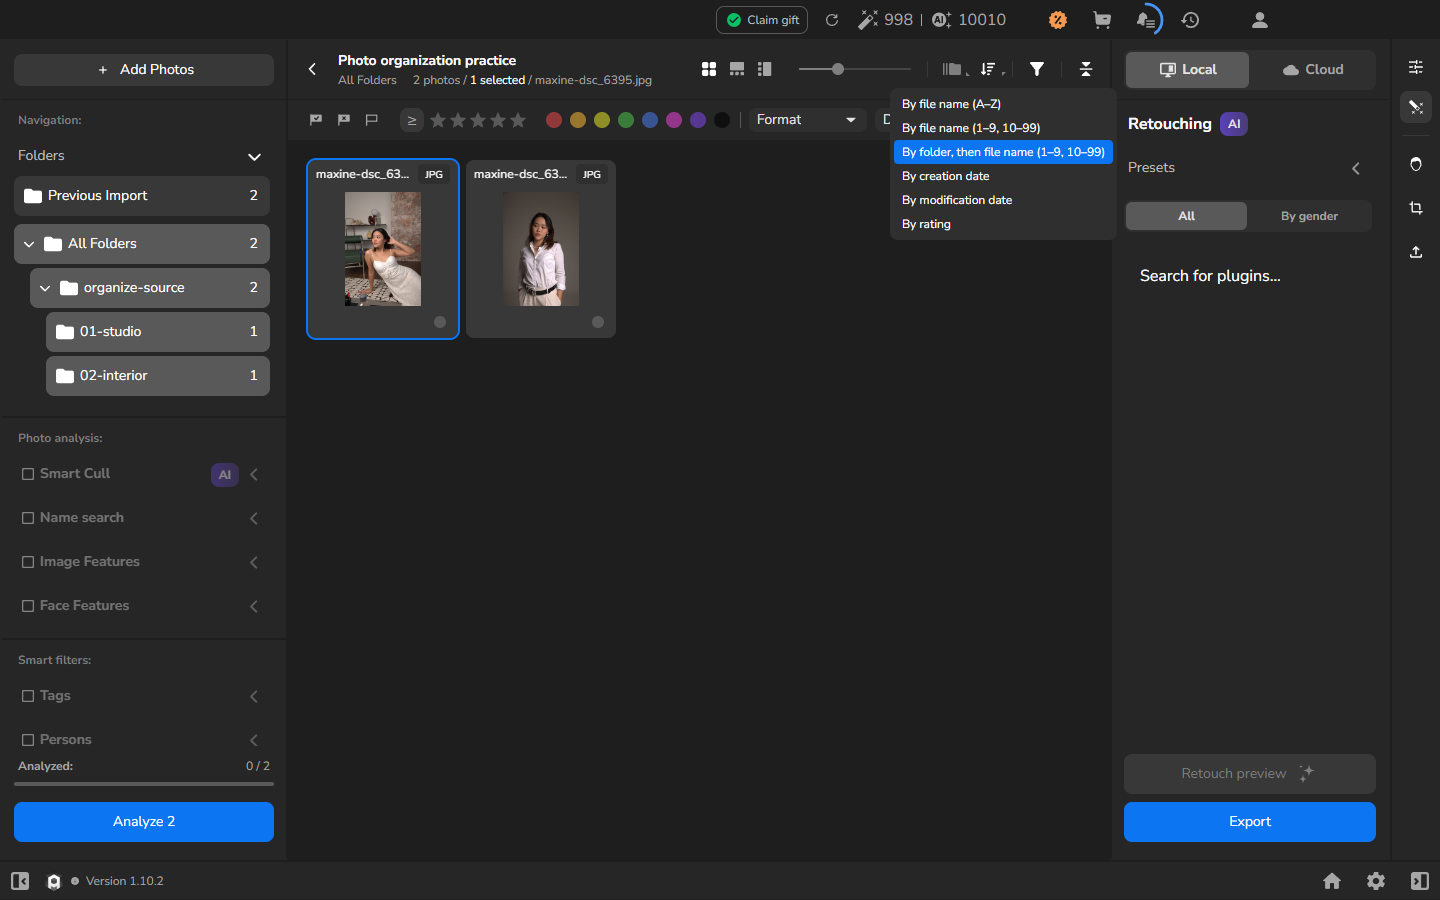
This sorting rule keeps photographs from each source folder together and orders their filenames naturally—for example, file 9 appears before file 10. The open menu identifies the active rule; the grid shows which direction is active.
Rename a photograph
Section titled “Rename a photograph”Renaming changes the underlying file represented by the project. Make a backup first if you need to preserve the original filename.
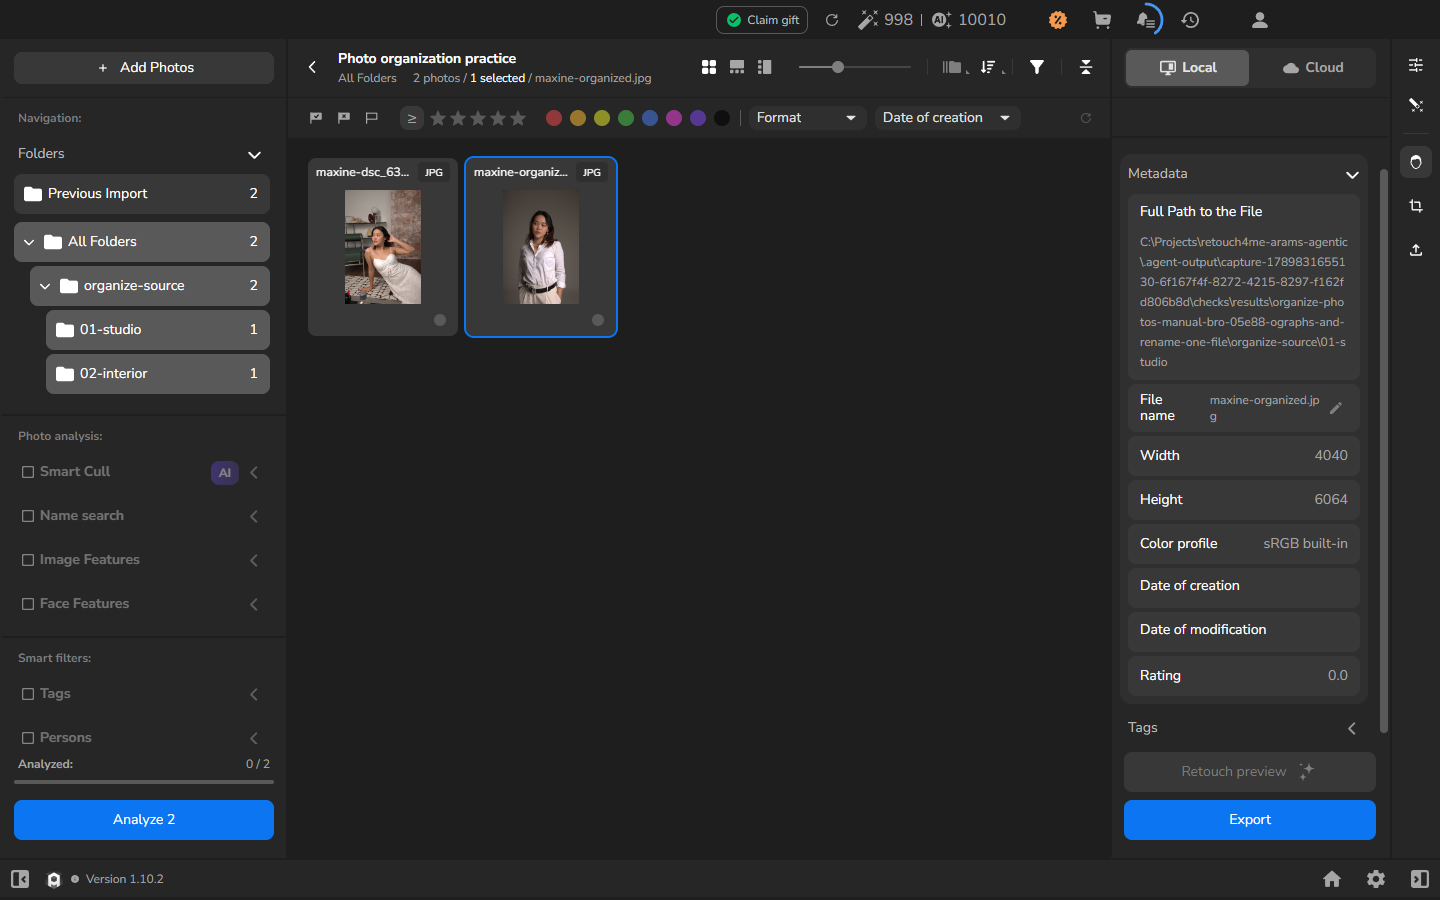
- Select the photograph you want to rename in the grid.
- Open the Metadata panel on the right.
- In the File name row, select the pencil icon.
- Replace the base name. Leave the filename extension unchanged.
- Press Enter.
If it does not work
Section titled “If it does not work”- A source folder is not visible: expand All Folders and each parent folder. If necessary, select All Folders first and confirm that the imported photographs are present.
- Fewer photographs appear after sorting: select All Folders. Sorting does not clear a folder filter.
- The order is not what you expected: reopen the sorting menu and confirm By folder, then file name (1–9, 10–99), then use the adjacent direction button.
- The filename editor does not appear: select exactly one photograph, open Metadata, and use the pencil in the File name row.
- The new name is not shown: press Enter to finish editing.