Choose retouching tools and settings
What you will do
Section titled “What you will do”Choose a retouching tool for a photograph and adjust it to suit the image. This example uses Heal in Cloud mode and shows how to change Sensitivity, keep different settings for different photographs, and restore the initial value.
You will also learn where to open the separate settings window used by more complex local plugins. These creative controls are separate from the global Arams Settings screen.
These steps configure retouching; they do not generate a retouched preview or export a processed photograph.
Before you start
Section titled “Before you start”Open a project containing the photograph you want to retouch. If needed, import your photographs and wait for their thumbnails to appear. This workflow requires Cloud mode and Heal to be available for your account.
Choose Heal for a photograph
Section titled “Choose Heal for a photograph”- Select the photograph in the photo grid.
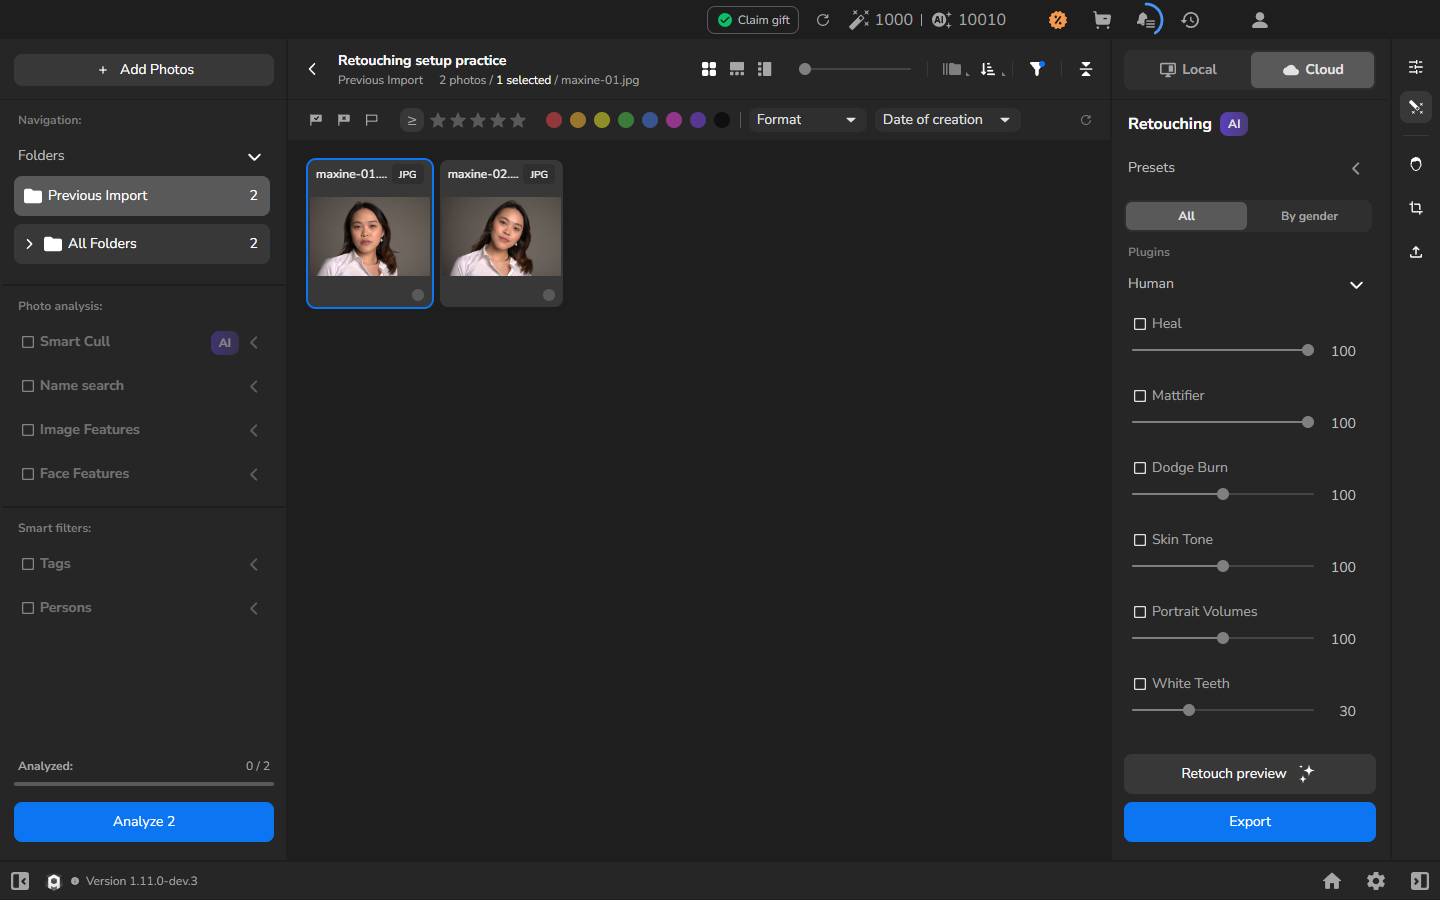
- Click the magic-wand icon in the narrow toolbar at the far right. Its tooltip reads Retouching.
- Click Cloud at the top of the right panel.
- Click All below Presets.
Under Plugins → Human, each tool has a checkbox. Find Heal in this list.
Enable Heal and set Sensitivity
Section titled “Enable Heal and set Sensitivity”- Select the checkbox beside Heal.
- Find Sensitivity in the Heal section. If the setting is hidden, move the pointer over the section and use its expand control.
- Click the numeric field beside the Sensitivity slider.
- Replace 100 with 75.
- Press Tab to apply the value.
The value 75 is only an example. For your own photograph, choose the value by comparing the processed result with the original.
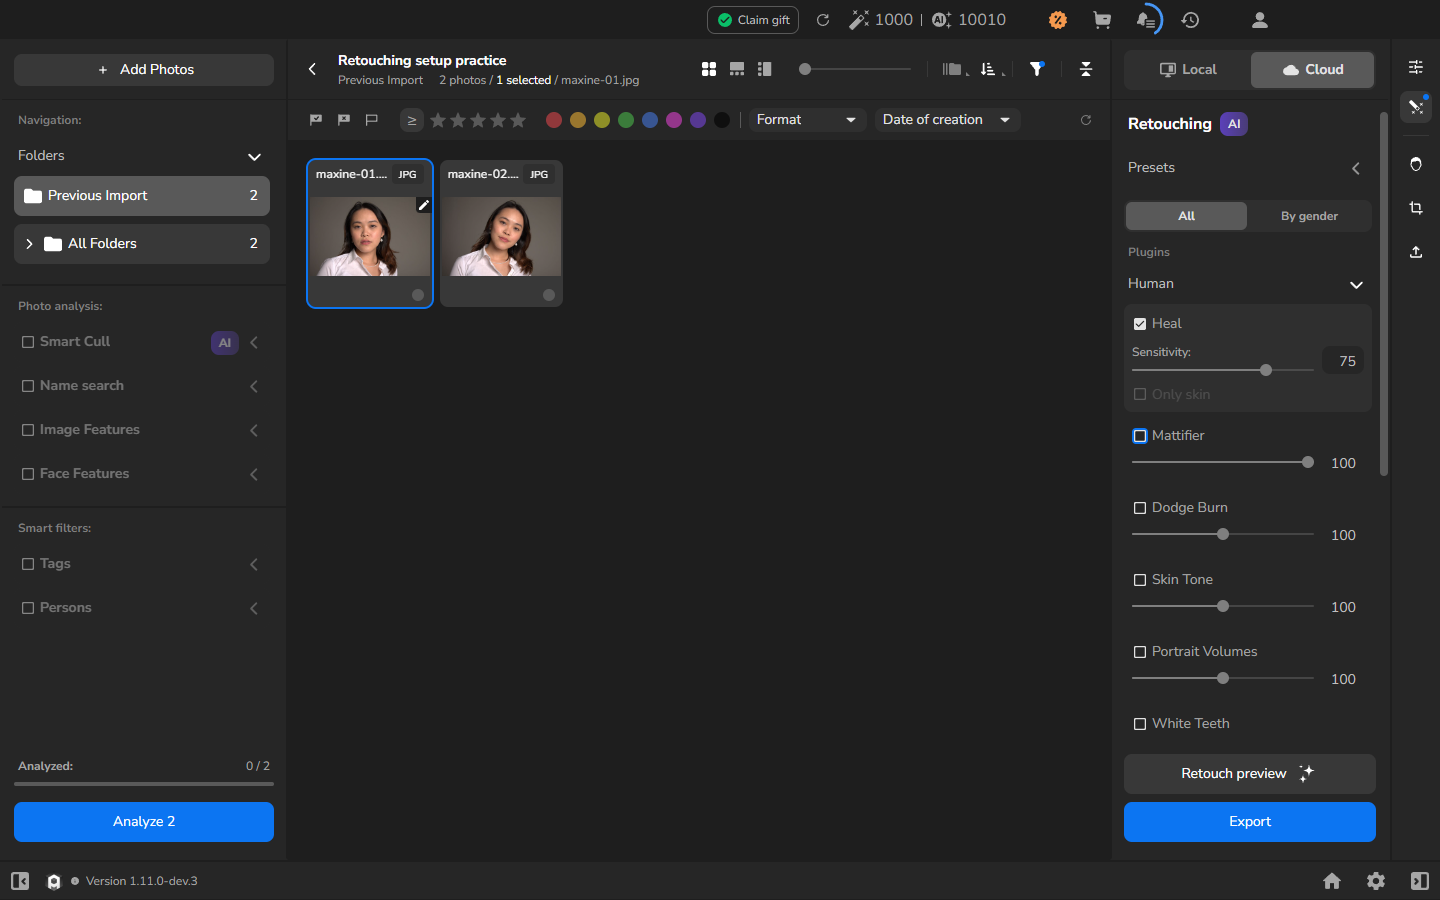
The tool selection and its settings belong to the selected photograph. When you move to another photograph, the checkbox and Sensitivity value may therefore be different. Check the selected filename before changing a setting so that you adjust the intended image.
Restore the initial setting
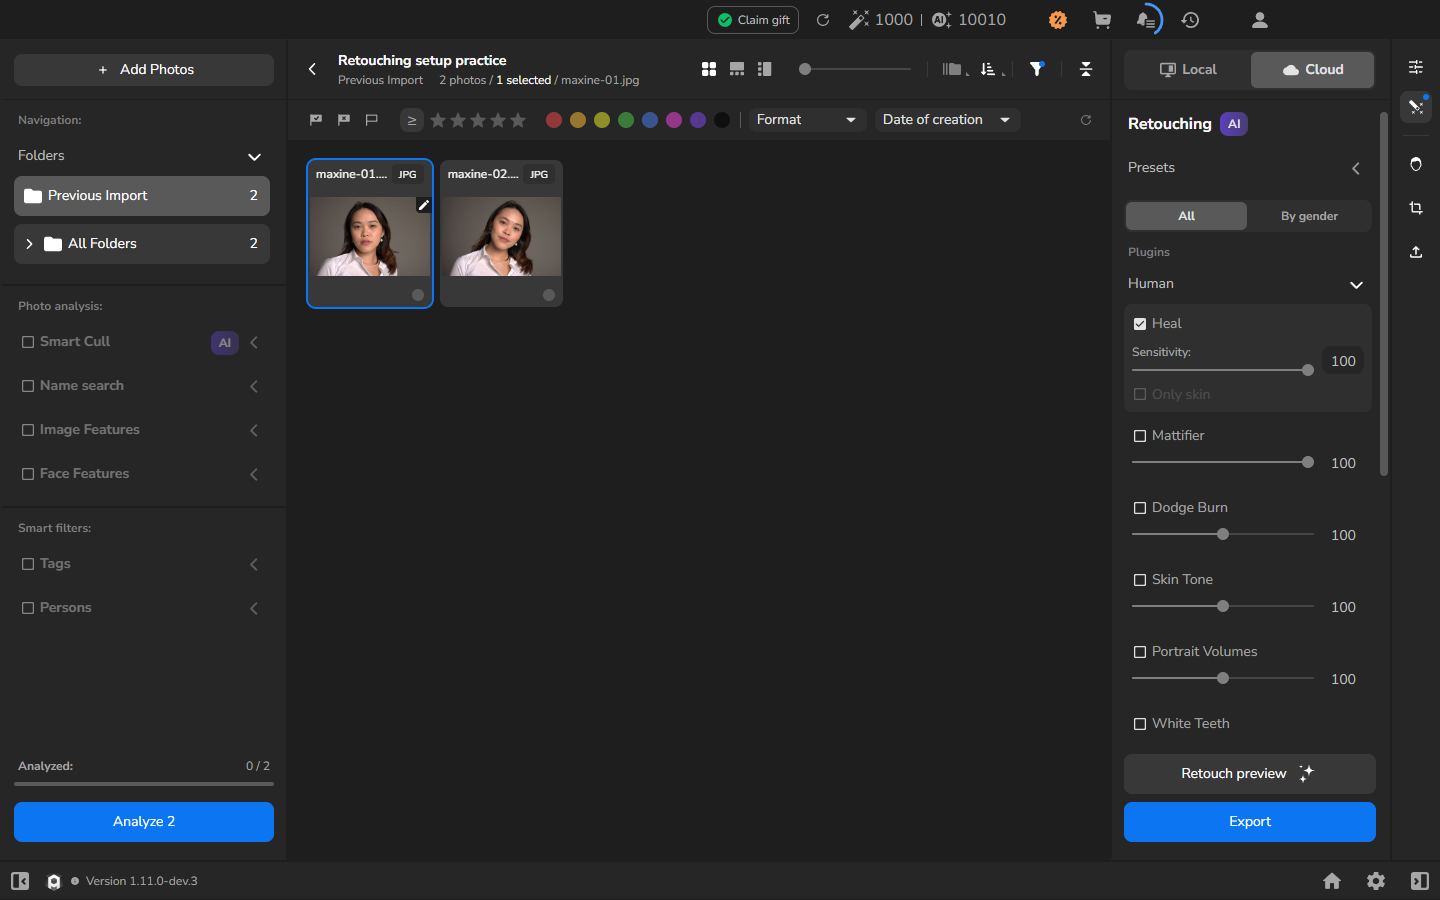
Section titled “Restore the initial setting”- Select the photograph whose Heal setting you want to reset.
- Move the pointer over the Heal section to reveal its controls.
- Click the reset control in that section.
In this example, Sensitivity returns from 75 to its initial value of 100.
Open complex settings for a local plugin
Section titled “Open complex settings for a local plugin”Some local plugins place their detailed controls in a separate window instead of showing every choice in the Arams sidebar. To open it:
- Select a photograph and open the Retouching panel.
- Select Local, then All.
- Enable the plugin you want to configure.
- Expand its section and click Settings beside the gear icon.
This gear belongs to the selected plugin. It does not open the global Arams Settings screen from the bottom bar.
The available choices depend on the plugin. Face Make groups controls for face detection, lifting, makeup, displacement, texture, and reshaping. Lab groups color-oriented controls such as HSL, curves, LUTs, and effects. Frequency Separation provides its own blend, threshold, and equalizer controls. Choose settings for the photograph in front of you rather than copying values from a different portrait.
When a plugin reports that preview layers cannot be created, use the pre-export stage to see the combined result before saving. Follow the Face Make pre-export workflow for a single-person portrait.
If it does not work
Section titled “If it does not work”- The retouching tools are not visible: open the Retouching panel using the magic-wand icon, then select Cloud and All as above.
- Sensitivity is hidden: enable Heal, then expand its section if needed.
- The value changes when you select another photo: check the selected filename. Each photograph can have its own Heal settings.
- You want to undo the setting change: use the reset control within Heal.
- Cloud or Heal is unavailable: make sure you are signed in and have selected Cloud and All. Access to cloud tools also depends on your account and service availability.
- A complex plugin has no usable Settings button: select Local, enable that plugin, and expand its section. The plugin must be installed and activated on this computer.