Find photographs and people
What you will do
Section titled “What you will do”Narrow a busy project to the photographs you need. Search by filename or a tag you added, limit the grid by creation date, or find photographs of the same person. You can also name people and correct which faces belong to them.
Before you start
Section titled “Before you start”Sign in to Arams, create or open a project, and import the photographs you want to search. To use the person filter, the project needs photographs with detectable faces and Automatic face search enabled in Settings.
Automatic face search sends photographs to the Retouch4me server for analysis. Enable it only when server analysis is appropriate for those photographs.
Search by filename
Section titled “Search by filename”- In the left sidebar, expand Name search.
- Select the large filename field. This enables the checkbox beside Name search.
- Enter all or part of a filename.
- Check the counter above the grid and the filenames on the remaining cards.
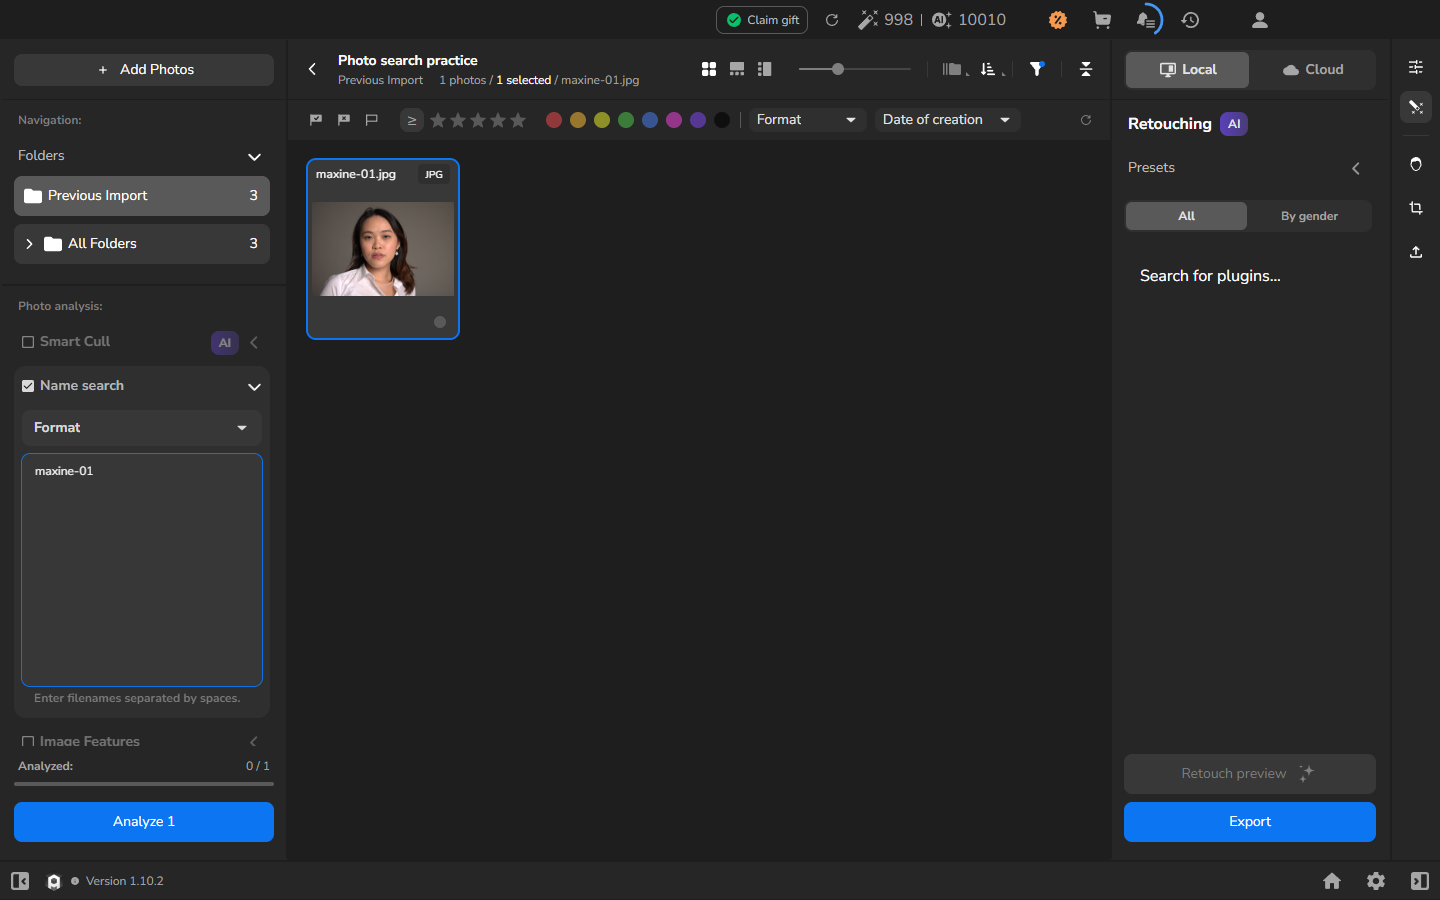
The grid shows only filenames containing your search text. Clear all active filters with the circular reset button in the filter bar before starting a different search.
Find a manually tagged photograph
Section titled “Find a manually tagged photograph”First add a tag to a photograph:
- Select one photograph and open Details and Faces on the right.
- Expand Metadata, then expand Tags if the tag field is hidden.
- Enter a useful tag, such as portfolio, and press Enter.
- Check that the tag appears under Tags.
To use the tag as a filter, select the displayed tag. The grid narrows to photographs carrying that tag.
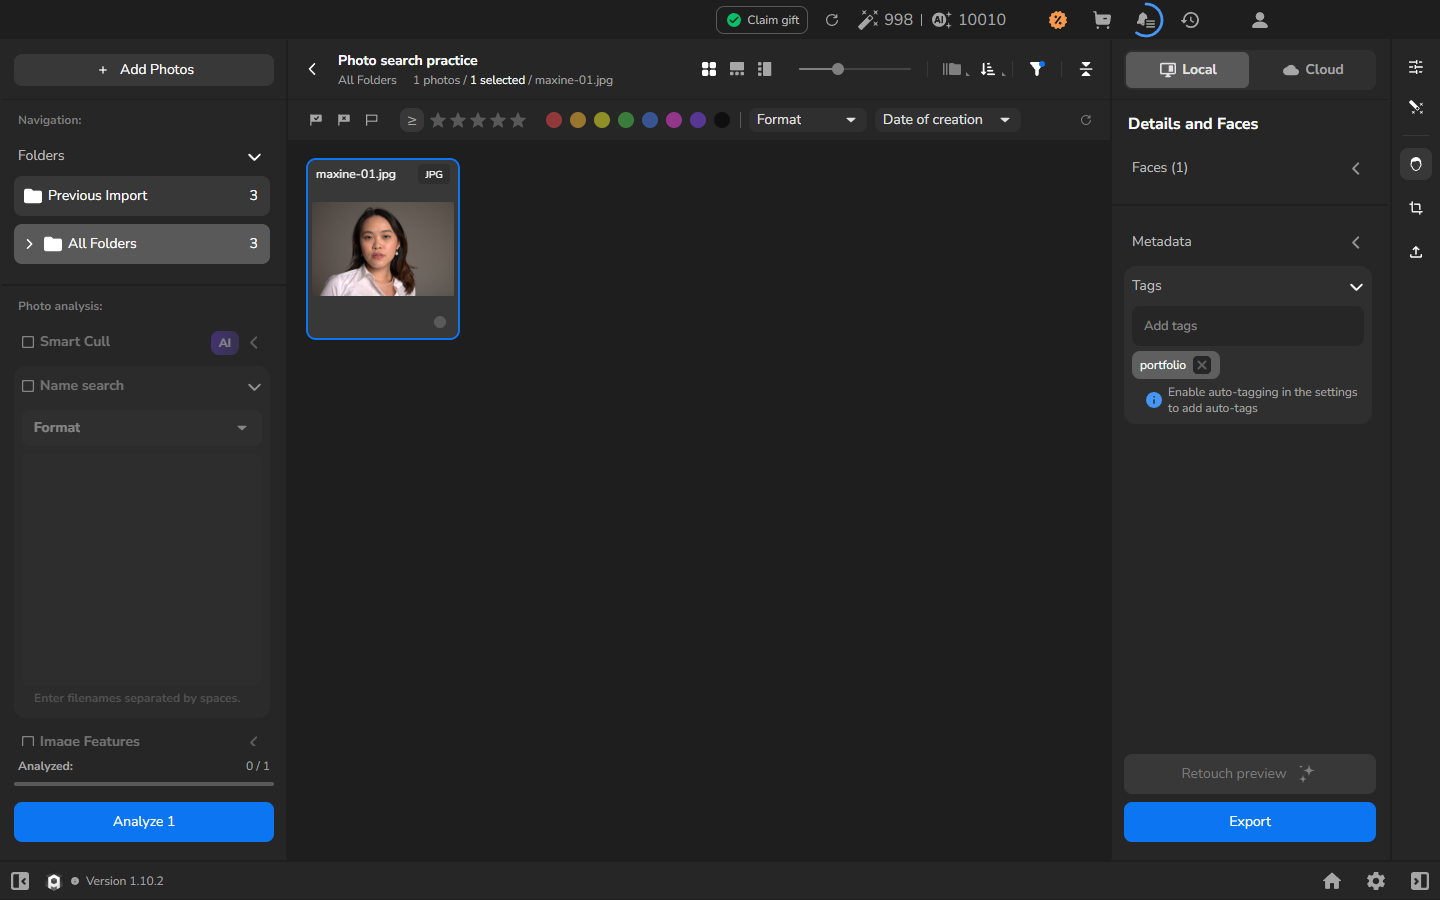
Use manual tags for categories that matter to your workflow, such as a portfolio shortlist, a client choice, or photographs that need more work. Selecting a displayed tag hides photographs without that tag.
Filter by creation date
Section titled “Filter by creation date”- Select Date of creation in the filter bar.
- Enter the end of the period you need in the To field and press Enter.
- Close the date panel and review the grid and result count.
- To include later photographs, reopen Date of creation and extend the end date.
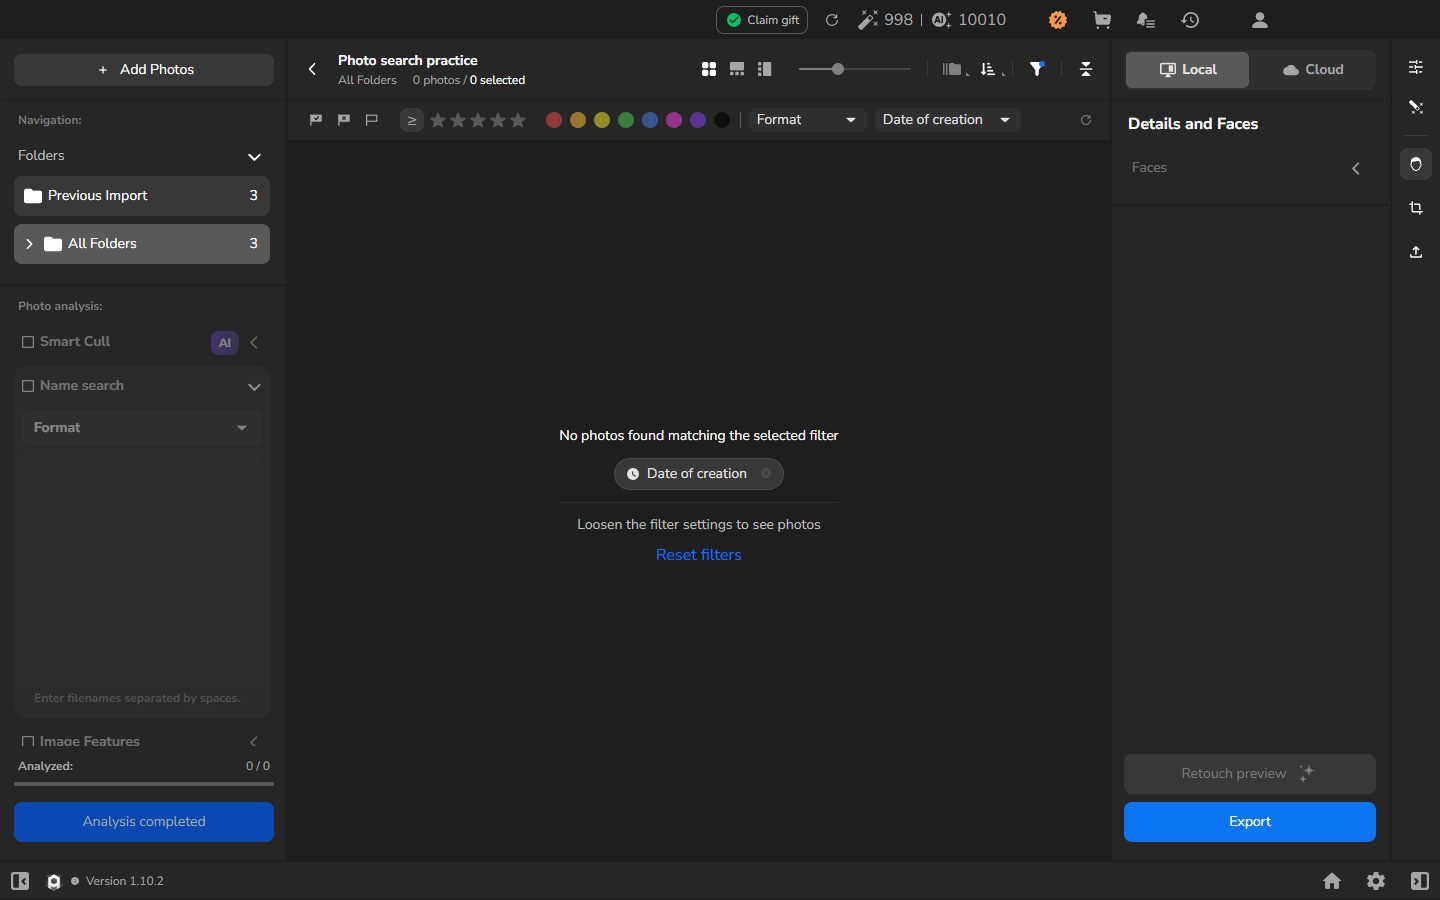
Use this filter when you know the relevant period but not the filenames or tags. The To value is inclusive: photographs from that date remain in the grid.
Find photographs of one person
Section titled “Find photographs of one person”If Persons is unavailable, open Settings, enable Automatic face search, accept the analysis notice if it appears, and return to the project. Wait for analysis to finish before using the filter.
- In the left sidebar, expand Persons under Smart filters.
- Review the detected face thumbnails. Arams labels the clusters generically, for example Person 1.
- Select one person thumbnail.
- Check that the grid contains fewer photographs and visually confirm each result before using it in a selection.
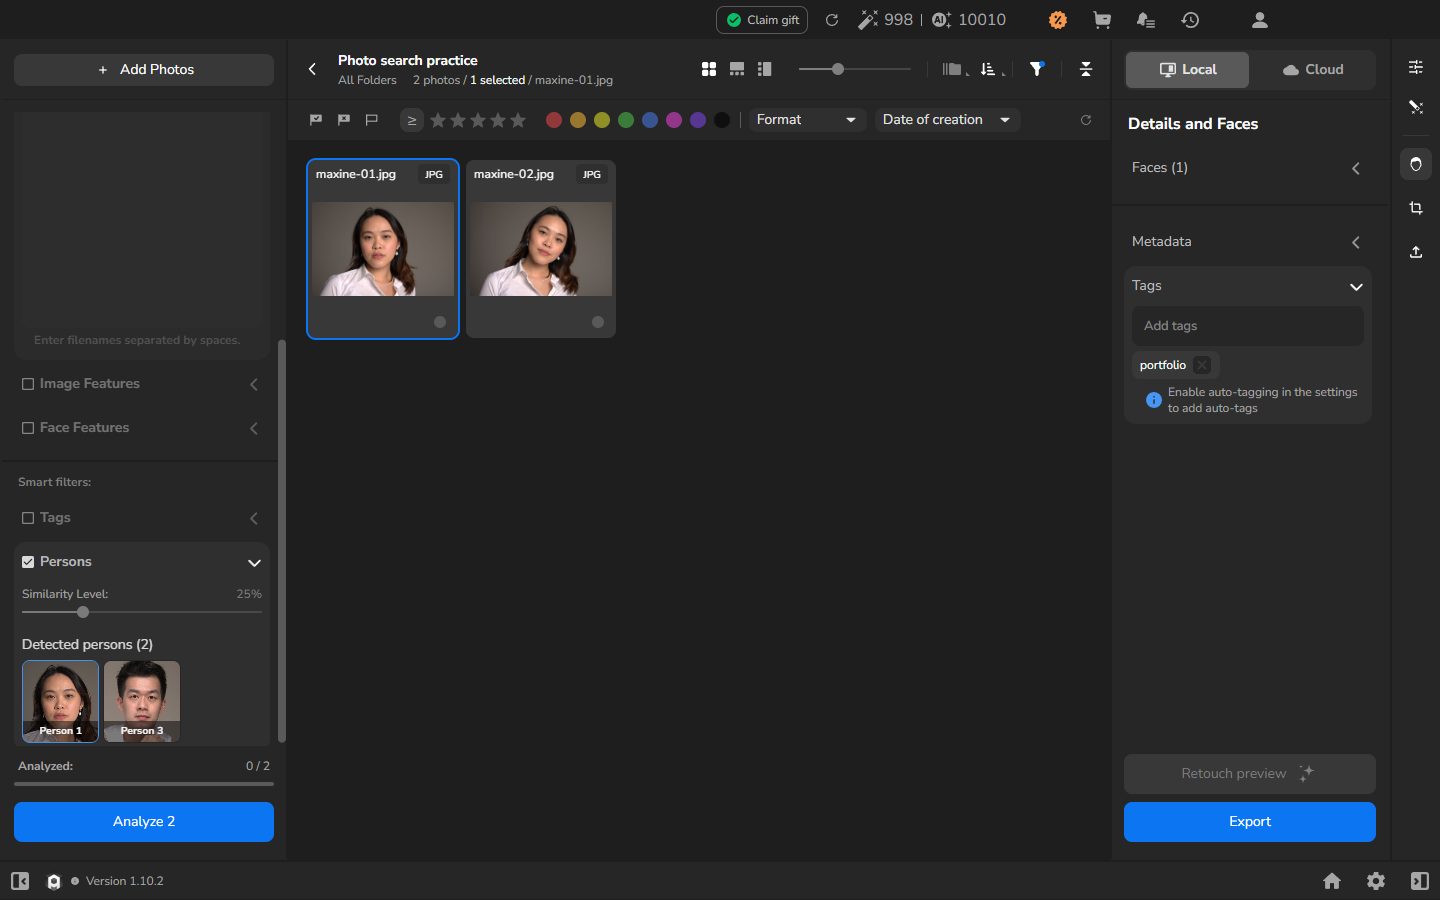
Face matching is not guaranteed to be accurate. Review the photographs in each cluster, especially profiles, partially hidden faces, and faces photographed under different lighting.
Understand person membership
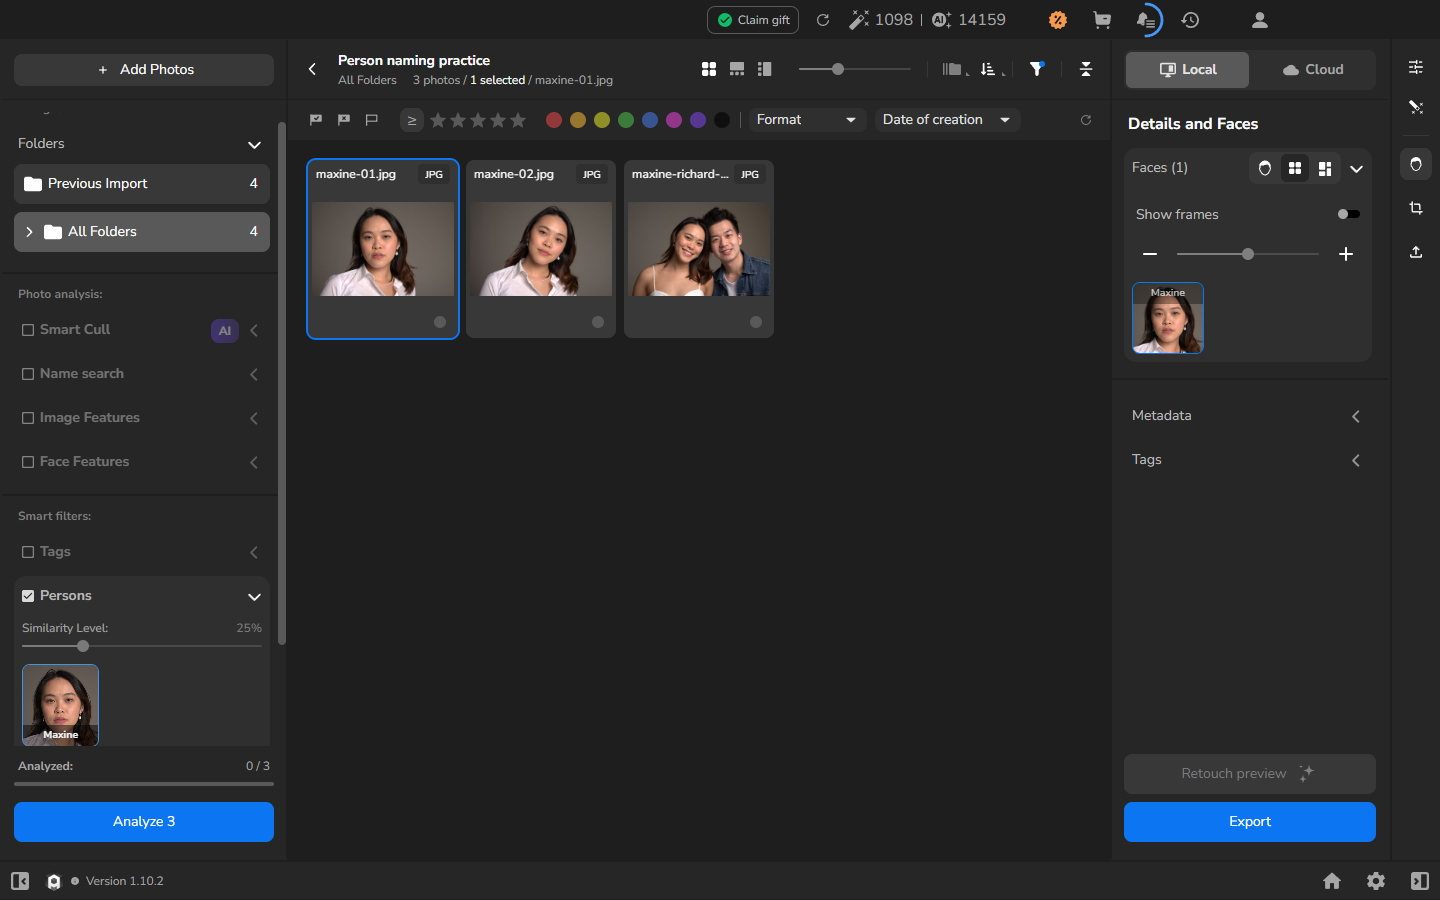
Section titled “Understand person membership”Automatic face search initially creates numbered clusters such as Person 1. Naming a detected face turns that identity cluster into a named person; it does not create a free-form group containing several different people.
Person membership is different from grouping similar photographs. A person filter collects photographs containing faces assigned to one identity; a similar-photo group compares complete photographs. A group portrait can therefore appear in the results for more than one person through its separate faces. A named person is not a free-form group for several different people.
Create and name a person
Section titled “Create and name a person”- Select a photograph containing the person’s detected face.
- Open Details and Faces, then expand Faces if its thumbnails are hidden.
- Right-click the required face and select Tag a new person.
- Enter a name and accept the dialog.
- Expand Persons and select the new named tile.
- Compare every visible photograph with the person you intended to name.
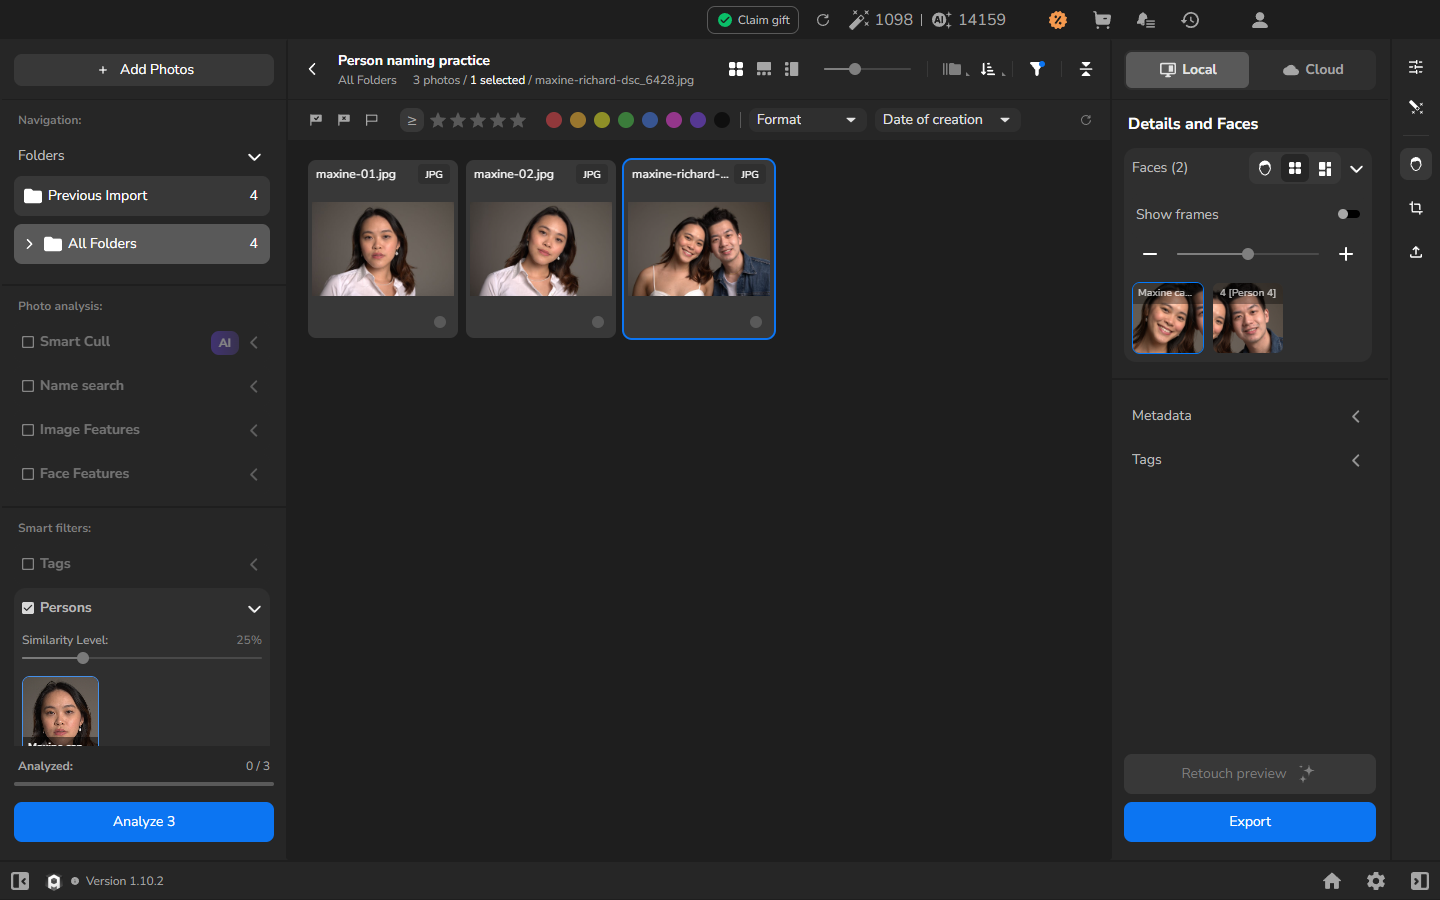
Naming one face names its existing identity cluster, so the new person filter may already contain other photographs. Review every result before relying on the named person for a selection.
Rename a person
Section titled “Rename a person”- Reset the active filter so all project photographs are visible.
- Under Persons, right-click the named person tile.
- Select Rename.
- Replace the current name and accept the dialog.
- Select the renamed tile to continue working with those photographs.
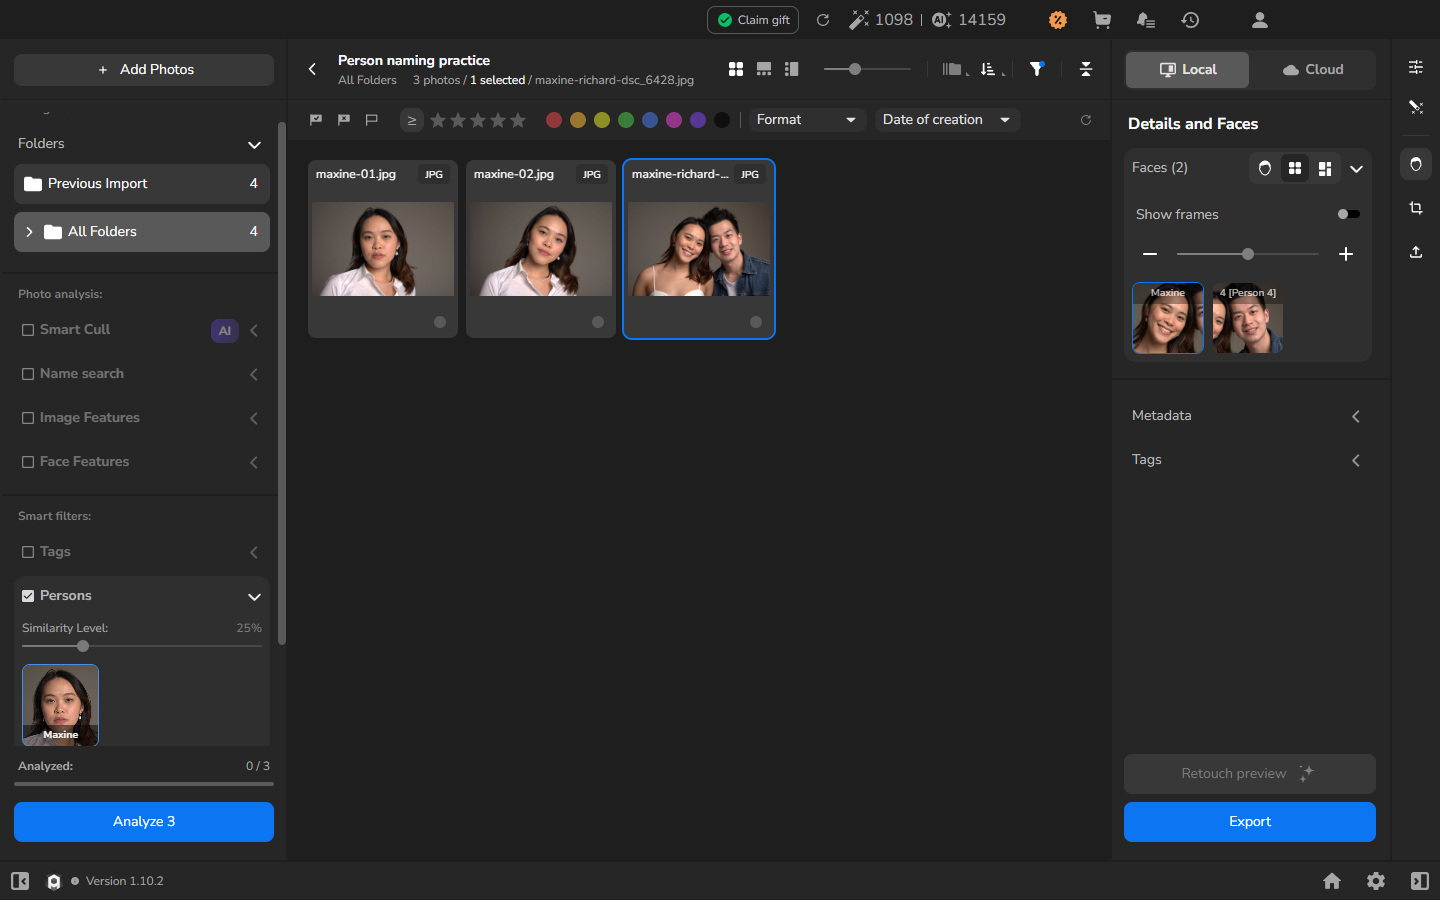
Renaming changes the identity label, not its photograph membership. It does not make Arams recheck whether every face belongs to that person.
Assign further faces to an existing person
Section titled “Assign further faces to an existing person”- Reset the filters and select another photograph containing the same person.
- Open Details and Faces and locate the required face thumbnail.
- Right-click the face and enter the existing person’s name in the person search field.
- Select the matching person row.
- Repeat for any other face that you have visually confirmed.
- Select the named person under Persons and review the complete result.
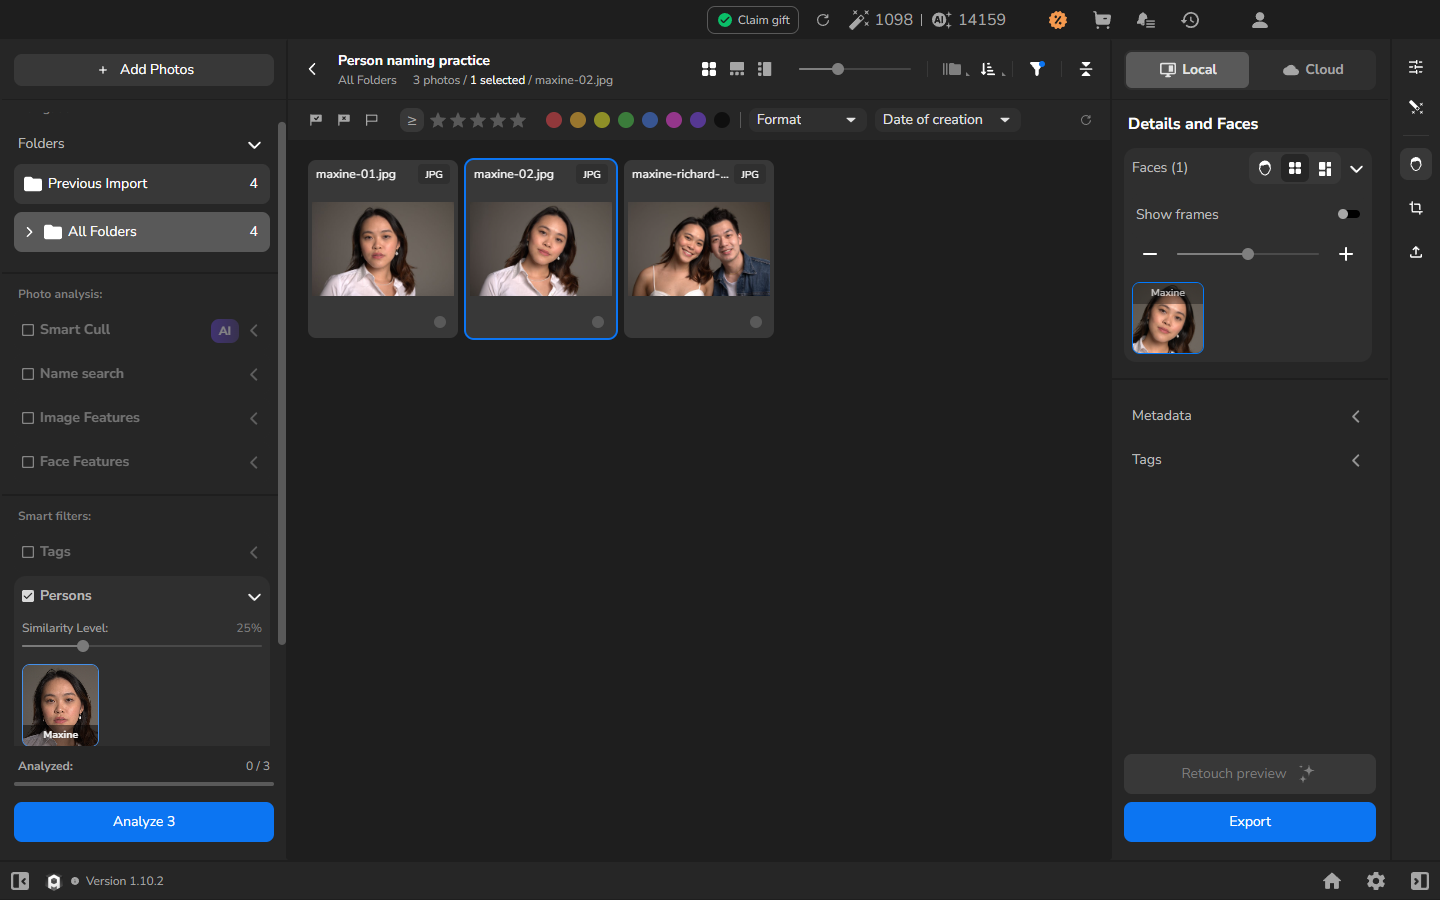
Assign a face when Arams has not connected it to the named person you recognize. The visible results may not change if the photograph already belongs to that person’s automatic cluster.
Remove or correct a mistaken assignment
Section titled “Remove or correct a mistaken assignment”- Reset the filters and select the photograph containing the wrongly assigned face.
- Open Details and Faces and right-click that face.
- Search for the currently assigned person.
- Select that person’s row again to remove the assignment from the face.
- Select the named person under Persons and confirm that the mistaken photograph is absent while the correct photographs remain.
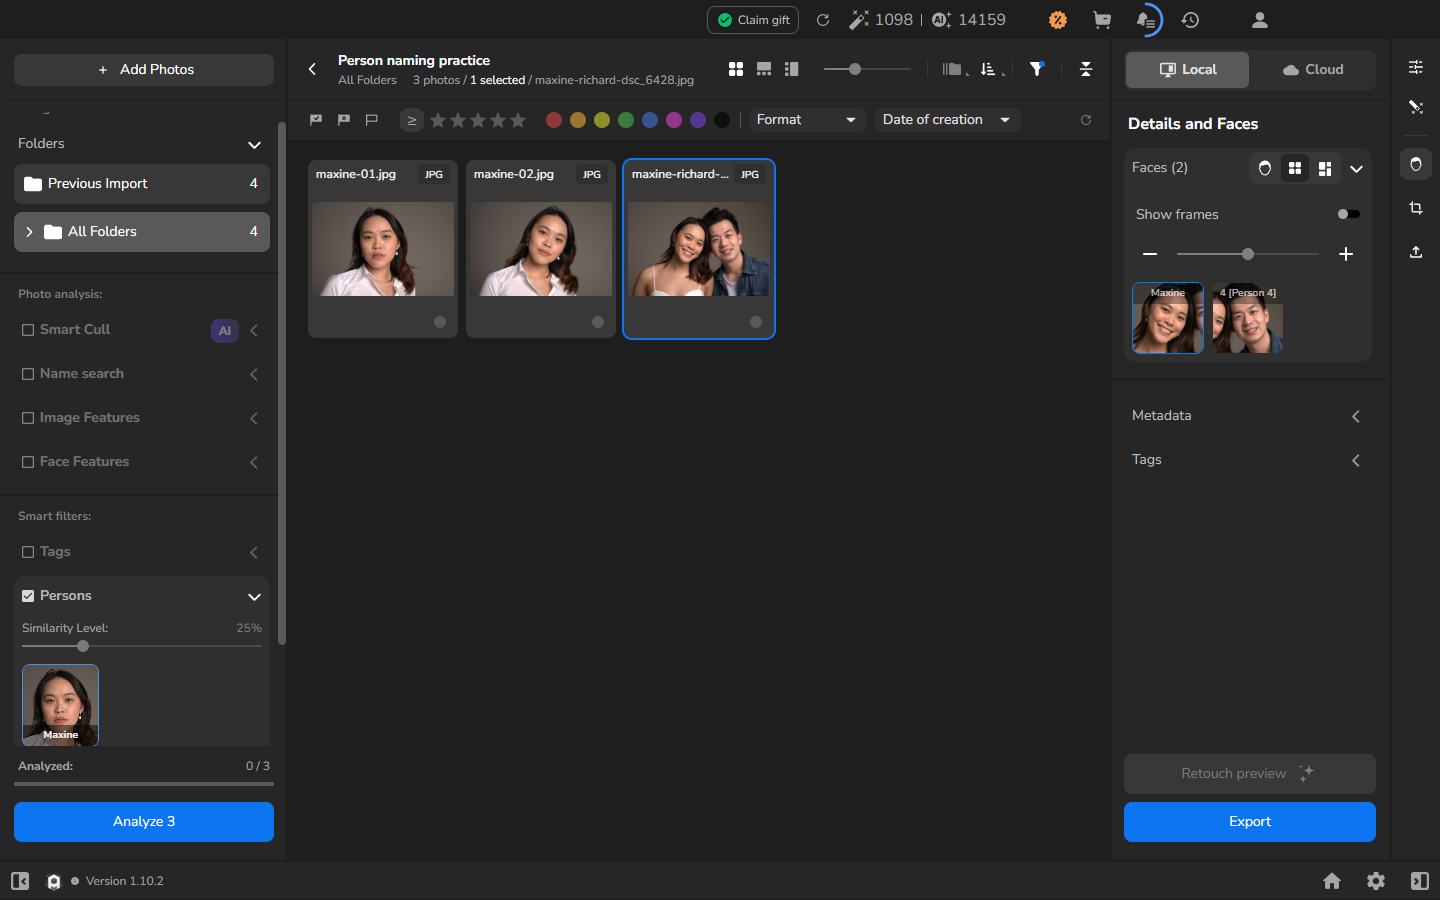
Correcting person membership does not delete or edit the photograph; it only changes which person filter includes that face.
Verify membership after reopening
Section titled “Verify membership after reopening”Named people and corrected memberships remain available when you return to a project. Expand Persons and select the name to continue working with that set of photographs.
Check the result
Section titled “Check the result”The project grid contains only photographs matching the active filename, manual tag, creation-date range, or person. Filters hide nonmatching photographs; they do not remove them from the project.
Use the circular reset button in the filter bar to return to the complete grid.
If it does not work
Section titled “If it does not work”- Typing a filename does not narrow the grid: select the filename field with the pointer before typing and confirm that the checkbox beside Name search is enabled.
- A manual tag is missing: select the photograph, open Details and Faces > Metadata > Tags, enter the tag, and press Enter. Confirm that the tag is displayed before selecting it.
- The date filter finds nothing: reopen Date of creation, inspect the To value, and extend the range. Use the filter-bar reset button if you are unsure which filters are active.
- Persons is empty: confirm Automatic face search is enabled, that server analysis is appropriate for the photographs, and that analysis has finished. A project with no detectable faces may not produce a person cluster.
- A person cluster includes the wrong photograph or misses one: treat the cluster as a starting point and inspect every result. Do not rely on the generic person number as an identity.
- A named person contains the wrong face: correct that face from Details and Faces, then check the complete Persons filter result. Do not remove the source photograph merely to fix membership.
- Assigning a face appears to make no change: the photograph may already belong to the automatic cluster. Check the face label and the complete result for that person.
- A corrected assignment returns after reopening: repeat the correction. If it still does not persist, do not rely on that named filter for delivery; review the photographs manually.
- A later search gives unexpected results: reset the previous filter first. Filename, tag, date, and person filters can otherwise narrow the grid together.