Import photos
What you will do
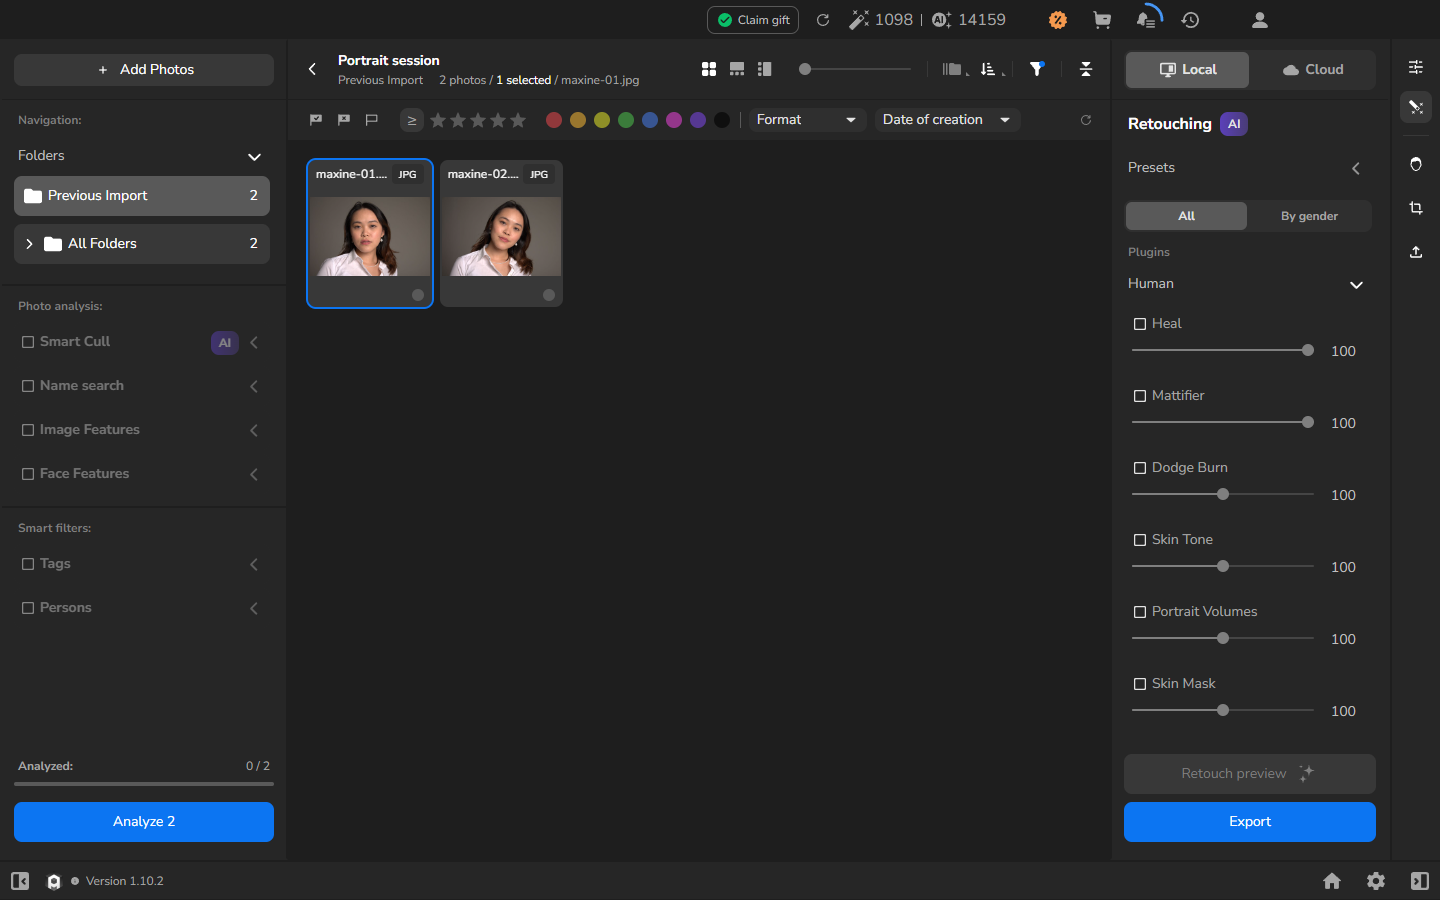
Section titled “What you will do”Add JPEG photos to an empty project so that you can start reviewing and working with them in Arams. When the import is complete, their thumbnails and filenames appear in the photo grid.
Before you start
Section titled “Before you start”Sign in to Arams and create or open an empty project. Have the JPEG photos available in a folder on your computer; you do not need to resize them before importing them.
- Open the empty project in Arams.
- In Windows File Explorer, open the folder containing your JPEG photos.
- Select the photos you want to import.
- Drag the selected files into the project’s central photo area and release them there.
- Wait for their thumbnails and filenames to appear in the grid.
After the import
Section titled “After the import”The photo total at the top of the project updates, and Previous Import in the left sidebar shows the photos you just added. Use this view when you want to review the latest group without looking through the rest of the project.
The screenshot shows one photo with a blue outline. This means that the photo is selected; it does not mean that only one photo was imported.
Once the thumbnails and filenames appear, the import is complete. Analysis, retouching, and export are separate parts of the workflow.
If it does not work
Section titled “If it does not work”If a photo does not appear, compare the filenames in your source folder with those in the grid. Try dragging the missing JPEG into the central photo area again. If the project remains empty after you drop a file, see Diagnose import failures.