Back up a project and verify its restoration
What you will do
Section titled “What you will do”Back up an Arams project together with its source photographs so that you can recover the project and continue working after a drive or folder is lost. You need both parts: the project data preserves your organization and settings, while the source folders preserve the photographs themselves.
This is a manual backup. Restore the project and source photographs to their original paths on the same Windows profile before you import the project. This workflow does not cover moving a project to another computer or different paths, cloud backup, or recovery of files that were not included in the backup.
Before you start
Section titled “Before you start”- Sign in to Arams on Windows.
- Choose a backup destination with enough space for the complete project folder, all source photographs, and any sidecar or exported files you want to keep.
- Keep the backup separate from the working drive so that one drive failure cannot remove both copies.
- Finish any active work, then return to the Arams home screen before copying the project.
Identify everything the project needs
Section titled “Identify everything the project needs”An Arams backup must preserve more than the project card shown on the home screen:
- Project data is the complete project folder managed by Arams. With Location set to Default, use Open in explorer from the project card to locate it. Copy the whole folder, including its hidden .retouch4me contents; do not copy or edit
index.aramsby itself. - Source photographs remain at their imported paths. Copy the source folder and preserve its filenames and folder layout. The project-data folder is not a replacement for these originals.
- Sidecars stored beside a source photograph, such as XMP files used by your workflow, need to stay with that photograph.
- Exported copies are separate deliverables. Back them up if you need them, but they do not restore a missing source photograph or project catalog.
For more detail about the difference between these files, see Keep projects and source photographs available.
Check the project before copying it
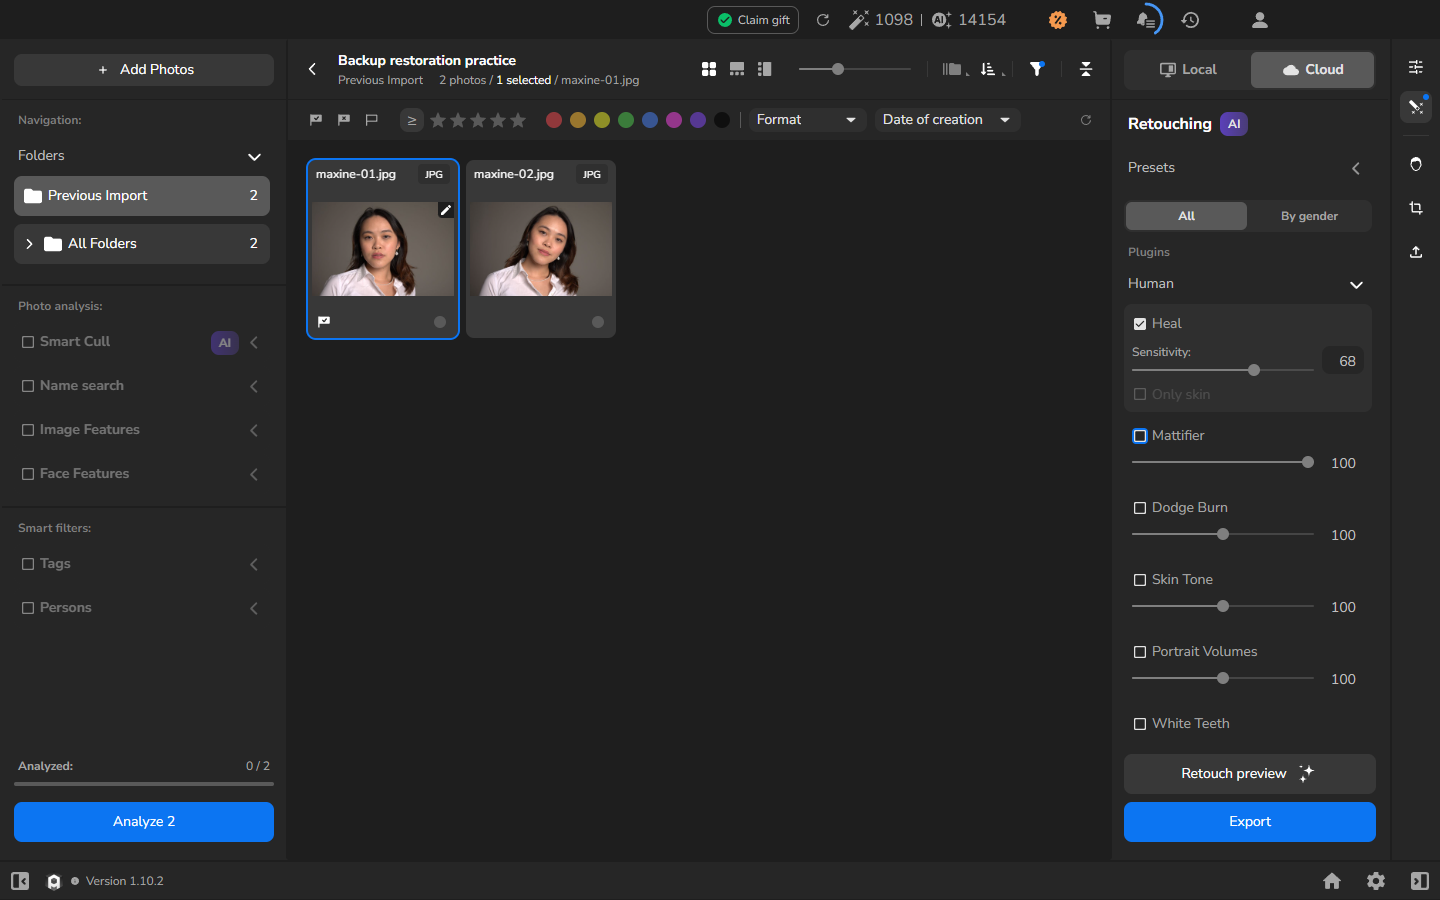
Section titled “Check the project before copying it”Open the project and make sure its photographs are available. Note a few choices that matter to you, such as ratings, Favorite flags, or retouch settings; after restoration, these give you a practical way to check that you opened the right project data rather than a newly created project.
Copy the project and photographs
Section titled “Copy the project and photographs”- Click the left-pointing arrow beside the project name to return to the Arams home screen. Do not copy the project while it is open.
- Right-click the project card and select Open in explorer.
- Copy the complete project folder to the backup destination. Include the hidden .retouch4me folder and its catalog.
- Copy every source-photo folder used by the project. Preserve filenames and the folder layout so that you can later restore the photographs to the same paths.
- Copy any sidecars that belong with the source photographs. Copy exported deliverables separately if you also need to preserve them.
- Check that the backup contains the complete project folder and all of the source folders you expect. Do not remove the working copies after making this check.
Restore the backup
Section titled “Restore the backup”Keep the backup untouched while you restore a separate copy. If the first attempt is incomplete, you can then start again without risking the only backup.
- Restore the complete project folder to its original project location.
- Restore the source photographs and their sidecars to the exact folders and filenames the project used. Do not reimport the photographs as new files.
- In Arams, select Create a project.
- In the dialog, select Import project.
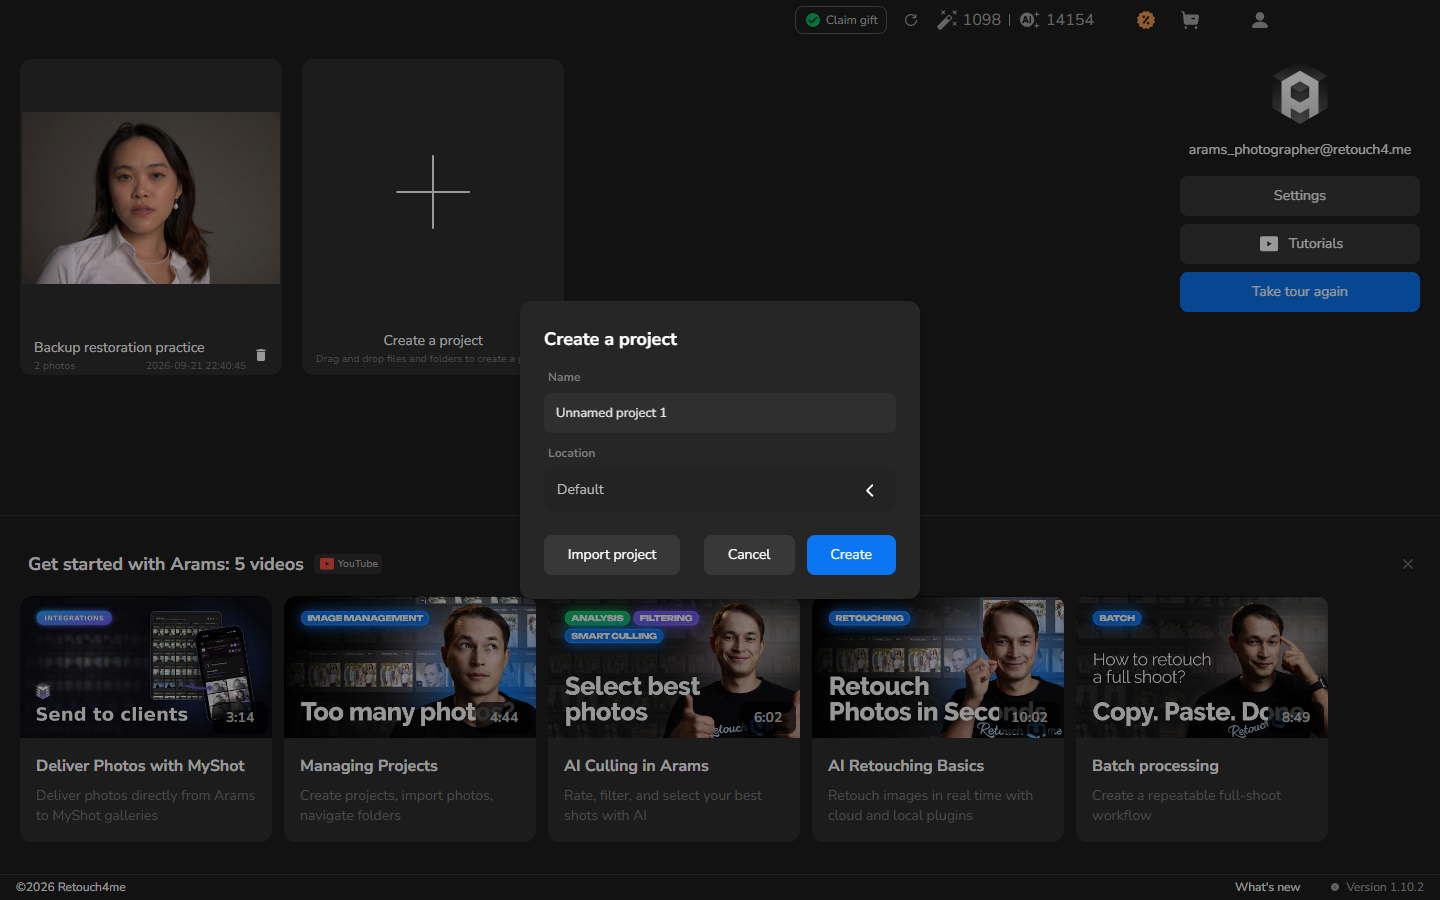
- In the Windows folder chooser, select the restored project folder. Select the project folder itself, not its hidden .retouch4me folder and not the
index.aramsfile. - Wait for Arams to open the project. If Arams stays on the home screen, select the restored project card to open it.
Verify the restored work
Section titled “Verify the restored work”- Browse the grid and open photographs from each restored source folder. If a photograph is dimmed or unavailable, restore it to its original path before continuing.
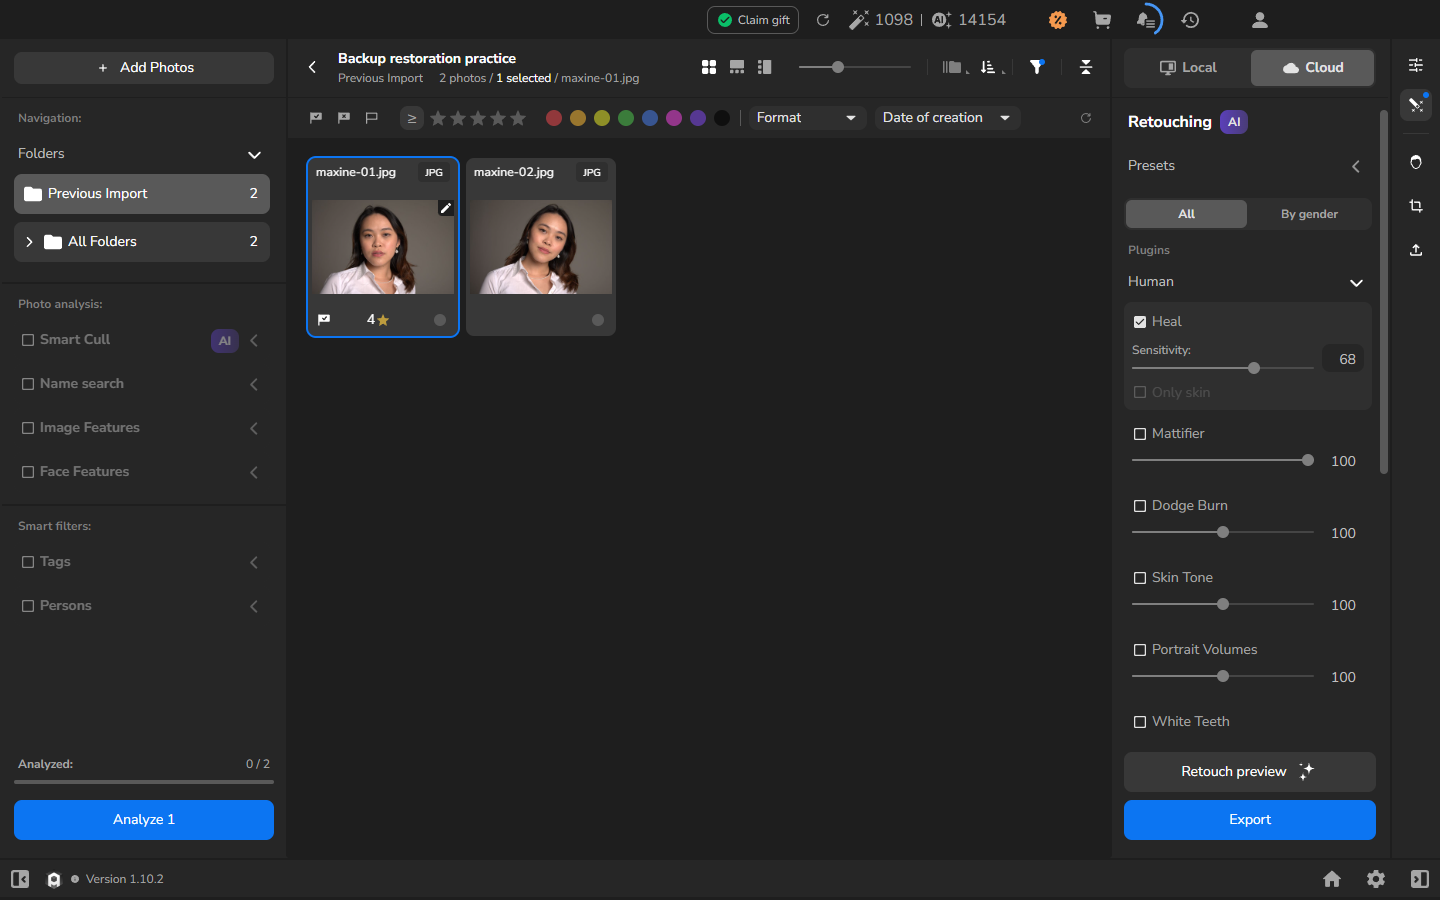
- Check some of the ratings and Favorite flags that you noted before the backup.
- Open a photograph with saved retouch choices and confirm that your settings are still present.
- Keep the backup until you have checked the project and the photographs you need.
If it does not work
Section titled “If it does not work”- No project card appears after import: choose Create a project > Import project again and select the restored project folder. Do not drag
index.aramsonto Create a project. - Arams reports that no project was found: check that you restored the complete folder and selected its top-level project directory. Do not move or edit files inside .retouch4me to force recognition.
- A photograph is dimmed or marked unavailable: restore it to the exact source path and filename, then close and reopen the project. Do not reimport a replacement just to make it appear in the grid.
- Ratings, Favorite flags, or retouch settings differ: preserve both the backup and the restored copy for diagnosis. Do not overwrite the backup with the incomplete restored state.