Compare retouching with the original
What you will do
Section titled “What you will do”Before you export a retouched portrait, compare it with the original at the same magnification. This makes it easier to spot lost skin texture, soft edges, or changes outside the intended area. Then export a separate JPEG and inspect the saved photograph rather than relying on the preview alone.
Before you start
Section titled “Before you start”- Sign in and import a portrait into a project. Choose a photograph with enough facial detail to judge skin texture, eyelashes, and hair edges.
- Use Local processing. Heal must be installed and activated. Local plugins are purchased separately from cloud processing and can be used without cloud retouching credits once purchased.
- Protect your original: export the retouched photograph with a new filename in a separate subfolder.
- Select the portrait you want to compare before you start processing.
For details about choosing a tool and creating a local preview, see Choose retouching tools and settings and Understand and verify local processing.
Inspect before and after at a useful magnification
Section titled “Inspect before and after at a useful magnification”- Open the retouching panel, choose Local, and select All.
- Clear any tools you do not want to apply, then enable Heal. Adjust its value for the portrait: use enough correction to reduce distracting marks while keeping natural skin texture.
- Choose Retouch preview and wait for processing to finish. The missing-preview indicator beside Heal disappears when the preview is ready.
- Double-click the portrait to open the larger viewer. Wait until Loading… disappears and the photograph is visible.
- Position the pointer over the face and zoom in until the eyes, skin texture, and hair edges are easy to inspect without losing orientation in the portrait. Note the percentage shown in the viewer so you can keep the same scale for both views.
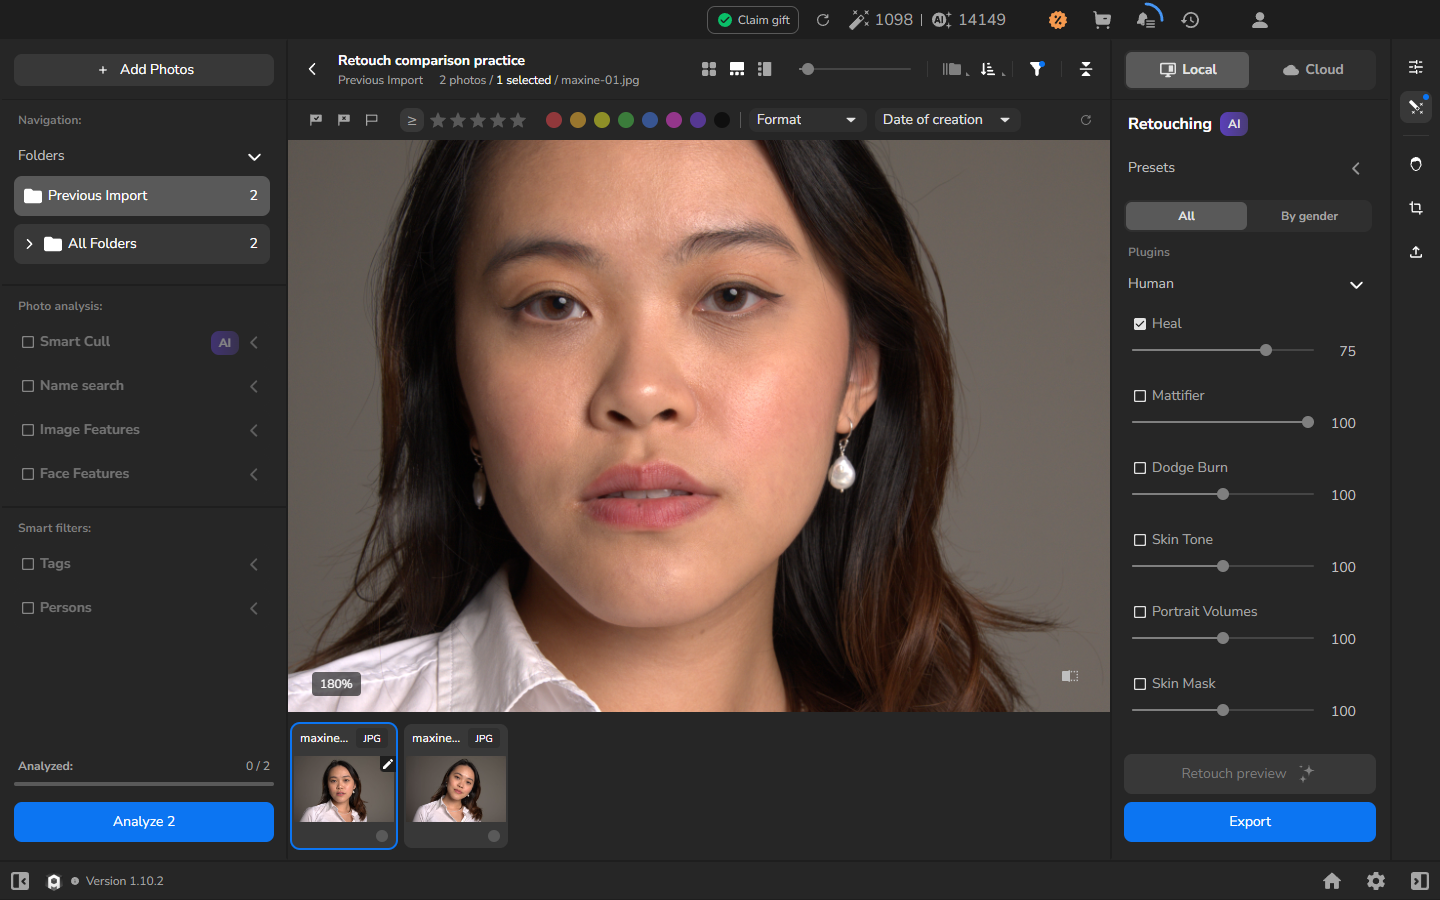
The displayed percentage controls only the view. It does not change the dimensions or quality of the exported file.
Compare face and skin details
Section titled “Compare face and skin details”- In the preview, inspect the same face area for retained eyelashes, hairline, and facial edges, as well as changes to small skin marks and texture.
- Hold the before/after control at the lower right of the image to show the original. Keep holding it while you inspect the face; releasing the control returns to the preview.
- Keep the displayed zoom percentage and position unchanged. Compare the same eyes, cheeks, forehead, nose, lips, and hairline in both views.
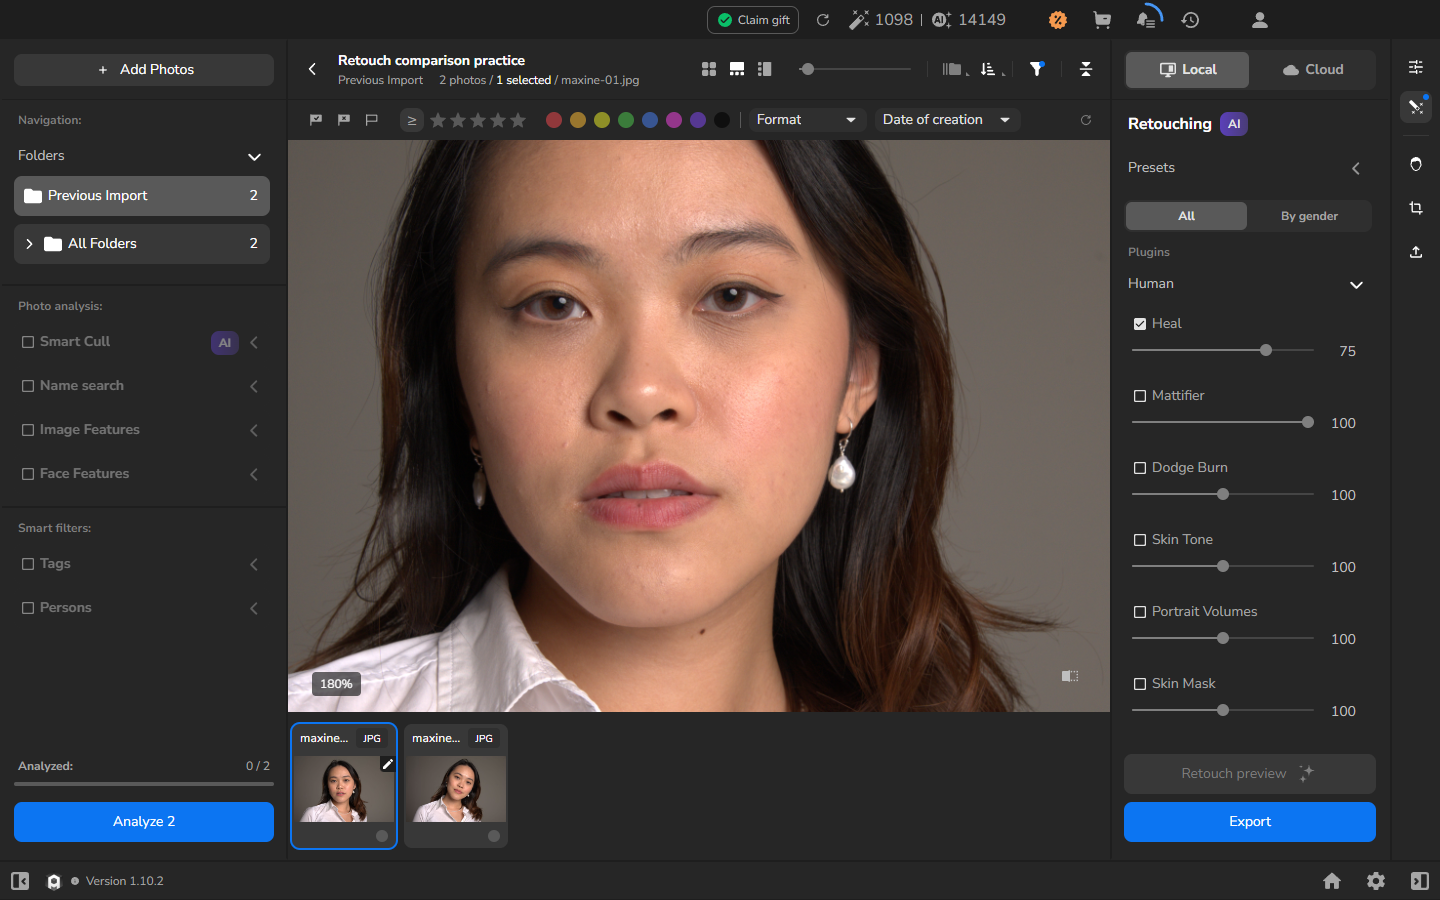
- Release the control and repeat the comparison if necessary. If you see lost texture, halos, blurred edges, or changes outside the intended area, reduce the correction before exporting.
Distinguish the preview from saved output
Section titled “Distinguish the preview from saved output”- Return to the gallery with the portrait selected and open Export settings.
- Choose Hard drive. Select the original files folder, enable Put in Subfolder, and enter a new subfolder name so the export stays separate from the source.
- Under the naming options, add -retouched to the filename. Enable Add to Current Project, leave Resize to fit off if you want to keep the source dimensions, and choose JPEG.
- Choose Export and wait for the operation to complete. The preview is temporary; it does not save a file on its own.
- Open All Folders and find the additional JPEG with the -retouched suffix. Check that the original is still present.
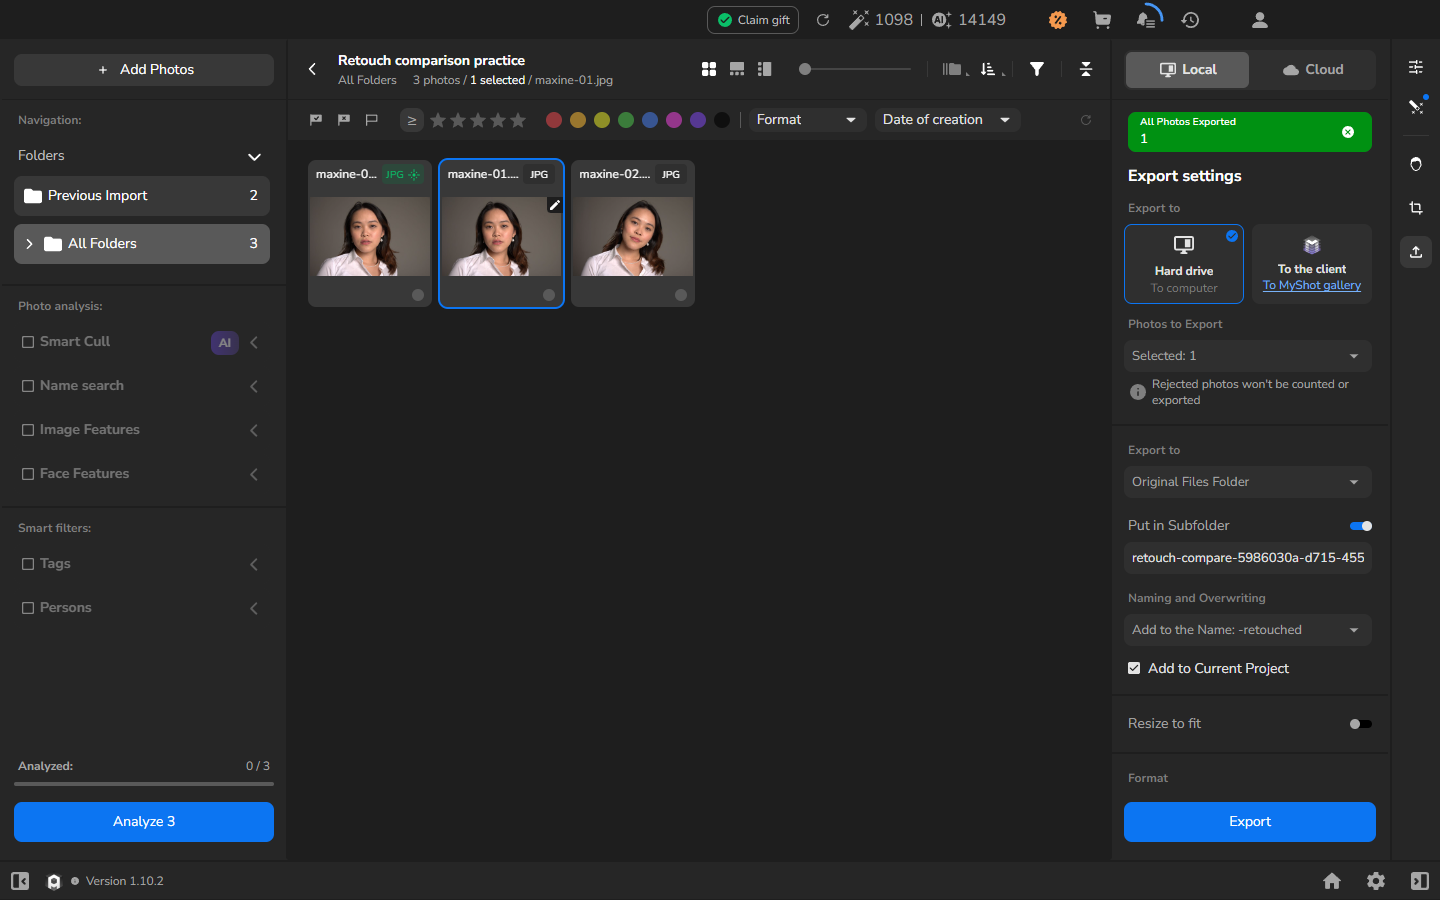
- Open the saved JPEG outside Arams and inspect the face again. It should show the retouching you approved. Because JPEG is a compressed output format, do not expect the saved file to be identical to the source or to its on-screen rendering.
If it does not work
Section titled “If it does not work”- The preview does not start: wait until the imported photograph opens fully in the larger viewer, return to the gallery, then check Heal and Retouch preview again. If processing still does not begin, use the visible status or error to troubleshoot it.
- Heal is unavailable: confirm that the local plugin is installed and activated.
- The before/after control is unavailable: confirm that preview processing completed and that Heal remains selected.
- The face moves between states: release the before/after control, return to the same face area and displayed percentage, and repeat the comparison without panning.
- No saved copy appears: check the export history and destination subfolder. A finished preview does not mean export succeeded.
- The output has unexpected dimensions: confirm that Resize to fit is off and export again into a new subfolder. Do not overwrite or delete the source photograph while troubleshooting.