Complete your first photo workflow
What you will do
Section titled “What you will do”Create a project, choose the JPEG photographs you want to keep, and export full-resolution copies to your computer without applying retouching.
Before you start
Section titled “Before you start”Sign in to Arams and place the JPEG photographs you want to work with in a folder you can find easily. Keep the originals: this workflow saves exported copies in a separate subfolder.
You will use Local mode with every retouching tool switched off. This keeps the first workflow focused on organizing, inspecting, and exporting photographs; you can add retouching in a later workflow.
Create a project and import your JPEGs
Section titled “Create a project and import your JPEGs”- On the home screen, click Create a project.
- Enter a descriptive name in Name. Leave the default location selected unless you have a reason to store the project elsewhere, then click Create.
- When the empty project opens, select your JPEGs in Windows File Explorer and drag them into the central photo area.
- Wait for the photographs and their filenames to appear in the grid before continuing.
For more detail and troubleshooting, see Create a project and Import photos.
Inspect and select the photographs
Section titled “Inspect and select the photographs”- Double-click a photograph to open it in the large viewer.
- Inspect the details that matter for your selection, such as focus and expression. Use the scale indicator to judge how closely you are viewing the image.
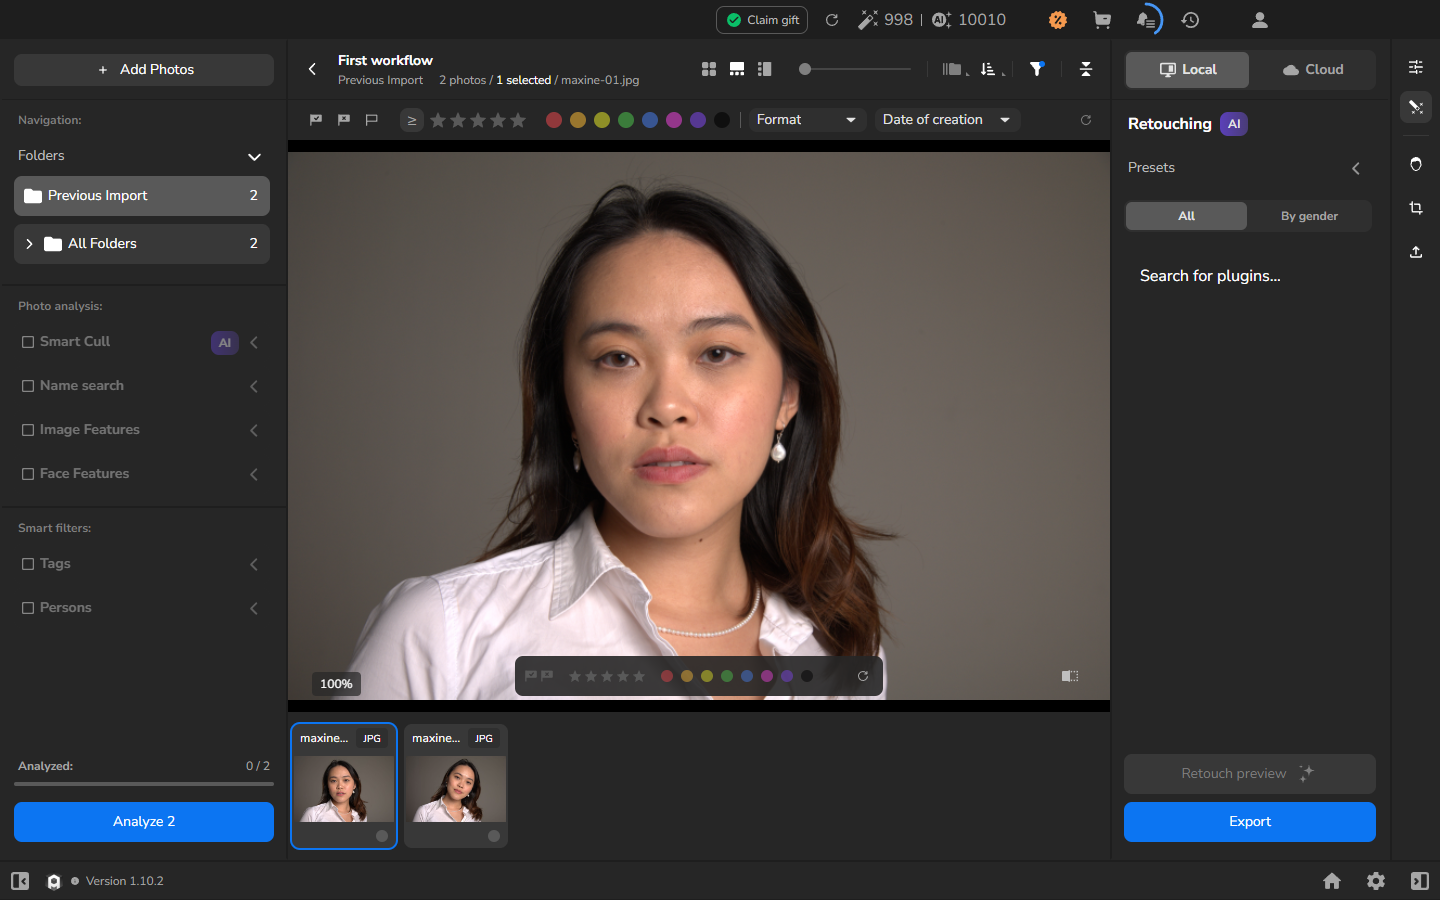
- Click the four-square Gallery icon in the top toolbar to return to the grid.
- To export every photograph in the project, click any card and press Ctrl+A. To export only some photographs, select those cards instead.
- Check the blue outlines and the selected count to make sure you have chosen the intended photographs.
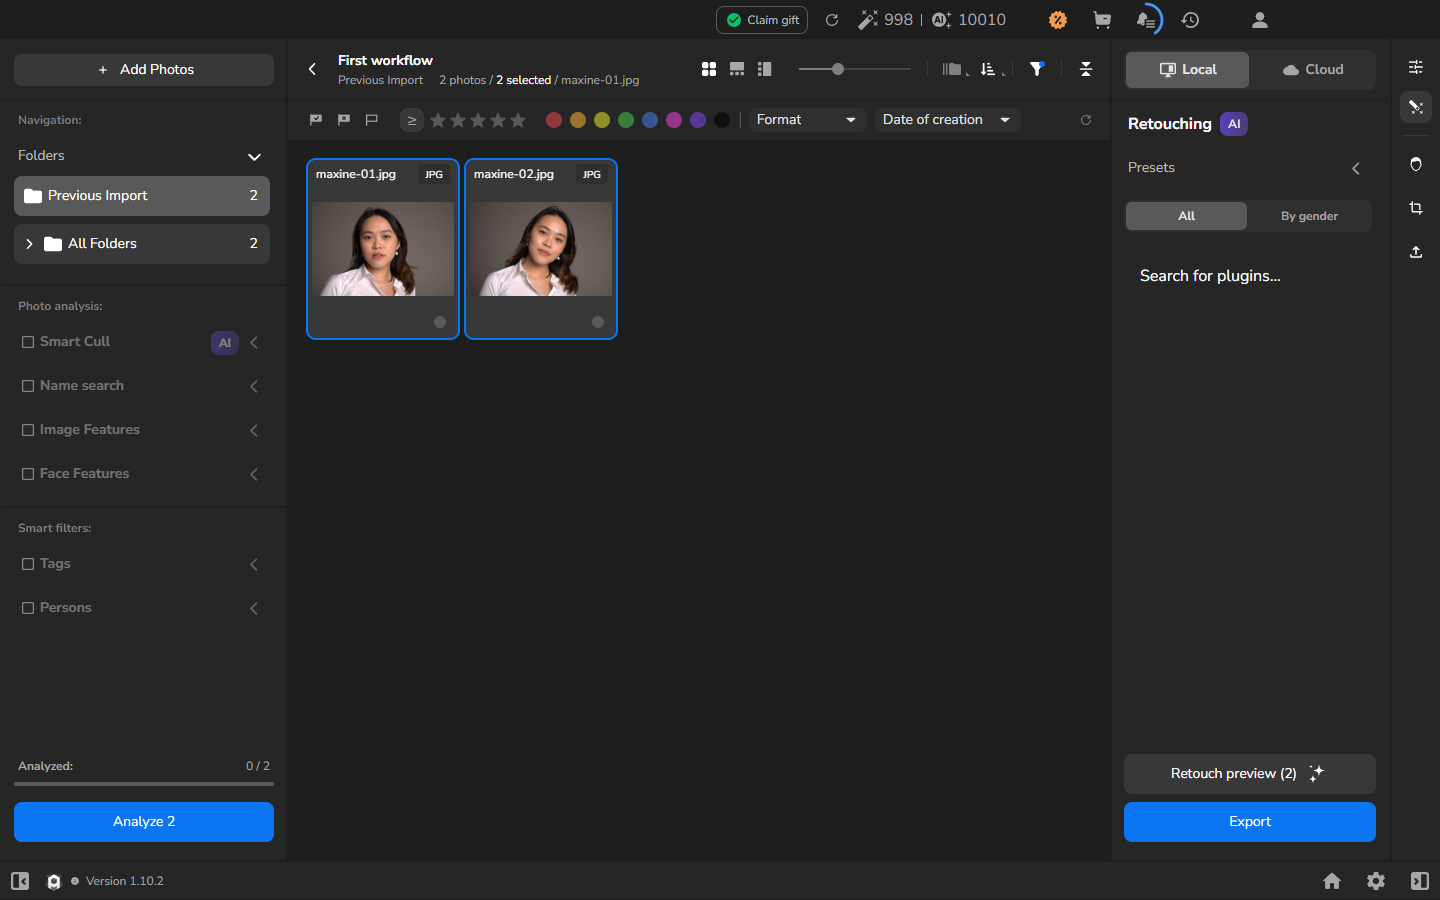
See Inspect a photograph and zoom in and Select and deselect photographs for the complete inspection and selection procedures.
Export the selected photographs
Section titled “Export the selected photographs”- Open the export panel and select Local.
- Open All in the tool list and switch off every retouching tool so the export does not apply a retouching effect.
- Open Export settings.
- Choose Hard drive — To computer and confirm that Selected matches the number of photographs you want to export.
- Choose Original Files Folder, turn on Put in Subfolder, and enter a new folder name. A separate subfolder keeps the copies apart from your originals.
- Choose Add to the Name: -retouched. This suffix distinguishes the exported files; it does not mean that a retouching tool was used.
- Leave Add to Current Project unchecked to keep the exported copies out of this project. Turn Resize to fit off to retain the original pixel dimensions.
- Select JPEG. If a shutdown option is shown, leave it unchecked unless you want the computer to shut down after export.
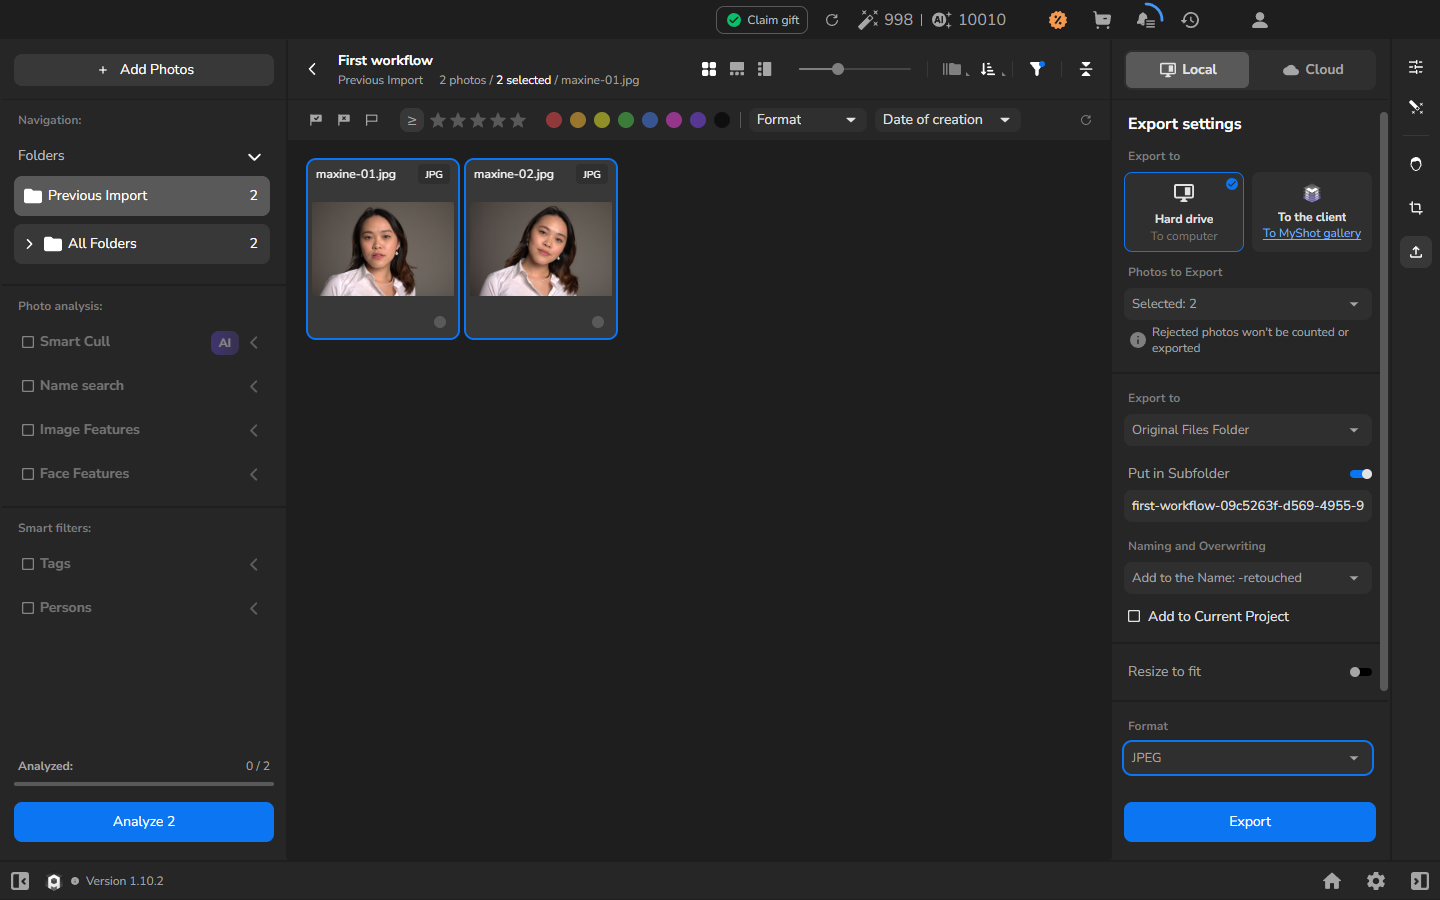
- Click Export.
- Open EXPORT AND RENDER HISTORY with the history/clock icon and wait for the task to show Completed and 100%.
- In Windows File Explorer, open the new subfolder beside the originals.
- Open the saved files and check their names, contents, and pixel dimensions before you deliver or move them.
See Export photographs and verify saved files for the detailed export procedure and format limitations.
Check the result
Section titled “Check the result”The export subfolder contains a JPEG copy of each selected photograph, with -retouched added to its filename. Because Resize to fit was off, each copy retains the pixel dimensions of its original. The original JPEGs remain unchanged in their original folder.
If you need another format or must preserve metadata or a particular color profile, review the related export guide before exporting.
If it does not work
Section titled “If it does not work”- A photograph is missing from the grid: wait for its thumbnail and filename before selecting or exporting. If it still does not appear, follow Import photos.
- The selected count is wrong: return to the grid and adjust the selection. Press Ctrl+A if you want to export every photograph in the project.
- A tool is still enabled: clear every tool under All before opening Export settings if you want unretouched copies.
- The saved files are missing: check the source folder and the name entered under Put in Subfolder. This workflow saves beside the originals, not in the project storage folder.
- The task does not reach Completed or a file will not open: do not use the copies yet. Note the task status or error, then follow the troubleshooting steps in Export photographs and verify saved files.