Automatically tag and find photographs with AI
What you will do
Section titled “What you will do”Prepare Arams for free automatic image tagging, import a varied set of photographs, review the tags that Arams actually assigns, and use one of those generated tags to narrow the project. You will also check the results for tags that do not describe a photograph well and for recognizable objects that were not tagged.
Automatic AI tagging is completely free and does not consume analysis credits. It is separate from the cloud photo and face analysis started with Analyze. You do not need to run that paid analysis to generate tags.
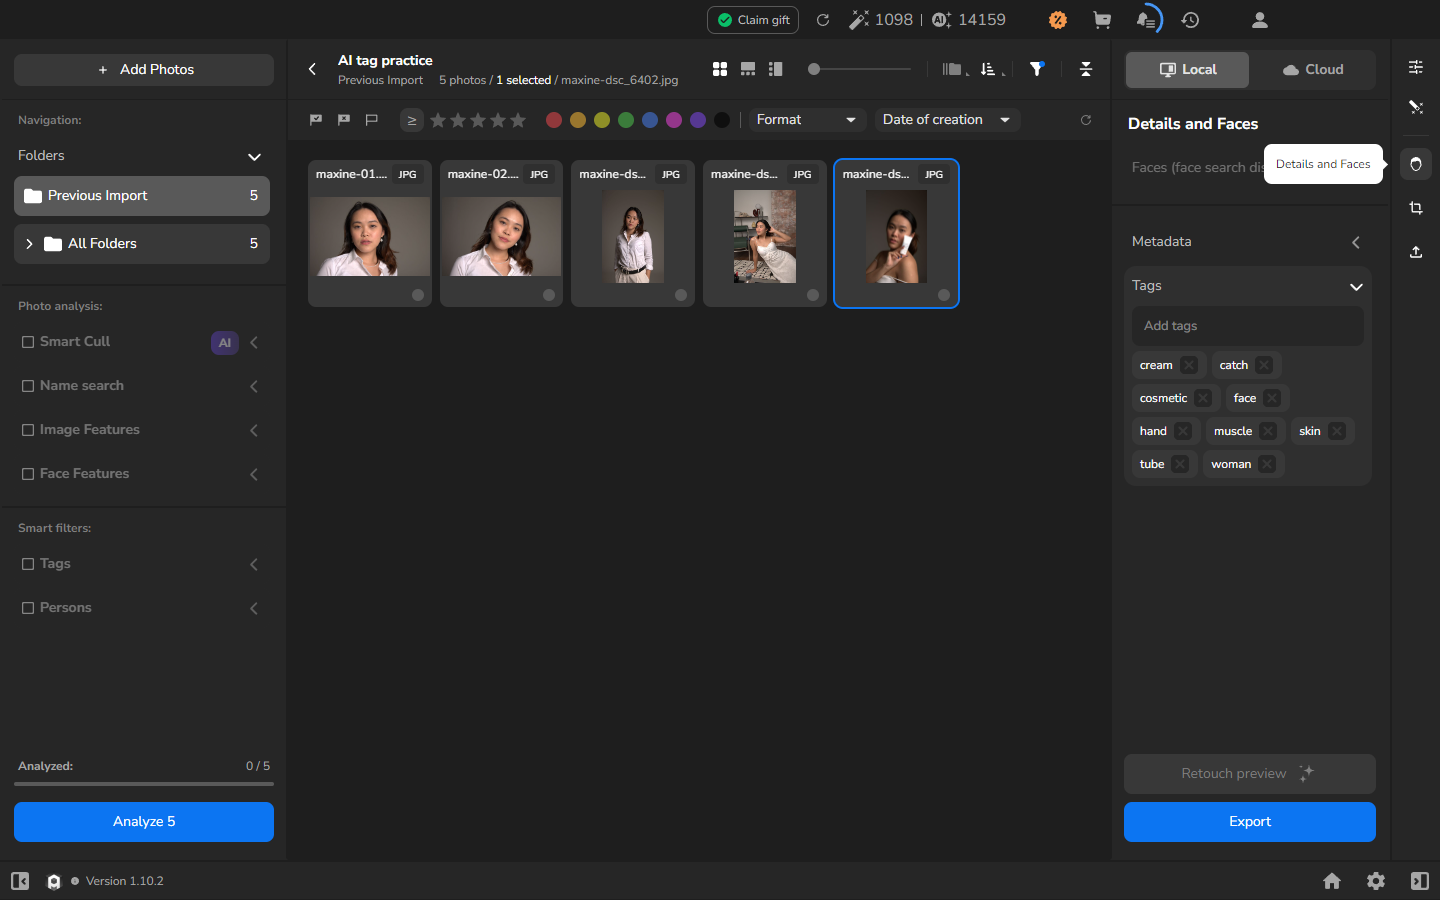
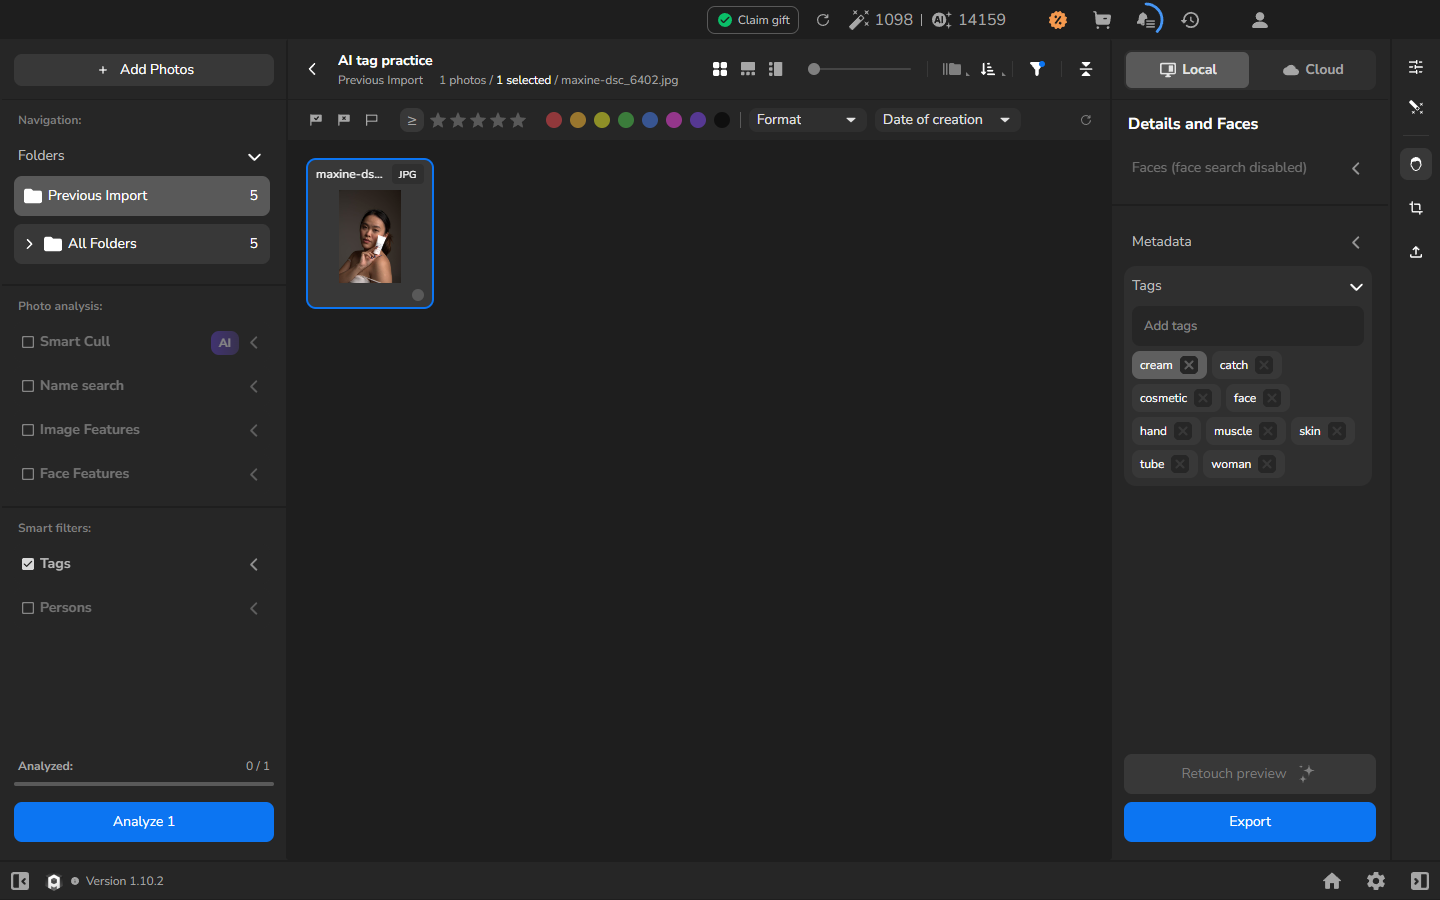
The tagging and filtering example was recorded in Arams 1.10.2. Selecting the generated tag cosmetic narrowed the project to 1 photos / 1 selected and kept maxine-dsc_6402.jpg visible. The Analyzed counter and Analysis completed label visible in the recorded run belong to the separate analysis workflow; they are not indicators of tagging progress.
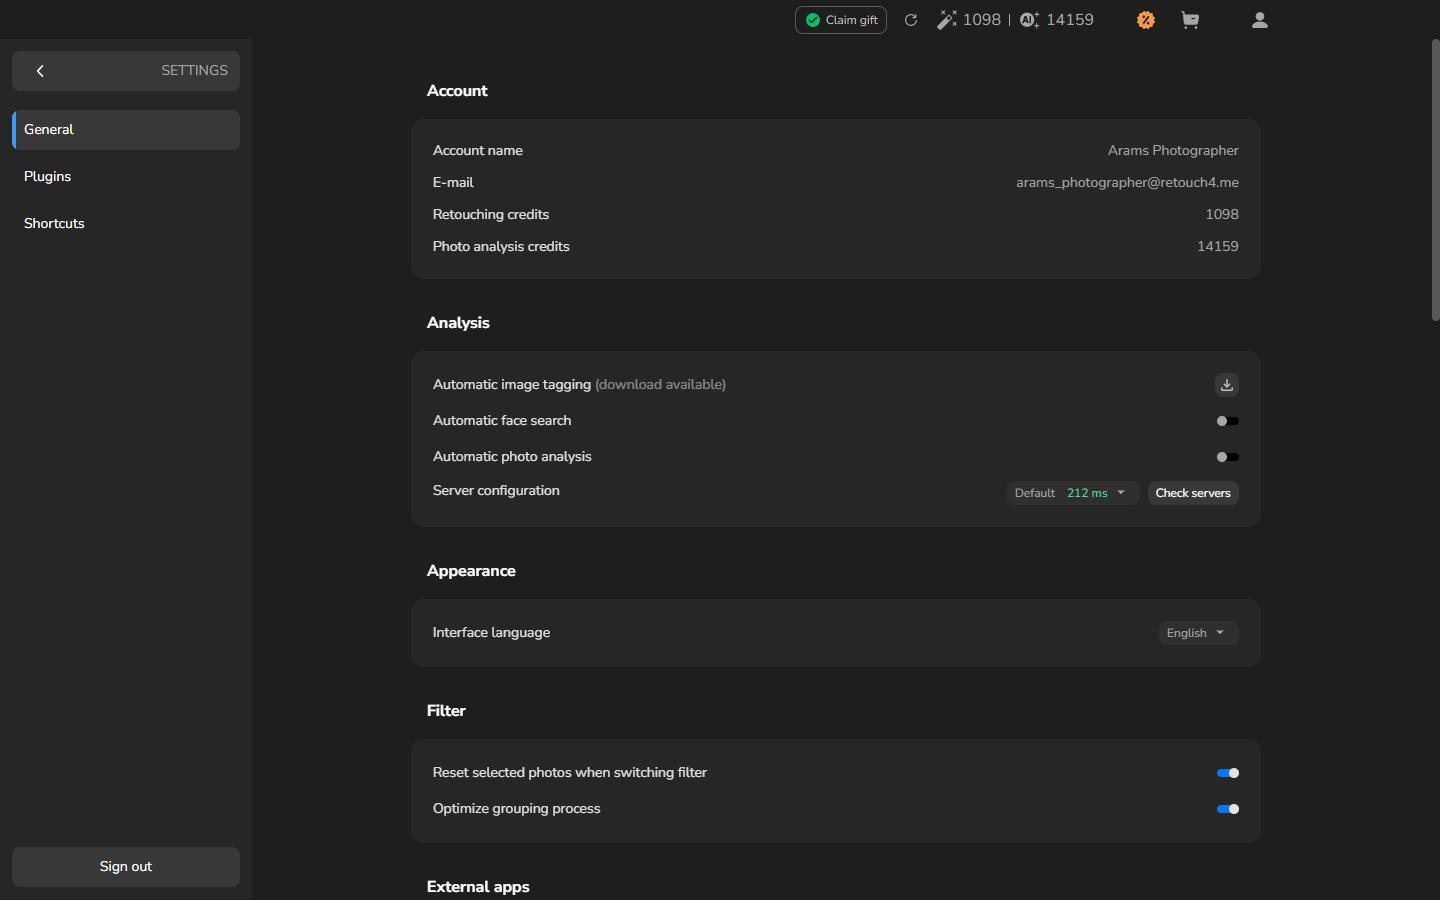
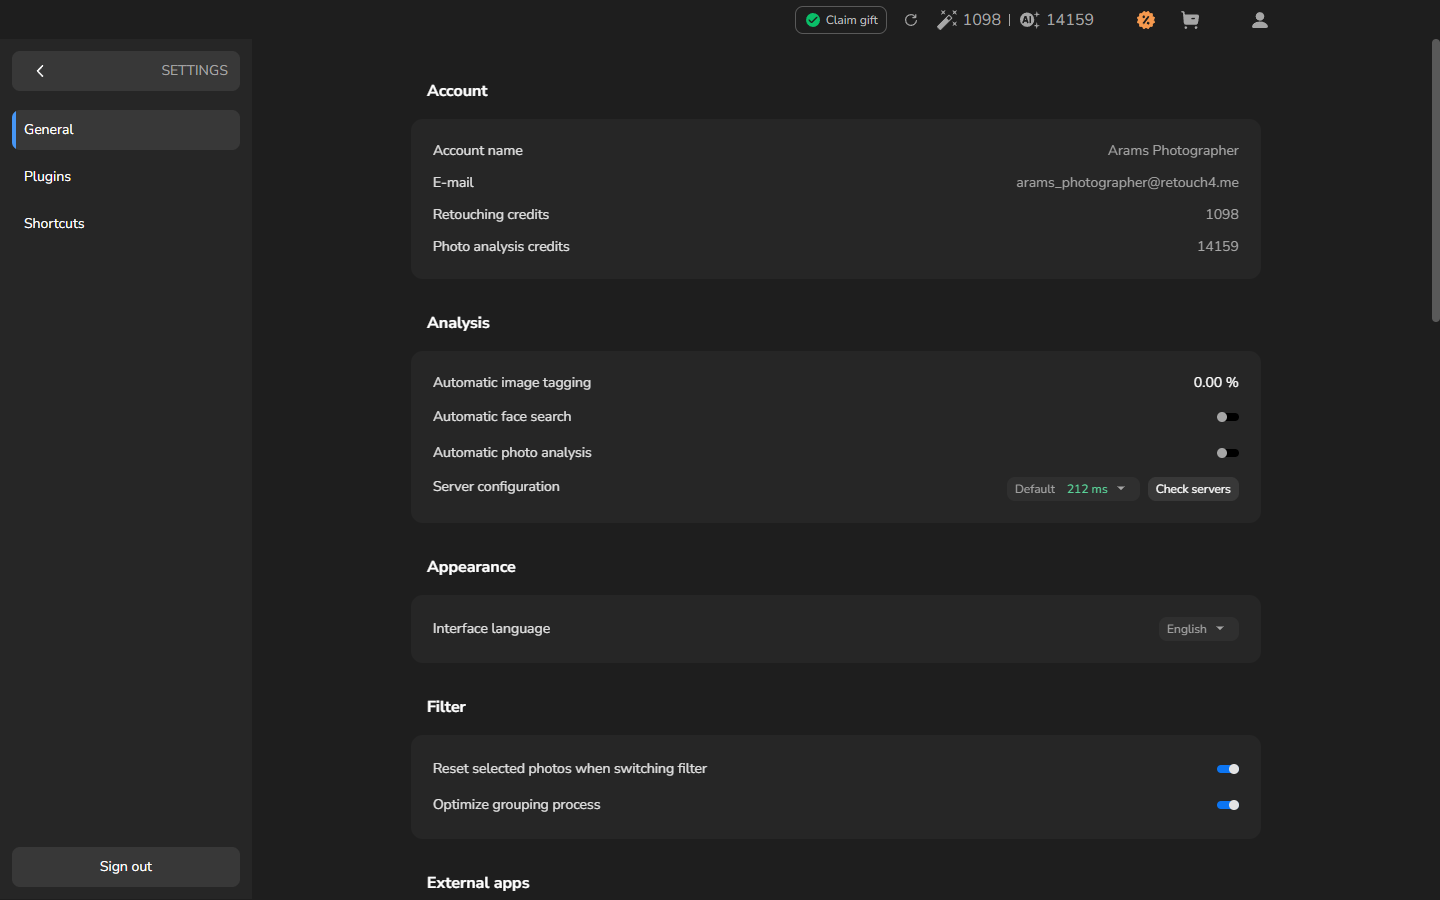
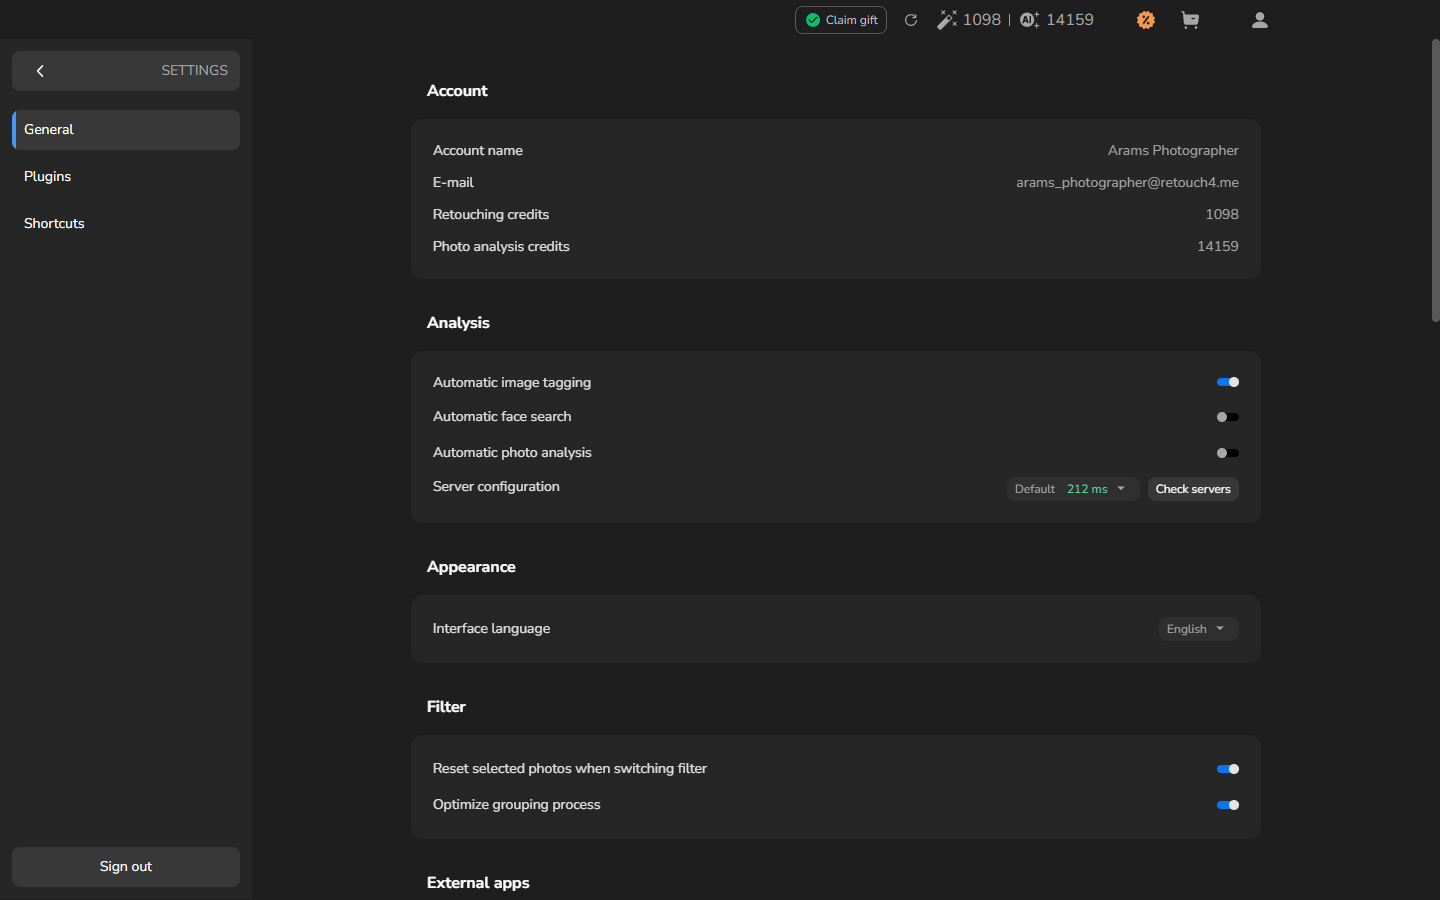
On a clean installation, Arams offered the tagging-model download in Settings. After the download was requested, the Automatic image tagging row showed progress from 0.00 %. When installation finished, Arams displayed the switch, and the switch remained on after Settings was closed and reopened. Automatic tags are suggestions for finding photographs, not an accuracy guarantee.
Before you start
Section titled “Before you start”- Sign in to Arams on Windows and use the English interface.
- Use photographs that you are authorized to use. Keep the original files unchanged and at full resolution.
- Download the tagging model in Settings. No analysis credits or credit purchase are needed for automatic tagging.
- Use a varied selection with a recognizable object and contrast photographs without it. The verified check used maxine-01.jpg and maxine-02.jpg at 6064 × 4040, maxine-dsc_6353.jpg, maxine-dsc_6395.jpg, and maxine-dsc_6402.jpg at 4040 × 6064. The last photograph visibly contains a cosmetic product.
- Do not add a manual tag during this procedure. A manual tag cannot demonstrate automatic image tagging.
The exact model size, network requirements, offline behavior, and persistence after restarting Arams were not verified. The completed check covered closing and reopening Settings in the same signed-in Arams session.
Check automatic image tagging readiness
Section titled “Check automatic image tagging readiness”- On the home screen, open Settings and select General.
- Under Analysis, find Automatic image tagging (download available) and select the download button at the right of that row.
- Wait while the row shows download progress. In the verified first-install check, it began at 0.00 %.

- When the switch appears, turn on Automatic image tagging if it is off.
- Return to the home screen, reopen Settings > General, and confirm that Automatic image tagging remains on.

The verified run began without the tagging component, displayed download progress, made the switch available after installation, and showed the switch still on after reopening Settings.
Follow tagging progress and inspect the tags
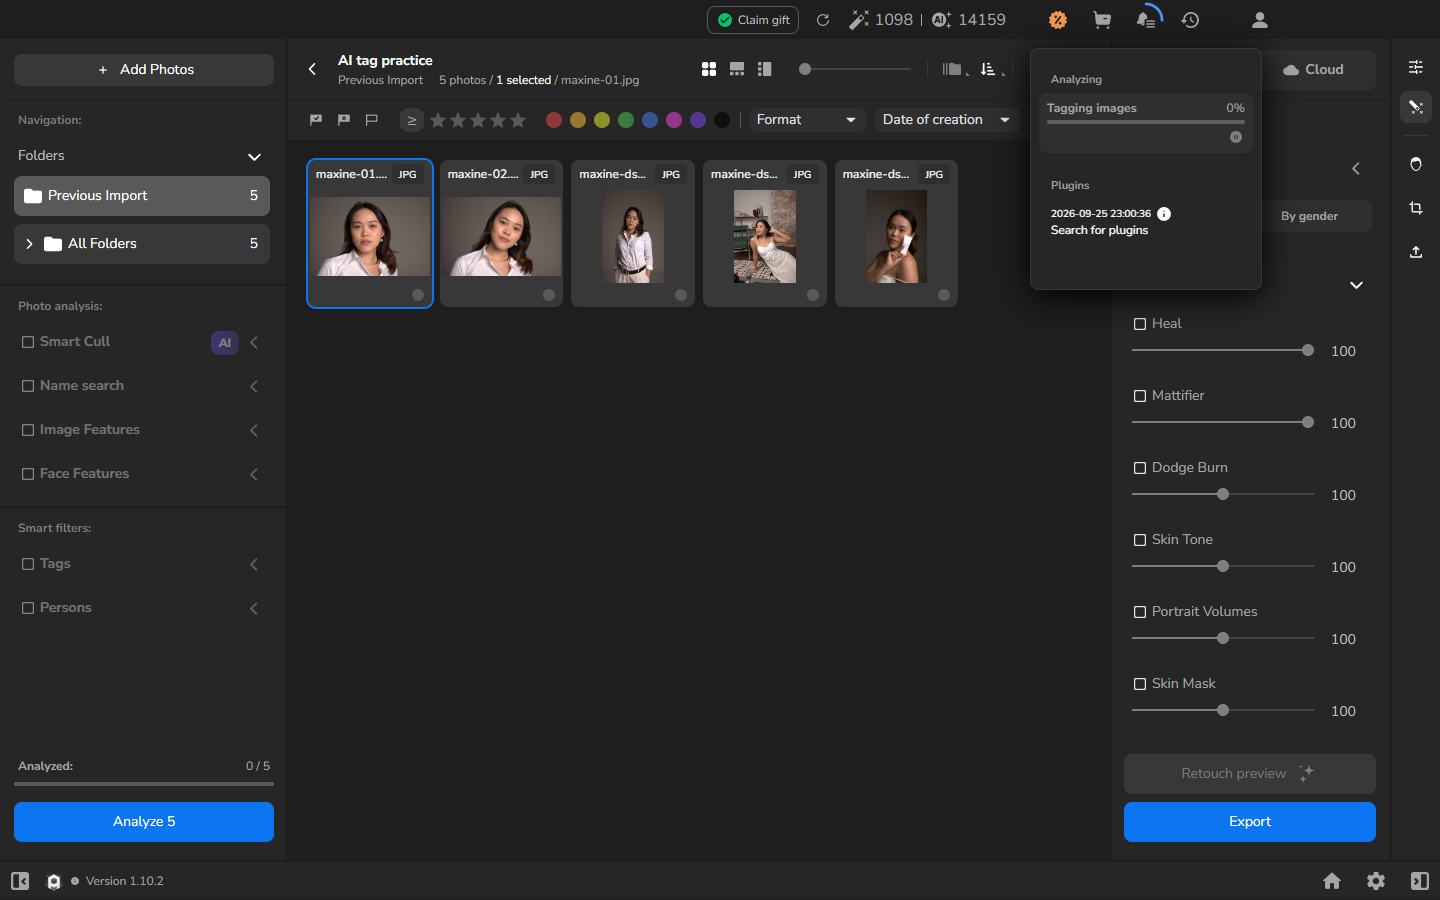
Section titled “Follow tagging progress and inspect the tags”- Return to the home screen and create a practice project.
- Import the full-resolution photographs, including contrasting subjects and objects, with Automatic image tagging enabled.
- Click the bell icon at the top of the window to view background progress. This area also shows other operations: look for the tagging operation rather than treating every progress entry as tagging.
- Wait for automatic tagging to finish. Analyze, Analyzed, and Analysis completed concern the separate cloud analysis, not this free tagging operation.
- Select each photograph in turn, open Details and Faces, and expand Metadata and Tags if needed to inspect the generated tags.

Use only tags observed after automatic tagging was enabled. Do not enter text into Add tags. In the verified example, maxine-dsc_6402.jpg received cream, catch, cosmetic, face, hand, muscle, skin, tube, and woman. Cream, cosmetic, and tube describe the visible product; catch and muscle are not useful descriptions of that object. The visible earring did not receive an earring tag in this list. This is why you should record inaccurate and missing tags instead of assuming that each generated word is correct or complete.

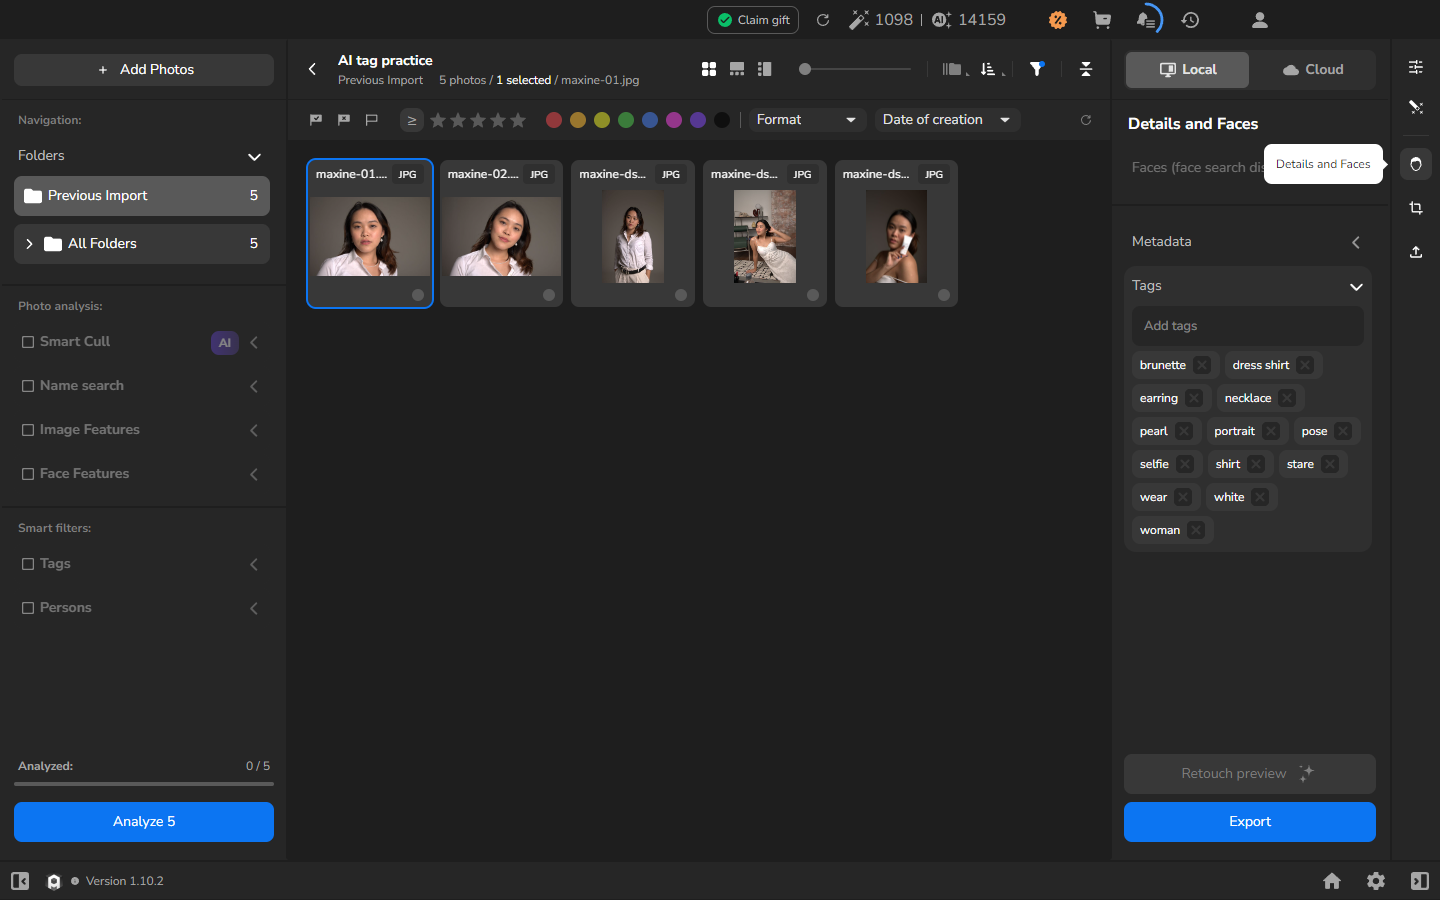
The contrast photograph maxine-01.jpg had a different generated list that included brunette, dress shirt, earring, necklace, pearl, portrait, pose, selfie, shirt, stare, wear, white, and woman. It did not show cosmetic. Differences between the lists establish a usable filter example; they do not establish general tag accuracy.
Find photographs with a generated tag
Section titled “Find photographs with a generated tag”- On the photograph containing the recognizable object, choose one generated tag that is not present on every contrast photograph. The verified example uses cosmetic on maxine-dsc_6402.jpg.
- Select that displayed tag to filter the project.
- Check the project counter and filenames. The object photograph must remain visible and at least one contrast photograph must be excluded.
- Inspect every remaining photograph. Note any result that does not visibly match the tag.
- Reset the filter and inspect recognizable objects for which Arams did not create a useful tag. Record these separately as missing tags; do not add a manual tag to make the example succeed.

In the verified run, selecting cosmetic left only maxine-dsc_6402.jpg in the grid and changed the counter to 1 photos / 1 selected. The filter proves that Arams can narrow this project by one observed generated tag; it does not mean that every cosmetic product will receive the same tag.
For general filename, date, manual-tag, and person searches, see Find photographs and people. This chapter covers only the automatic-tagging setup and the use of an automatically generated tag.
Check the result
Section titled “Check the result”The model download completes, and Automatic image tagging remains on after reopening Settings. Check tagging progress through the bell icon, then confirm that the photographs have generated tags. The recorded tags must come from automatic tagging rather than manual entry; completing cloud analysis is not required. Selecting cosmetic leaves maxine-dsc_6402.jpg visible and excludes the four contrast photographs.
Before relying on the filtered set, compare the tags with the actual photographs. Keep inaccurate and missing tags in the review notes instead of silently treating them as correct results.
If it does not work
Section titled “If it does not work”- The model does not reach a ready state: preserve the exact progress or error message and stop. Do not claim that the model was downloaded, and do not replace the state with a mock.
- Automatic image tagging does not stay enabled: reopen Settings once and record the observed state. Do not infer persistence from the first screen.
- Tagging is still in progress: click the bell icon and check the tagging operation for progress or an error. Keep the project open while it finishes.
- No generated tags appear: confirm that automatic image tagging was ready before import and check its progress through the bell icon. If tagging has finished but tags are missing, note the affected photographs and any error shown. Starting paid cloud analysis is not a required troubleshooting step.
- The object has no useful tag: treat this as a missing result. Try another authorized recognizable object only in a new verified run.
- A tag includes unrelated photographs: inspect and record them as inaccurate results. A tag filter narrows the review; it does not replace visual judgment.
- The tag filter returns every photograph: choose only a tag that differs across the observed tag lists. If none does, the prepared set does not establish tag filtering and needs a more varied authorized selection.