Crop and straighten photographs
What you will do
Section titled “What you will do”Use the Cropping panel to improve the composition of a photograph or straighten a tilted horizon. You can compare the new framing with the full image, reset both adjustments if you change your mind, and export a separate JPEG without overwriting the source photograph.
Before you start
Section titled “Before you start”Create a project and import the photographs you want to work on.
Choose the crop for its intended use. A square frame may suit one delivery, while another may need more space around the subject. Before you commit, inspect the subject and important details near every edge.
Choose the framing and aspect ratio
Section titled “Choose the framing and aspect ratio”- In the photo grid, select a photograph, then open it in the large photograph view.
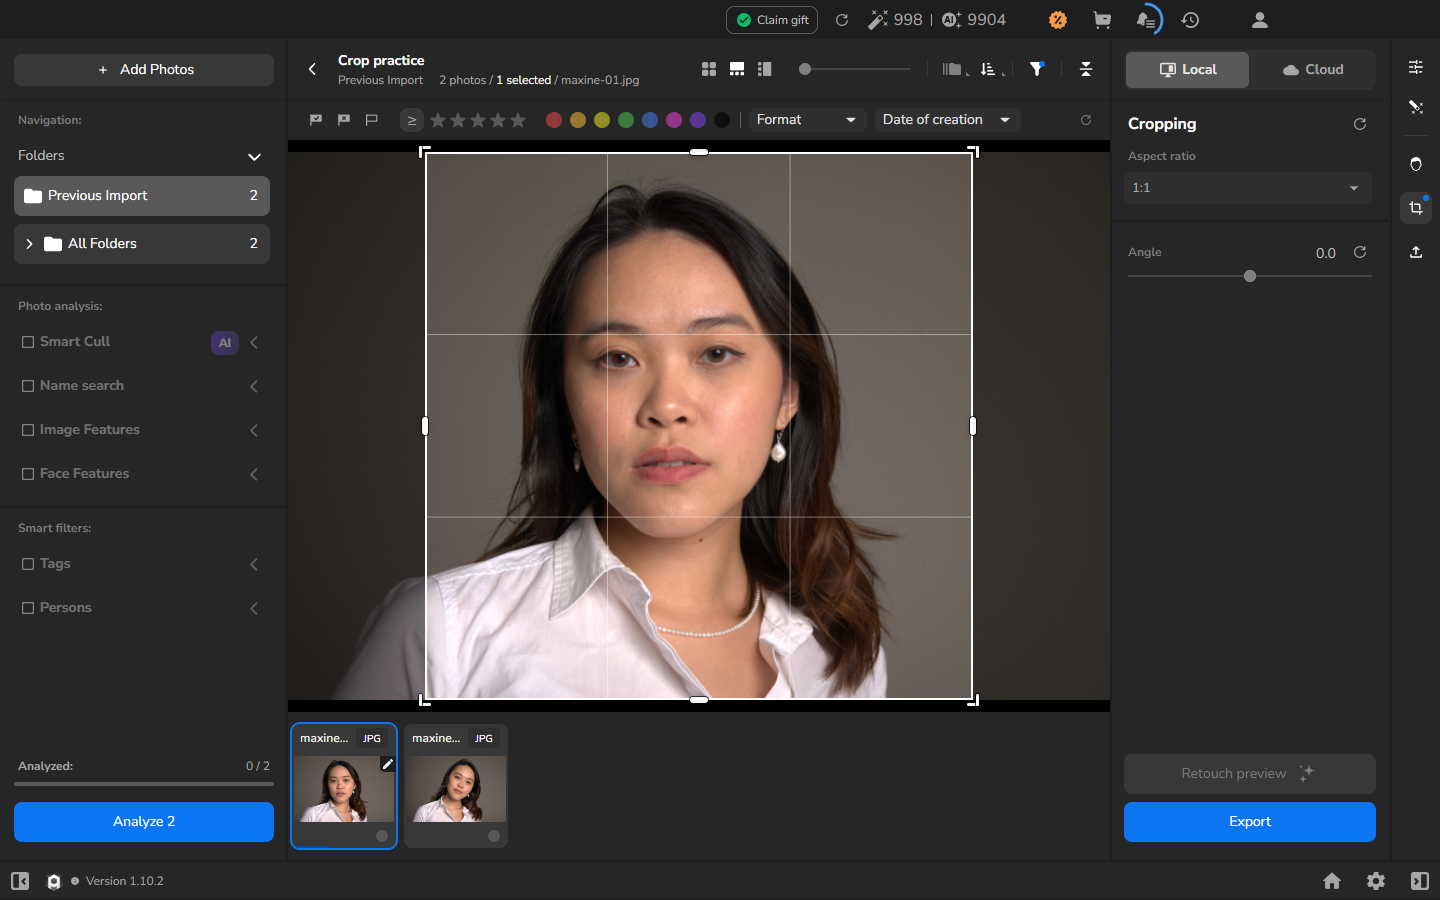
- Select the crop icon on the right toolbar. The Cropping panel opens.
- Under Aspect ratio, choose the ratio required for the photograph’s destination. Select 1:1 for a square frame.
- Use the rule-of-thirds grid to assess the composition. The area outside the crop is dimmed, so check that the subject and every detail you want to keep remain inside the bright frame.
Straighten or rotate the photograph
Section titled “Straighten or rotate the photograph”- In Angle, enter a small value and compare a strong horizontal or vertical line with the grid.
- Adjust the value until the line looks level. Change the sign if the photograph moves in the wrong direction.
- Check the subject and all four edges. A larger rotation can reveal empty areas outside the photograph or move content out of the frame.
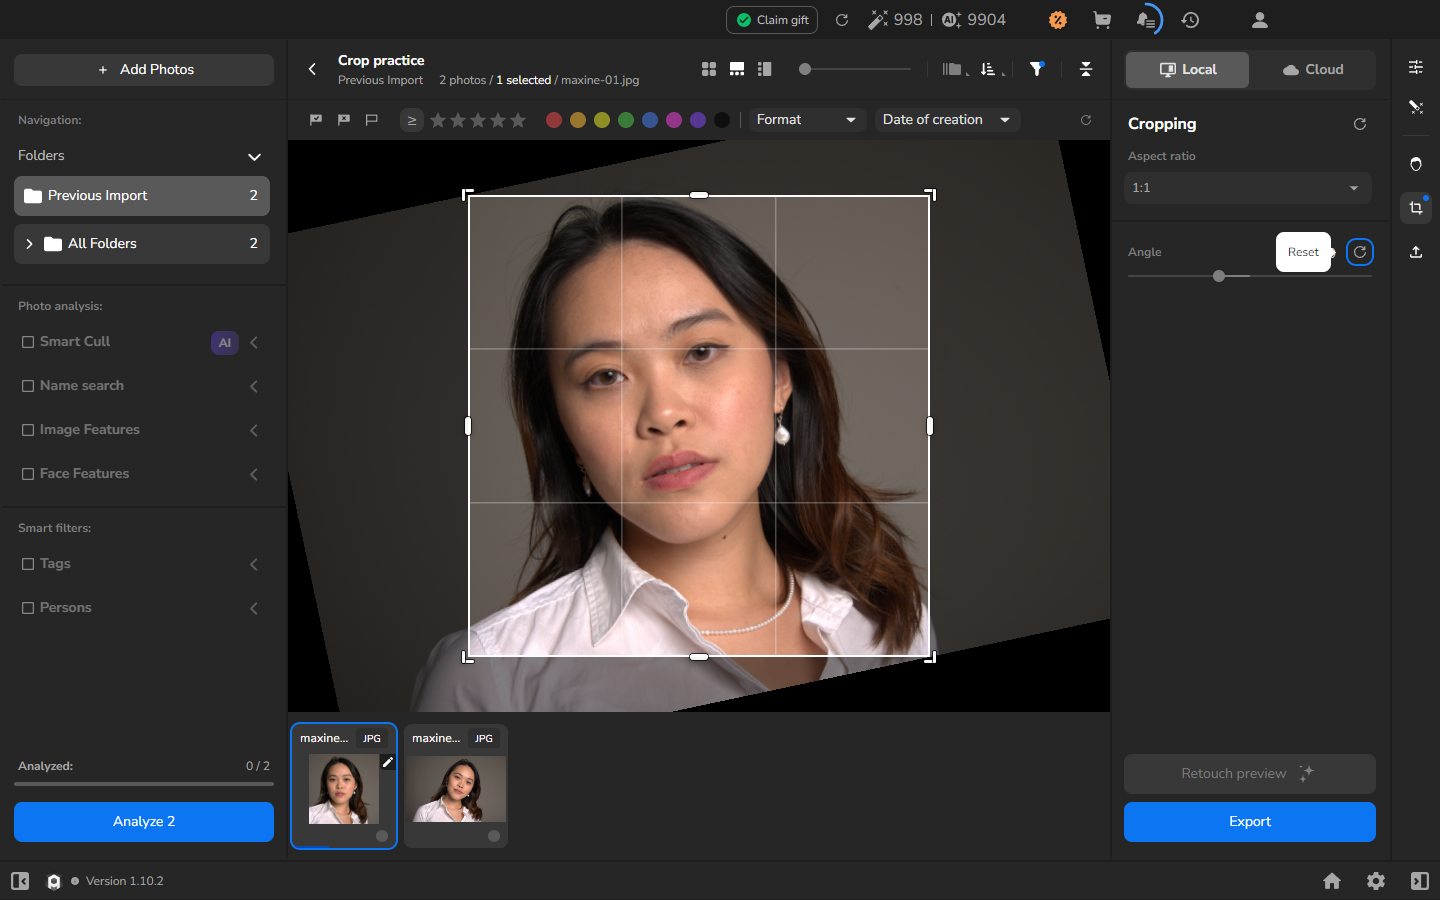
The screenshot uses -12.0 to make the rotation easy to see. For your photograph, use the smallest correction that straightens the image and keeps the composition you want.
Reset the crop
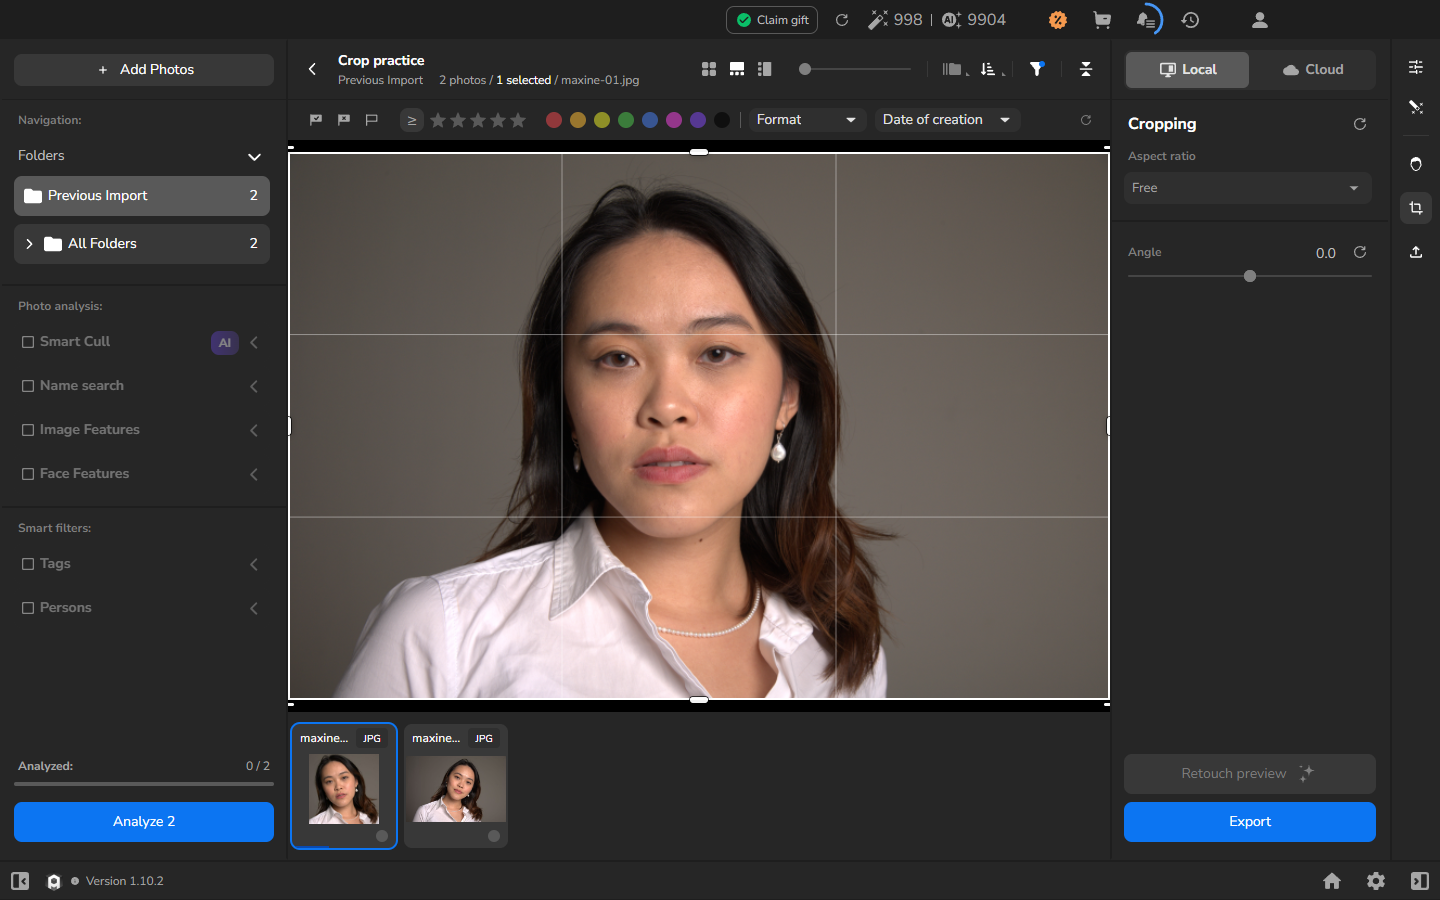
Section titled “Reset the crop”If you decide not to keep the new framing, select the circular reset icon beside Angle. Its tooltip is Reset. Reset clears both adjustments: Aspect ratio returns to Free and Angle returns to 0.0. Check the photograph before leaving the crop interface.
Export a copy without replacing the original
Section titled “Export a copy without replacing the original”- Return to the gallery and select the photograph.
- Export a full-size JPEG copy. Choose a new subfolder or add a suffix under Add to the Name, leave Resize to fit off, and wait for Export and Render History to show COMPLETED.
- Open the generated JPEG in an image viewer. Check the framing, orientation, and details near the edges before you deliver it.
Check the result
Section titled “Check the result”The crop should suit the photograph’s destination without cutting through the subject or removing details you need. Lines that should be level should also look level.
For an exported copy, review the photograph itself as well as Export and Render History. A COMPLETED status does not replace checking that the JPEG opens and has the framing you intended.
If it does not work
Section titled “If it does not work”- No crop control is available: make sure the photograph is open in the large photograph view. Zooming the preview does not crop the photograph.
- The ratio changes but the frame does not: wait for the photograph to finish loading, then select 1:1 again.
- The rotation creates empty areas or cuts into the subject: reduce the Angle value or select Reset and try a different crop.
- Reset leaves an adjustment active: select Reset again and check that Aspect ratio shows Free and Angle shows 0.0 before exporting.
- A full-size export has unexpected dimensions after reset: make sure Resize to fit is off. Export to a new file while you troubleshoot so that the original remains safe.
- The export does not complete: check the task status and error in Export and Render History. Do not use the generated file until the task shows COMPLETED and the JPEG opens normally.