Refine layered TIFF exports in Photoshop
What you will do
Section titled “What you will do”Export a processed photograph from Arams as a layered TIFF, then finish it selectively in Photoshop. You can adjust the strength of an exported retouching layer, mask the effect where it is too strong, and keep an editable working copy alongside a flattened delivery copy.
The layer stack depends on the tools used and the exported photograph. The example in this guide contains a Retouch4me Heal layer above Background. It does not mean that every Arams plugin exports its own layer or mask.
Before you start
Section titled “Before you start”- Finish processing the photograph in Arams before you export it.
- Make sure Photoshop can open and save layered TIFF files.
- Choose a folder where you can keep three distinct files: the TIFF exported by Arams, an editable Photoshop working copy, and the final delivery copy. Keep your original photograph unchanged.
Process a photograph in Arams
Section titled “Process a photograph in Arams”- Import your photographs and apply the retouching tools that suit the job.
- Review the processed photograph at a useful magnification. Pay particular attention to areas that may need a local adjustment in Photoshop, such as a small region where an effect looks too strong.
- Select the photograph you want to hand off and open the export workspace.
- Select Local processing and wait for processing to finish.
Export a layered TIFF
Section titled “Export a layered TIFF”- Open Export settings and choose the selected photograph.
- Select a destination folder and a filename that will distinguish this export from the original.
- Under Format, select TIFF (Layers).
- Decide whether the photograph should keep its original dimensions. For a full-resolution Photoshop handoff, leave Resize to fit off.
- Review the destination, selected photograph, filename rule, and format before starting the export.
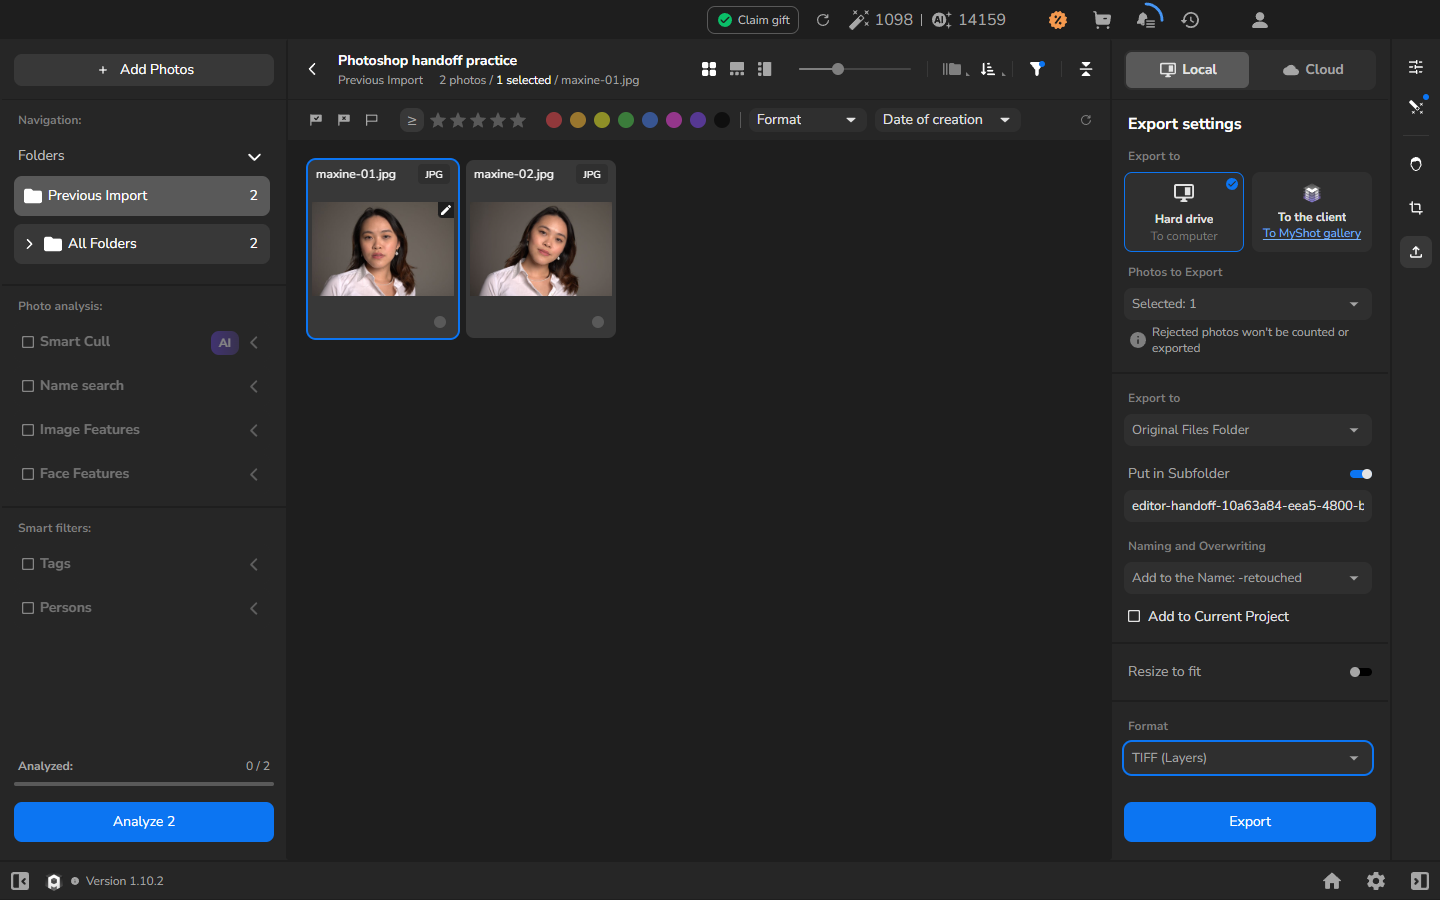
- Start the export and wait until Export and Render History reports COMPLETED at 100%.
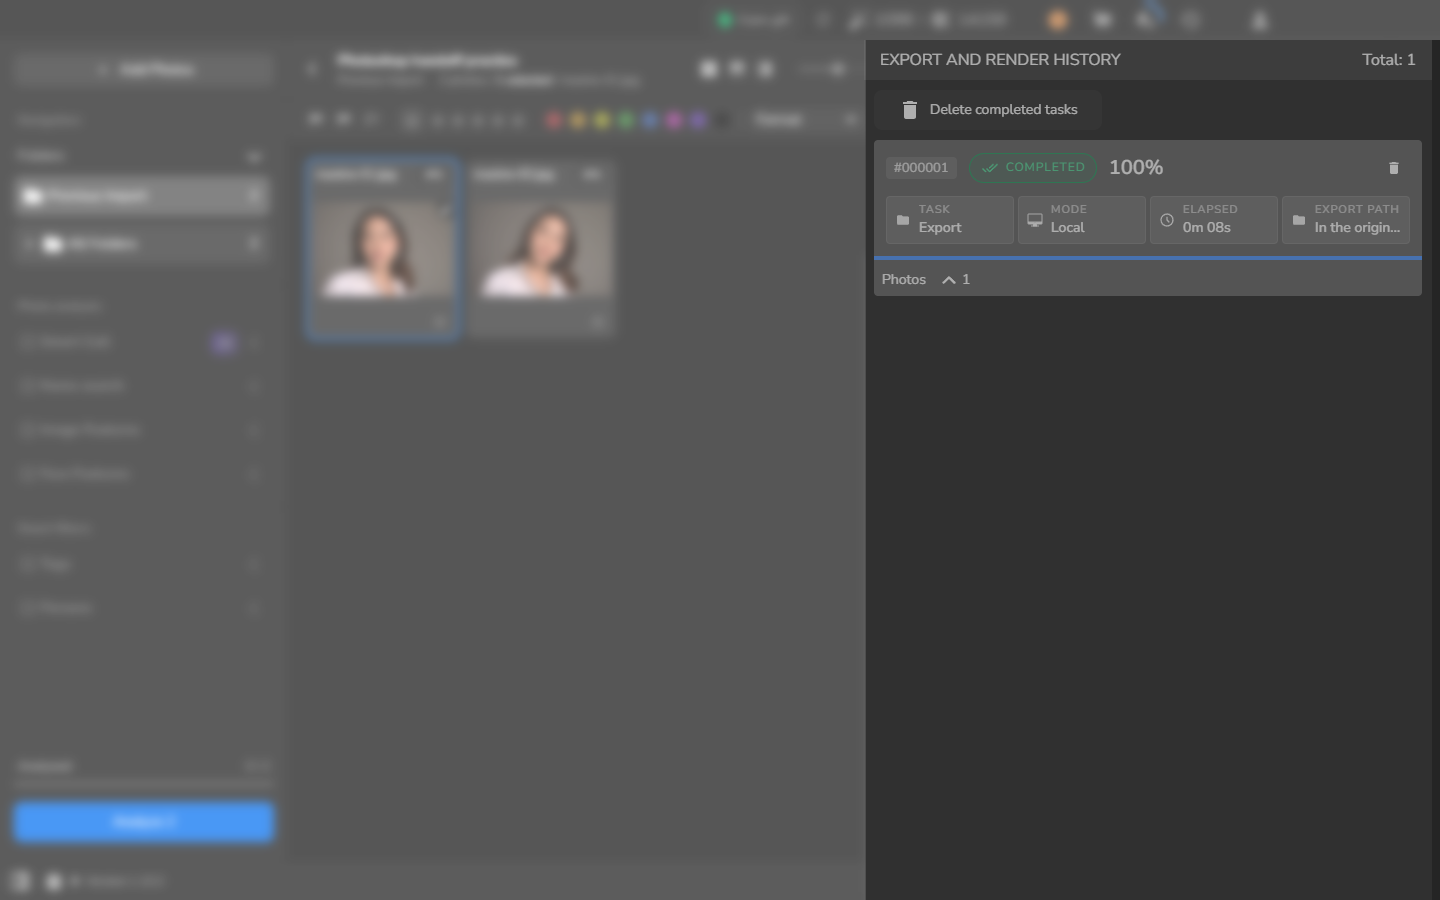
Open the exported TIFF in Photoshop before relying on it as an editable master. If your Arams version does not offer TIFF (Layers), an ordinary flattened TIFF cannot provide this workflow.
Inspect the layer stack in Photoshop
Section titled “Inspect the layer stack in Photoshop”- Open the exported TIFF in Photoshop and display the Layers panel.
- Identify the background and any retouching layers that are actually present. The example shows Retouch4me Heal above a locked Background layer; your stack may differ.
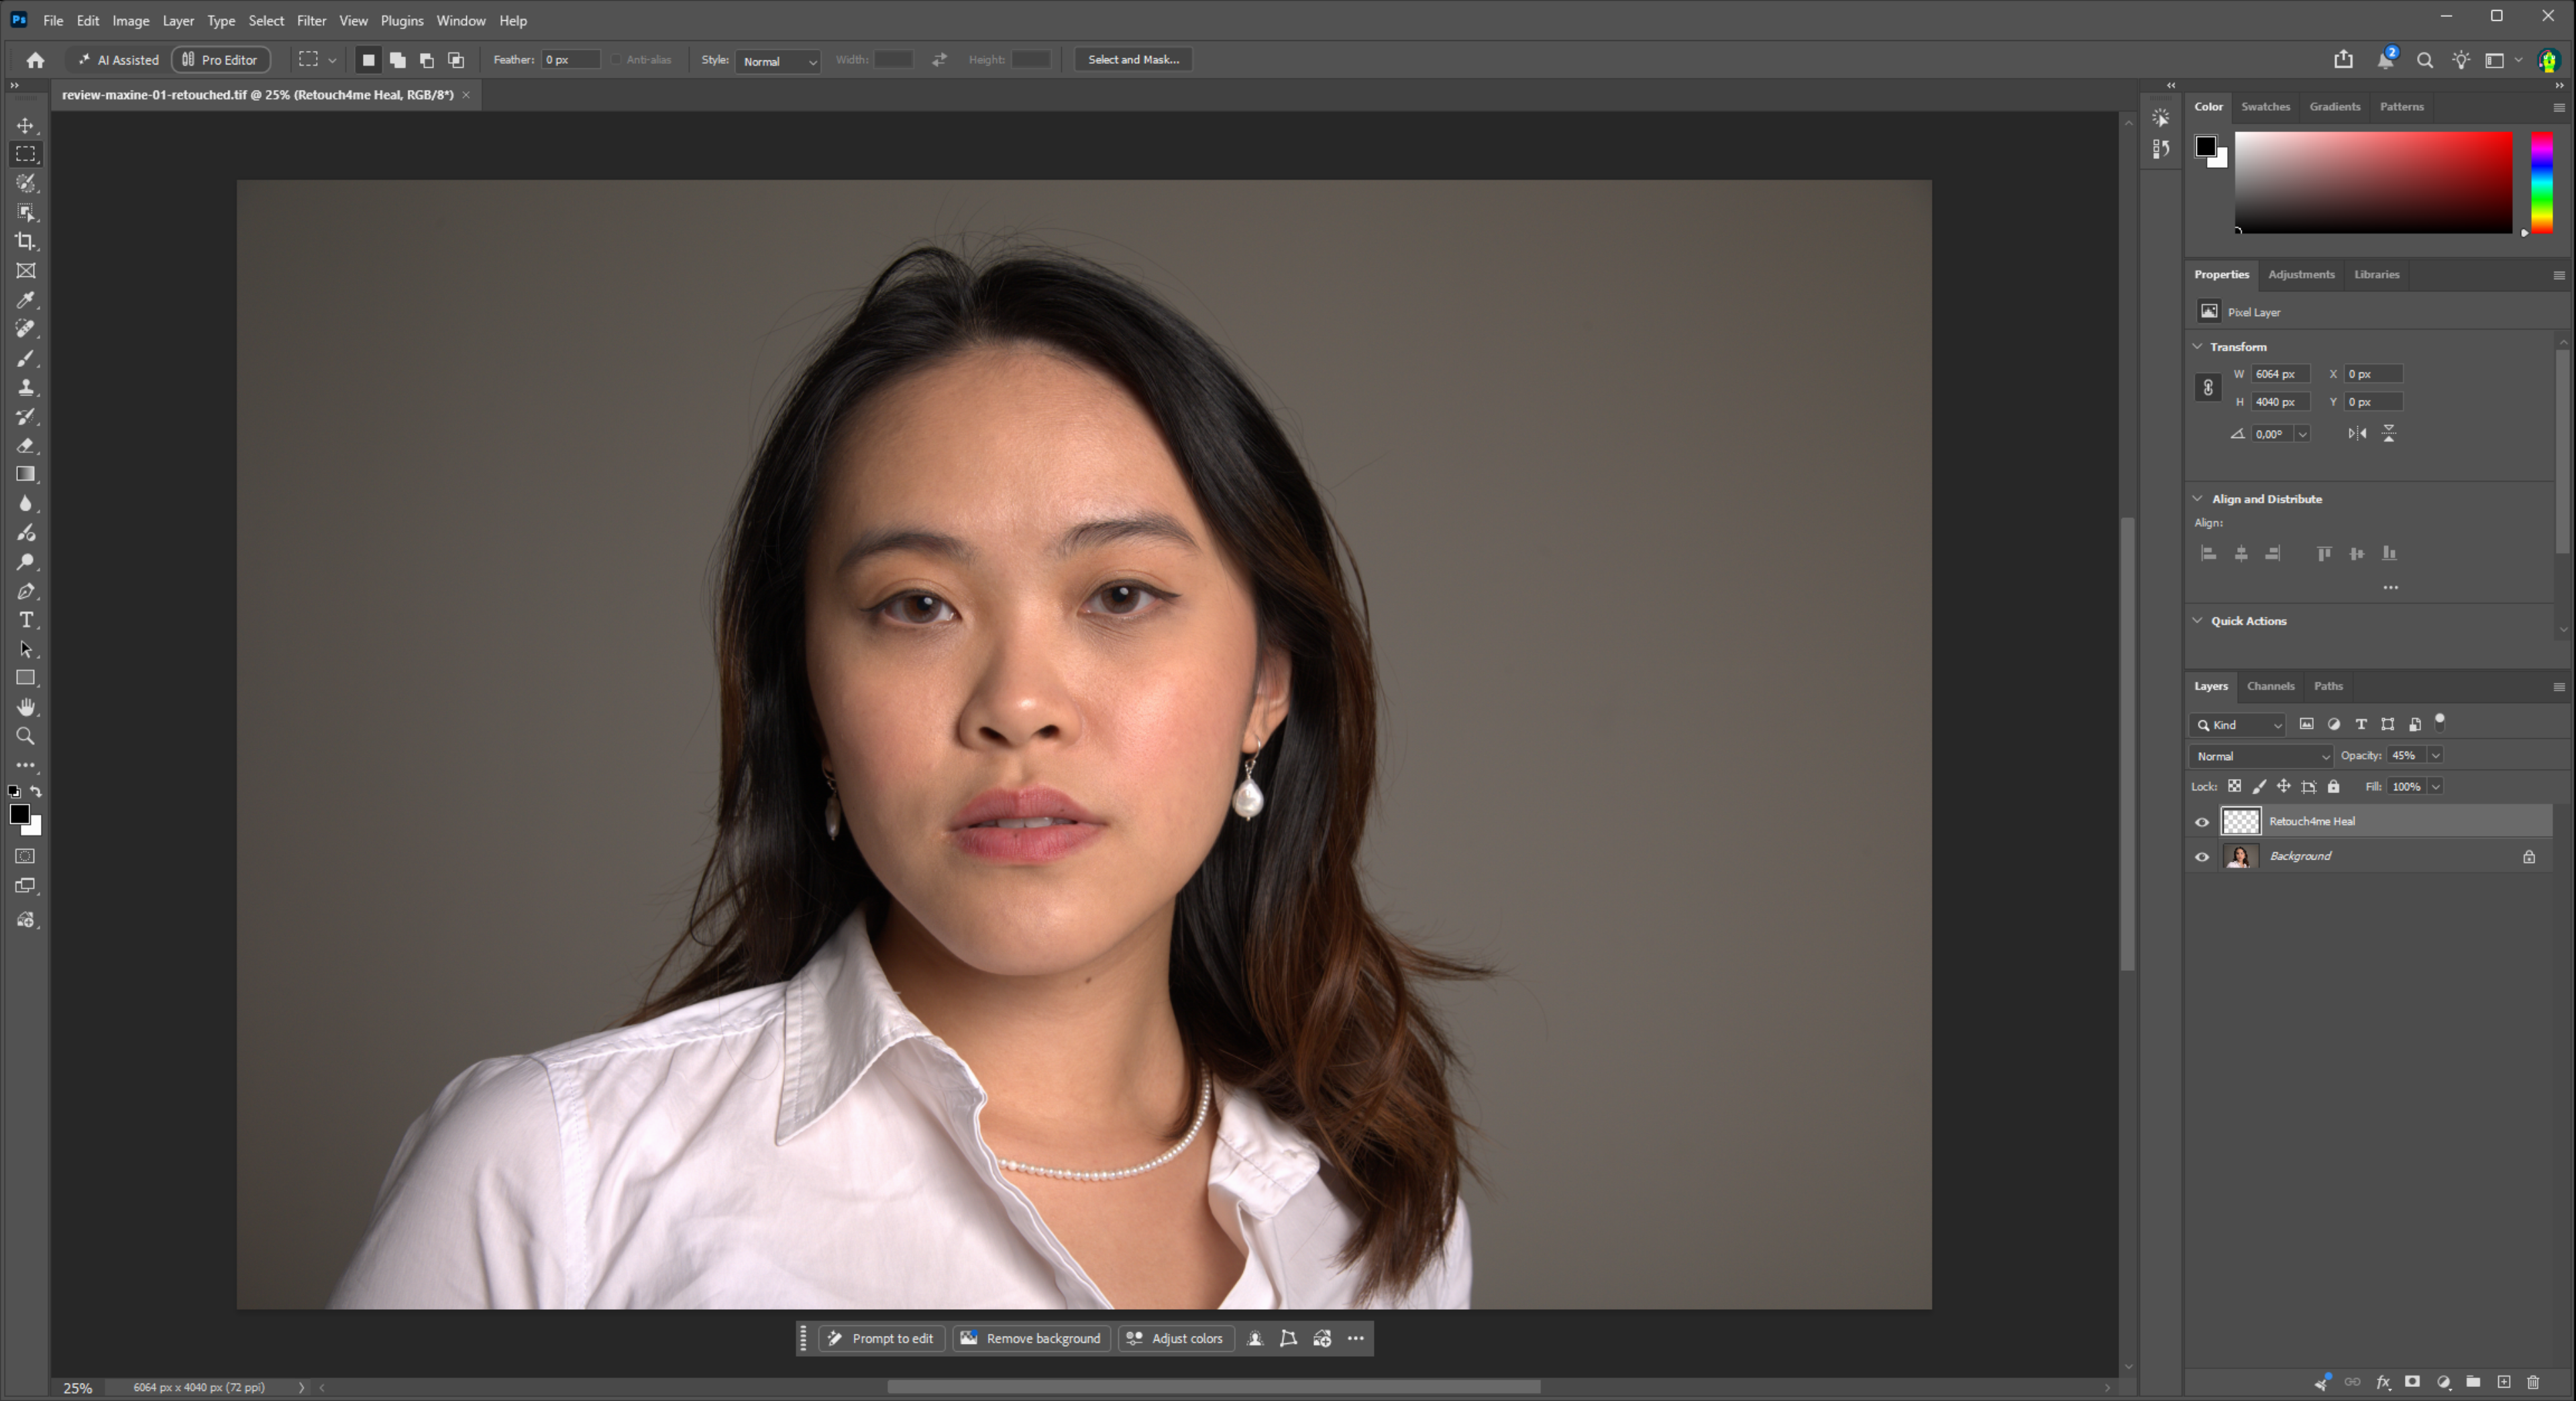
- Use the eye icon to hide one retouching layer, then show it again. Compare important details at a useful magnification so you understand what that layer contributes before changing it.
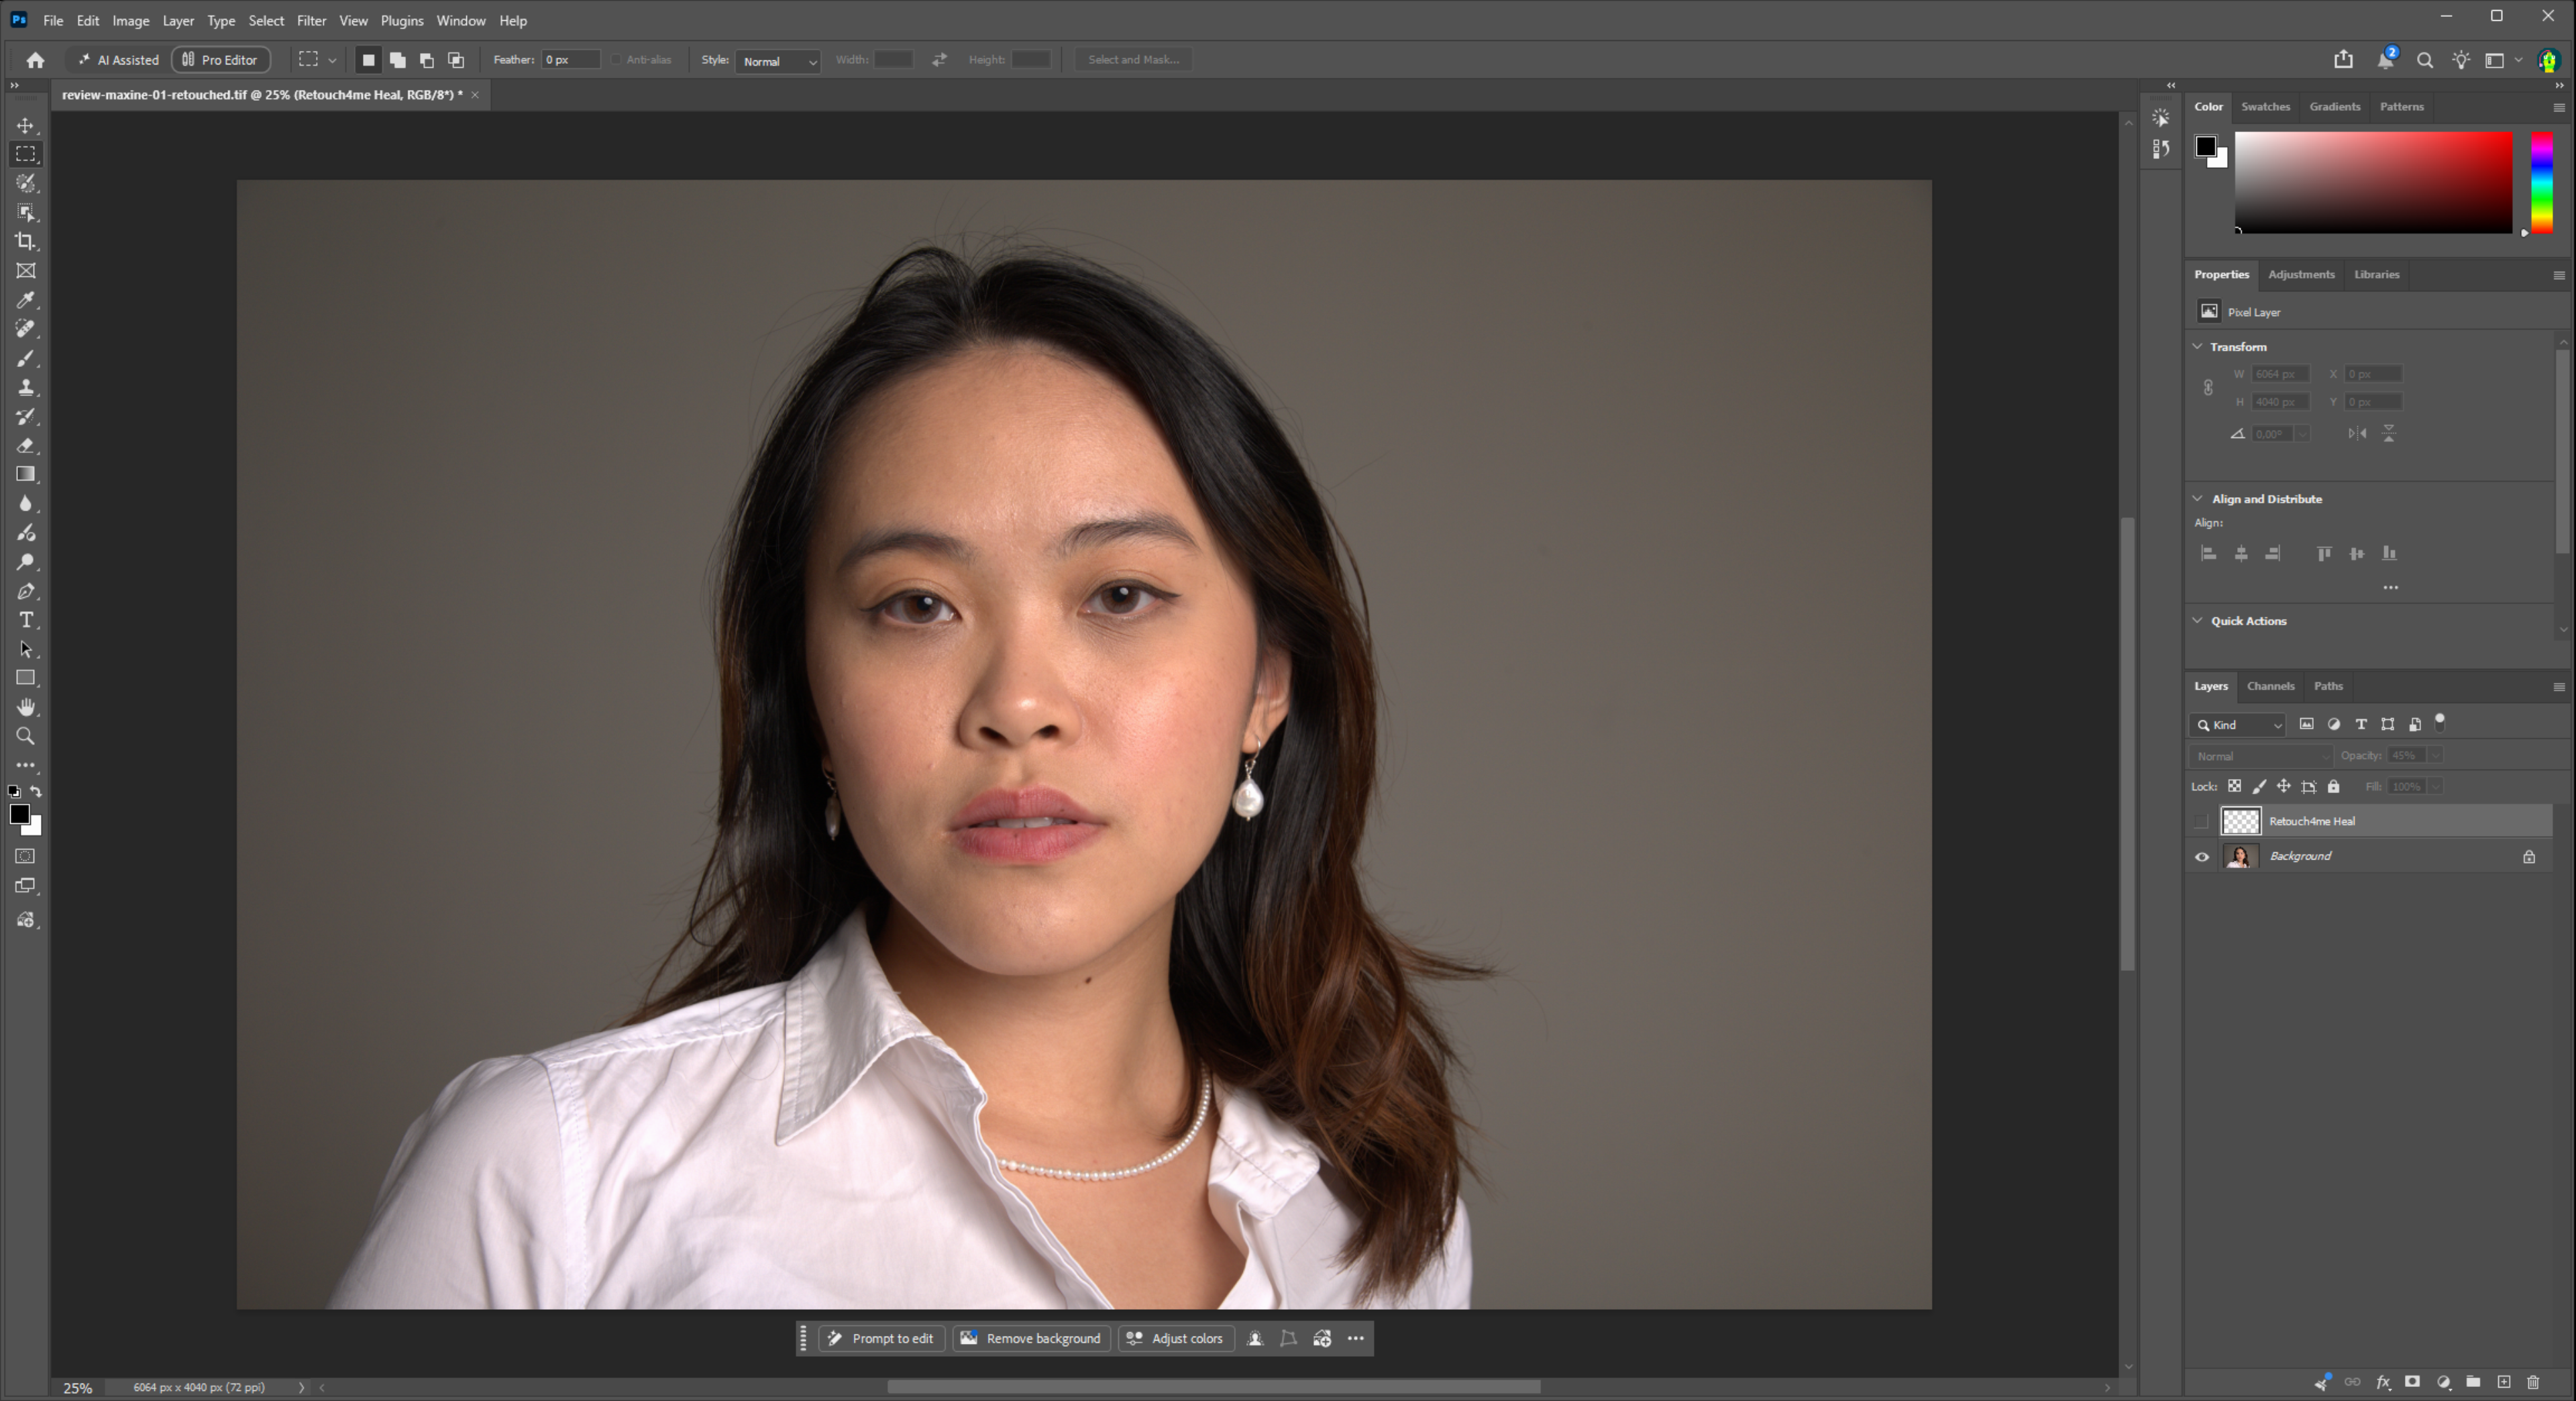
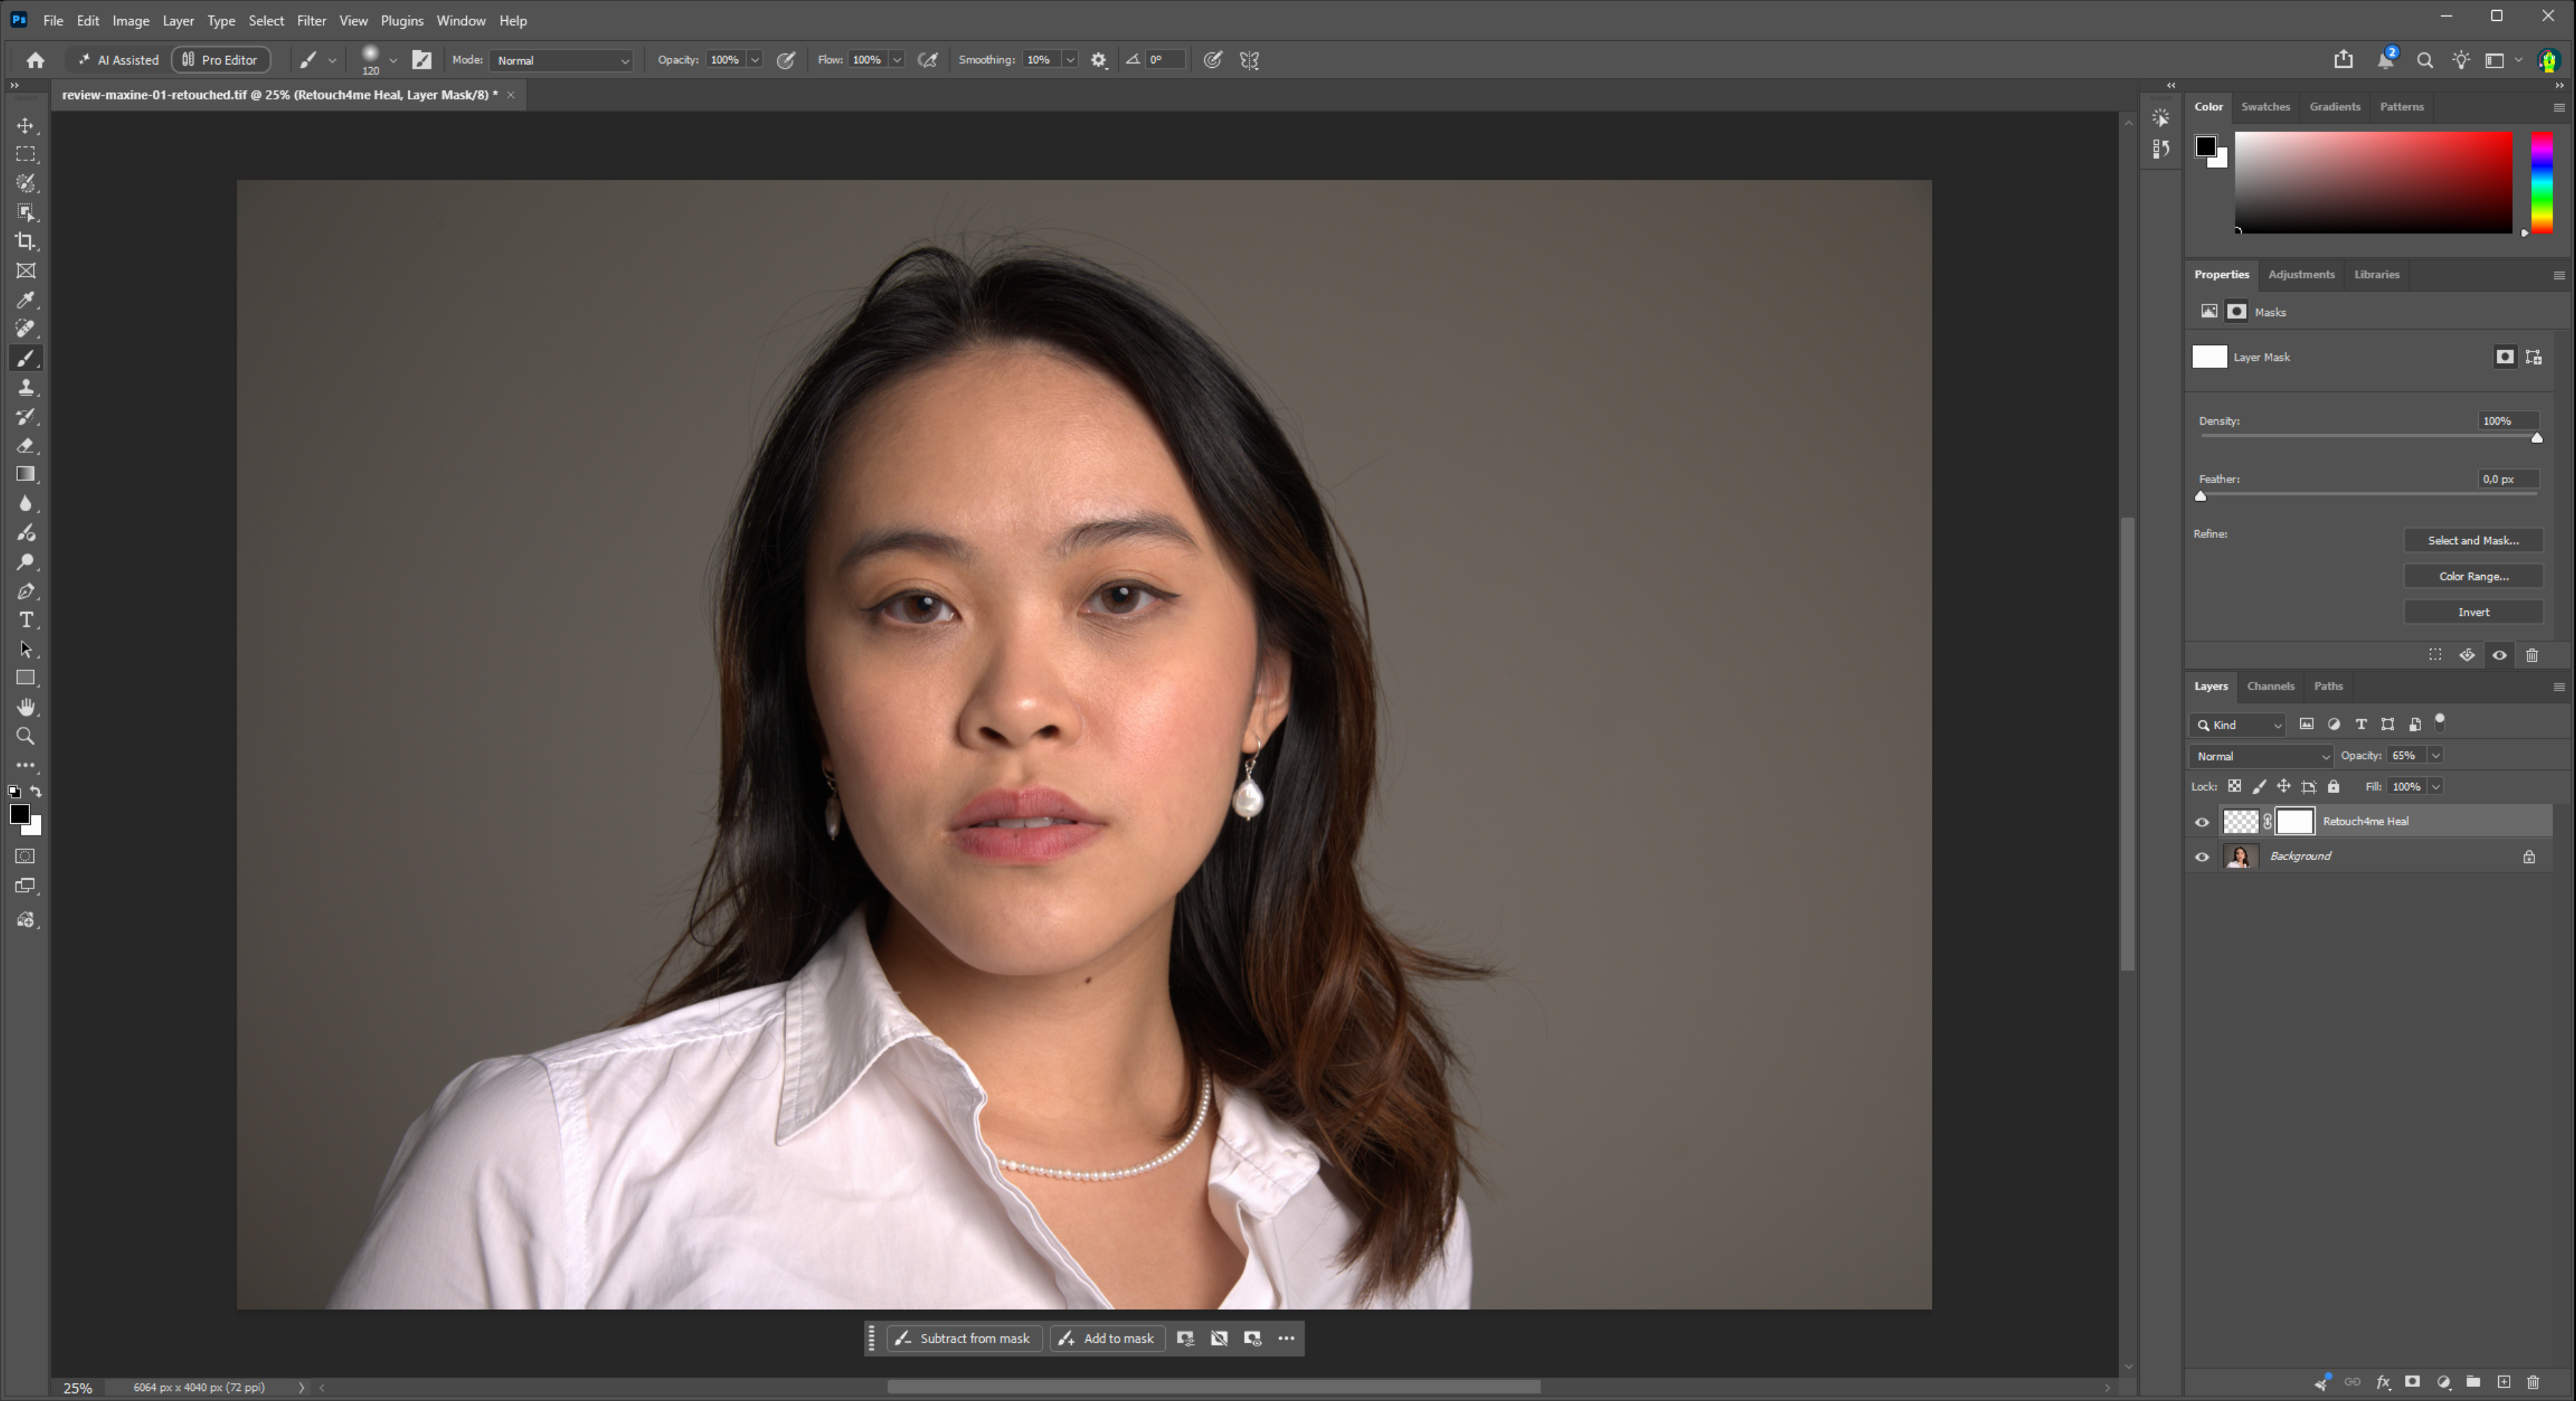
Choose the opacity by looking at your photograph; the screenshot shows one possible setting.
Make a selective refinement
Section titled “Make a selective refinement”- Select the retouching layer you want to refine.
- Adjust its opacity while comparing the result with the layer hidden and with its original setting. Lower opacity softens the effect across the entire photograph; higher opacity strengthens it.
- If only part of the photograph needs less of the effect, add a white layer mask in Photoshop. Do not assume that Arams supplied a mask: the mask in this example was added manually after export.
- Select a soft black brush and paint on the mask over the area where you want to reduce the effect. Choose the brush size and hardness for the subject and edge you are working around.
- Check the transition and nearby detail. If the masked area develops a visible edge or loses useful detail, undo the stroke and try a softer brush, lower brush opacity, or a smaller adjustment.
Save and reopen the layered working copy
Section titled “Save and reopen the layered working copy”- Use Save As to create a separate layered TIFF working copy. Keep the TIFF exported by Arams as an unchanged fallback.
- Close the working copy and reopen it in Photoshop.
- Check that the layer order, visibility, opacity, and manual mask are still editable and match what you saved.
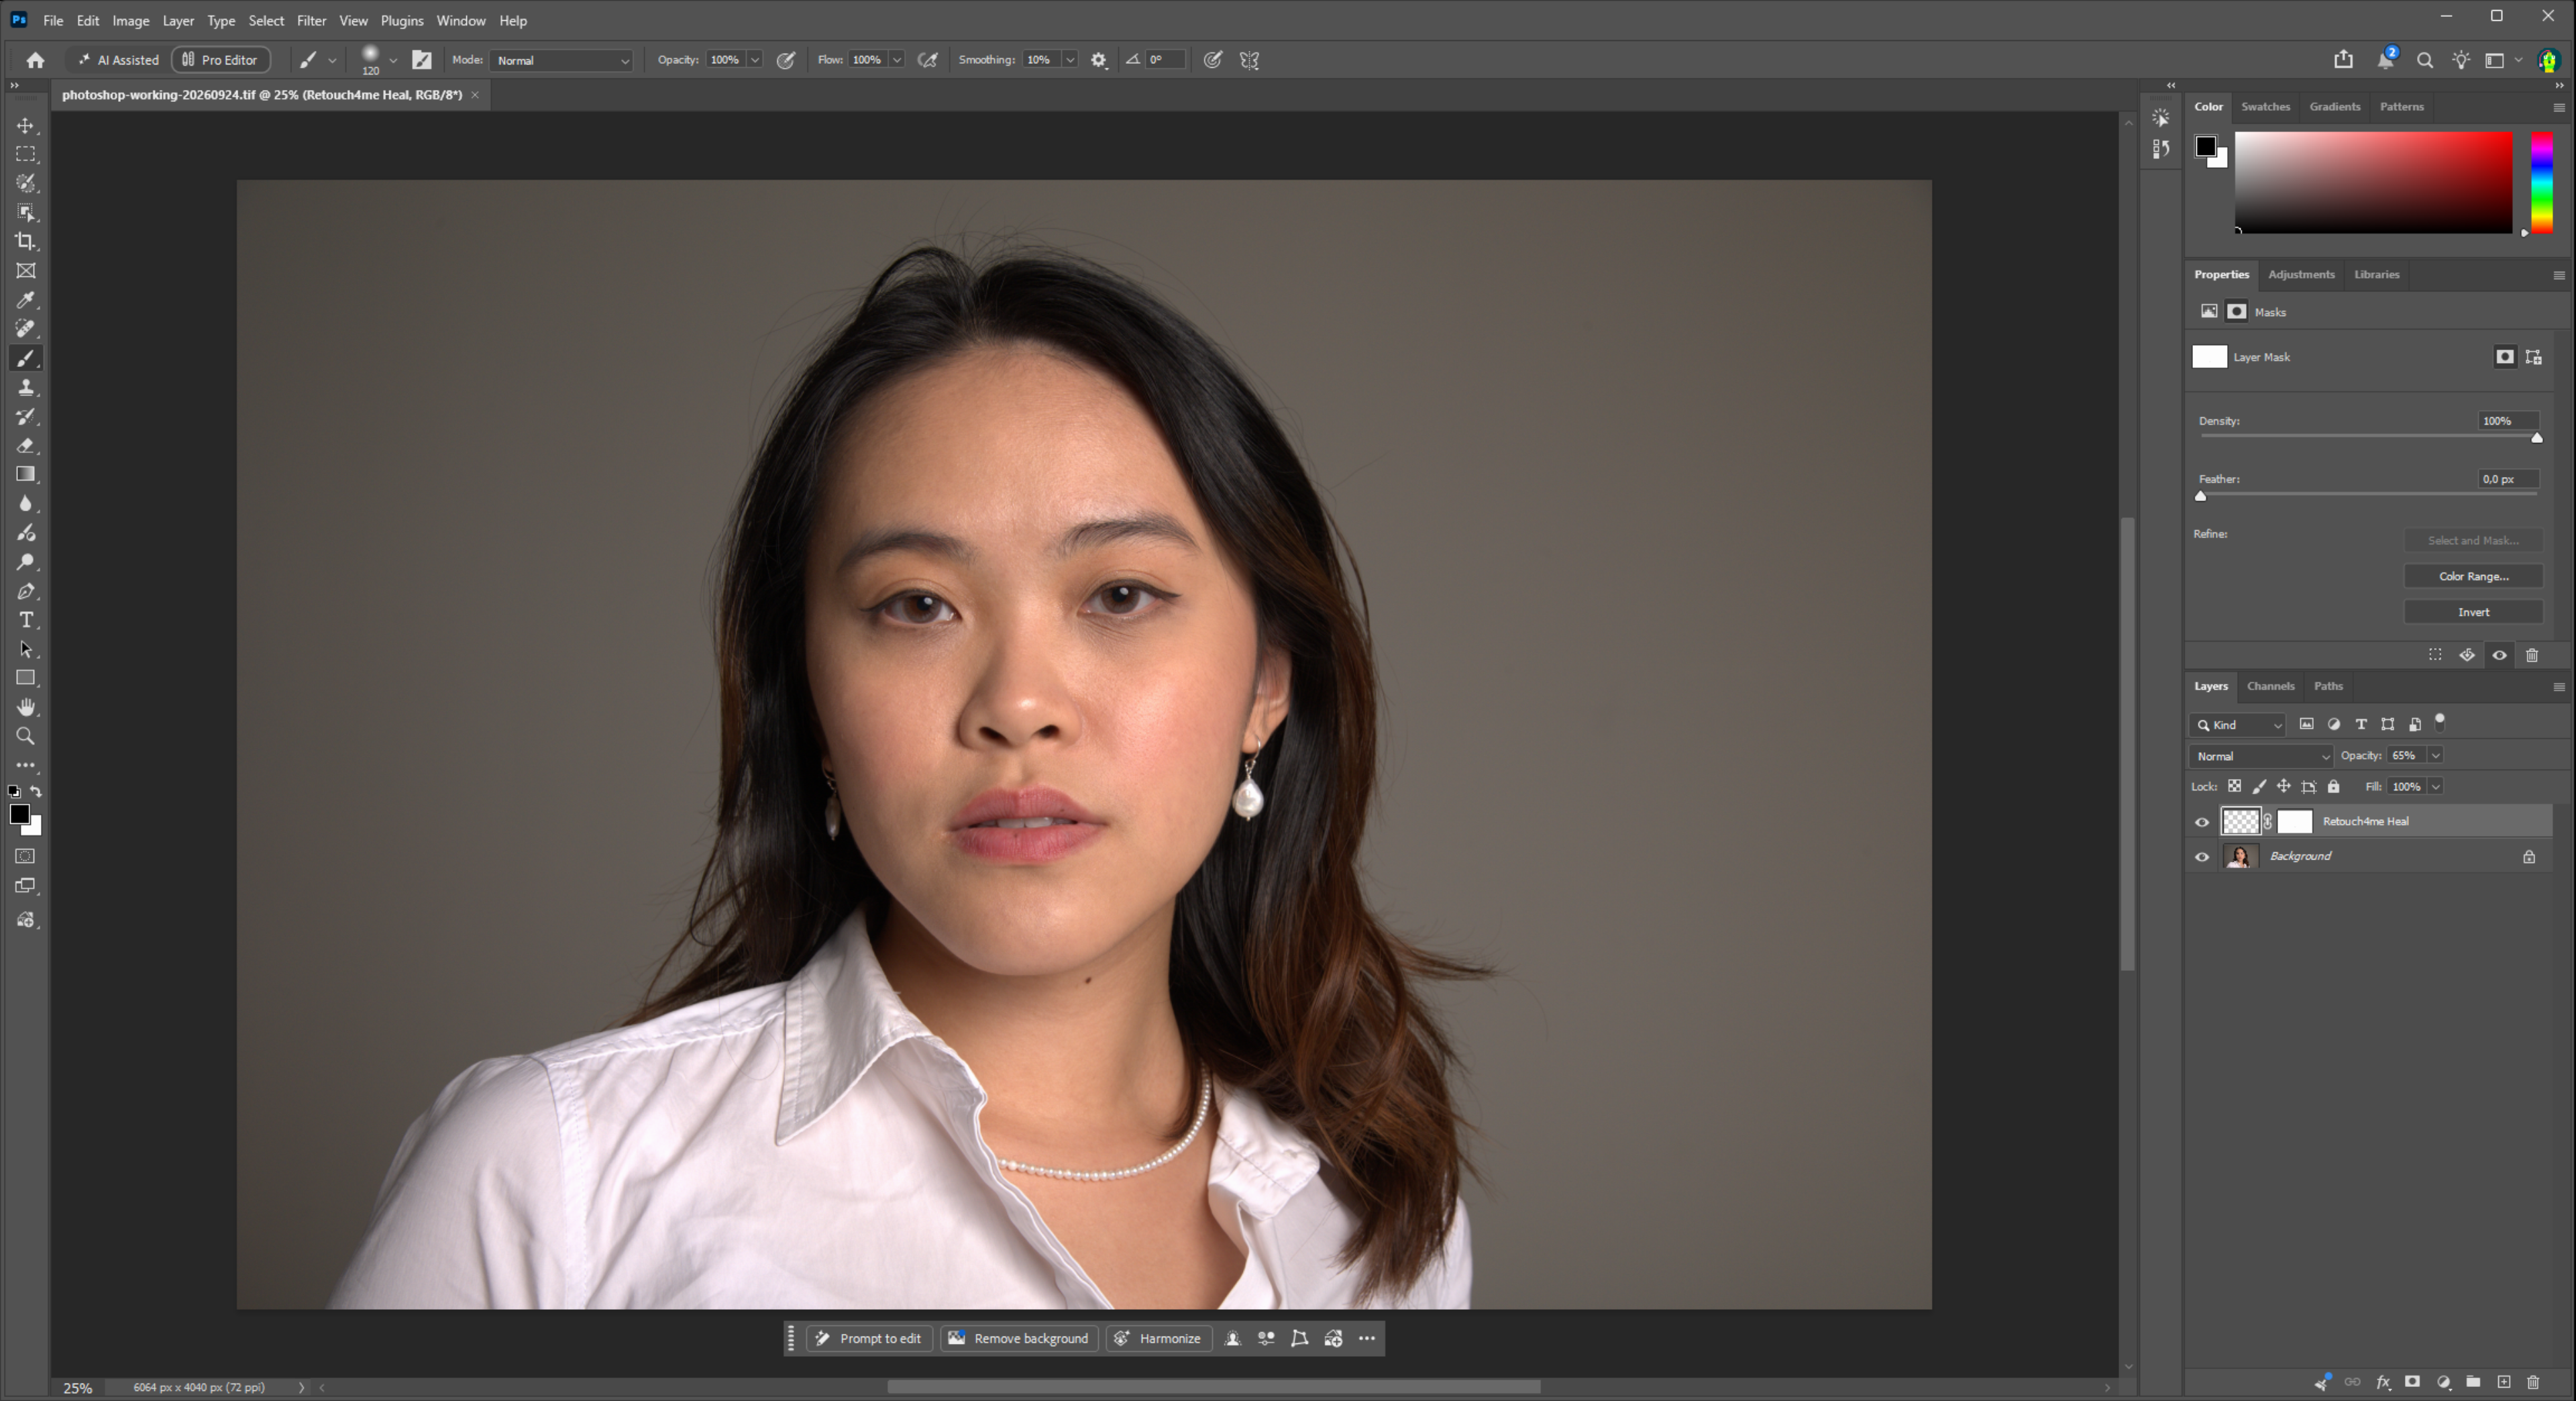
Reopening the file is a quick safeguard before you invest more time in finishing or create a flattened copy.
Create a flattened delivery copy
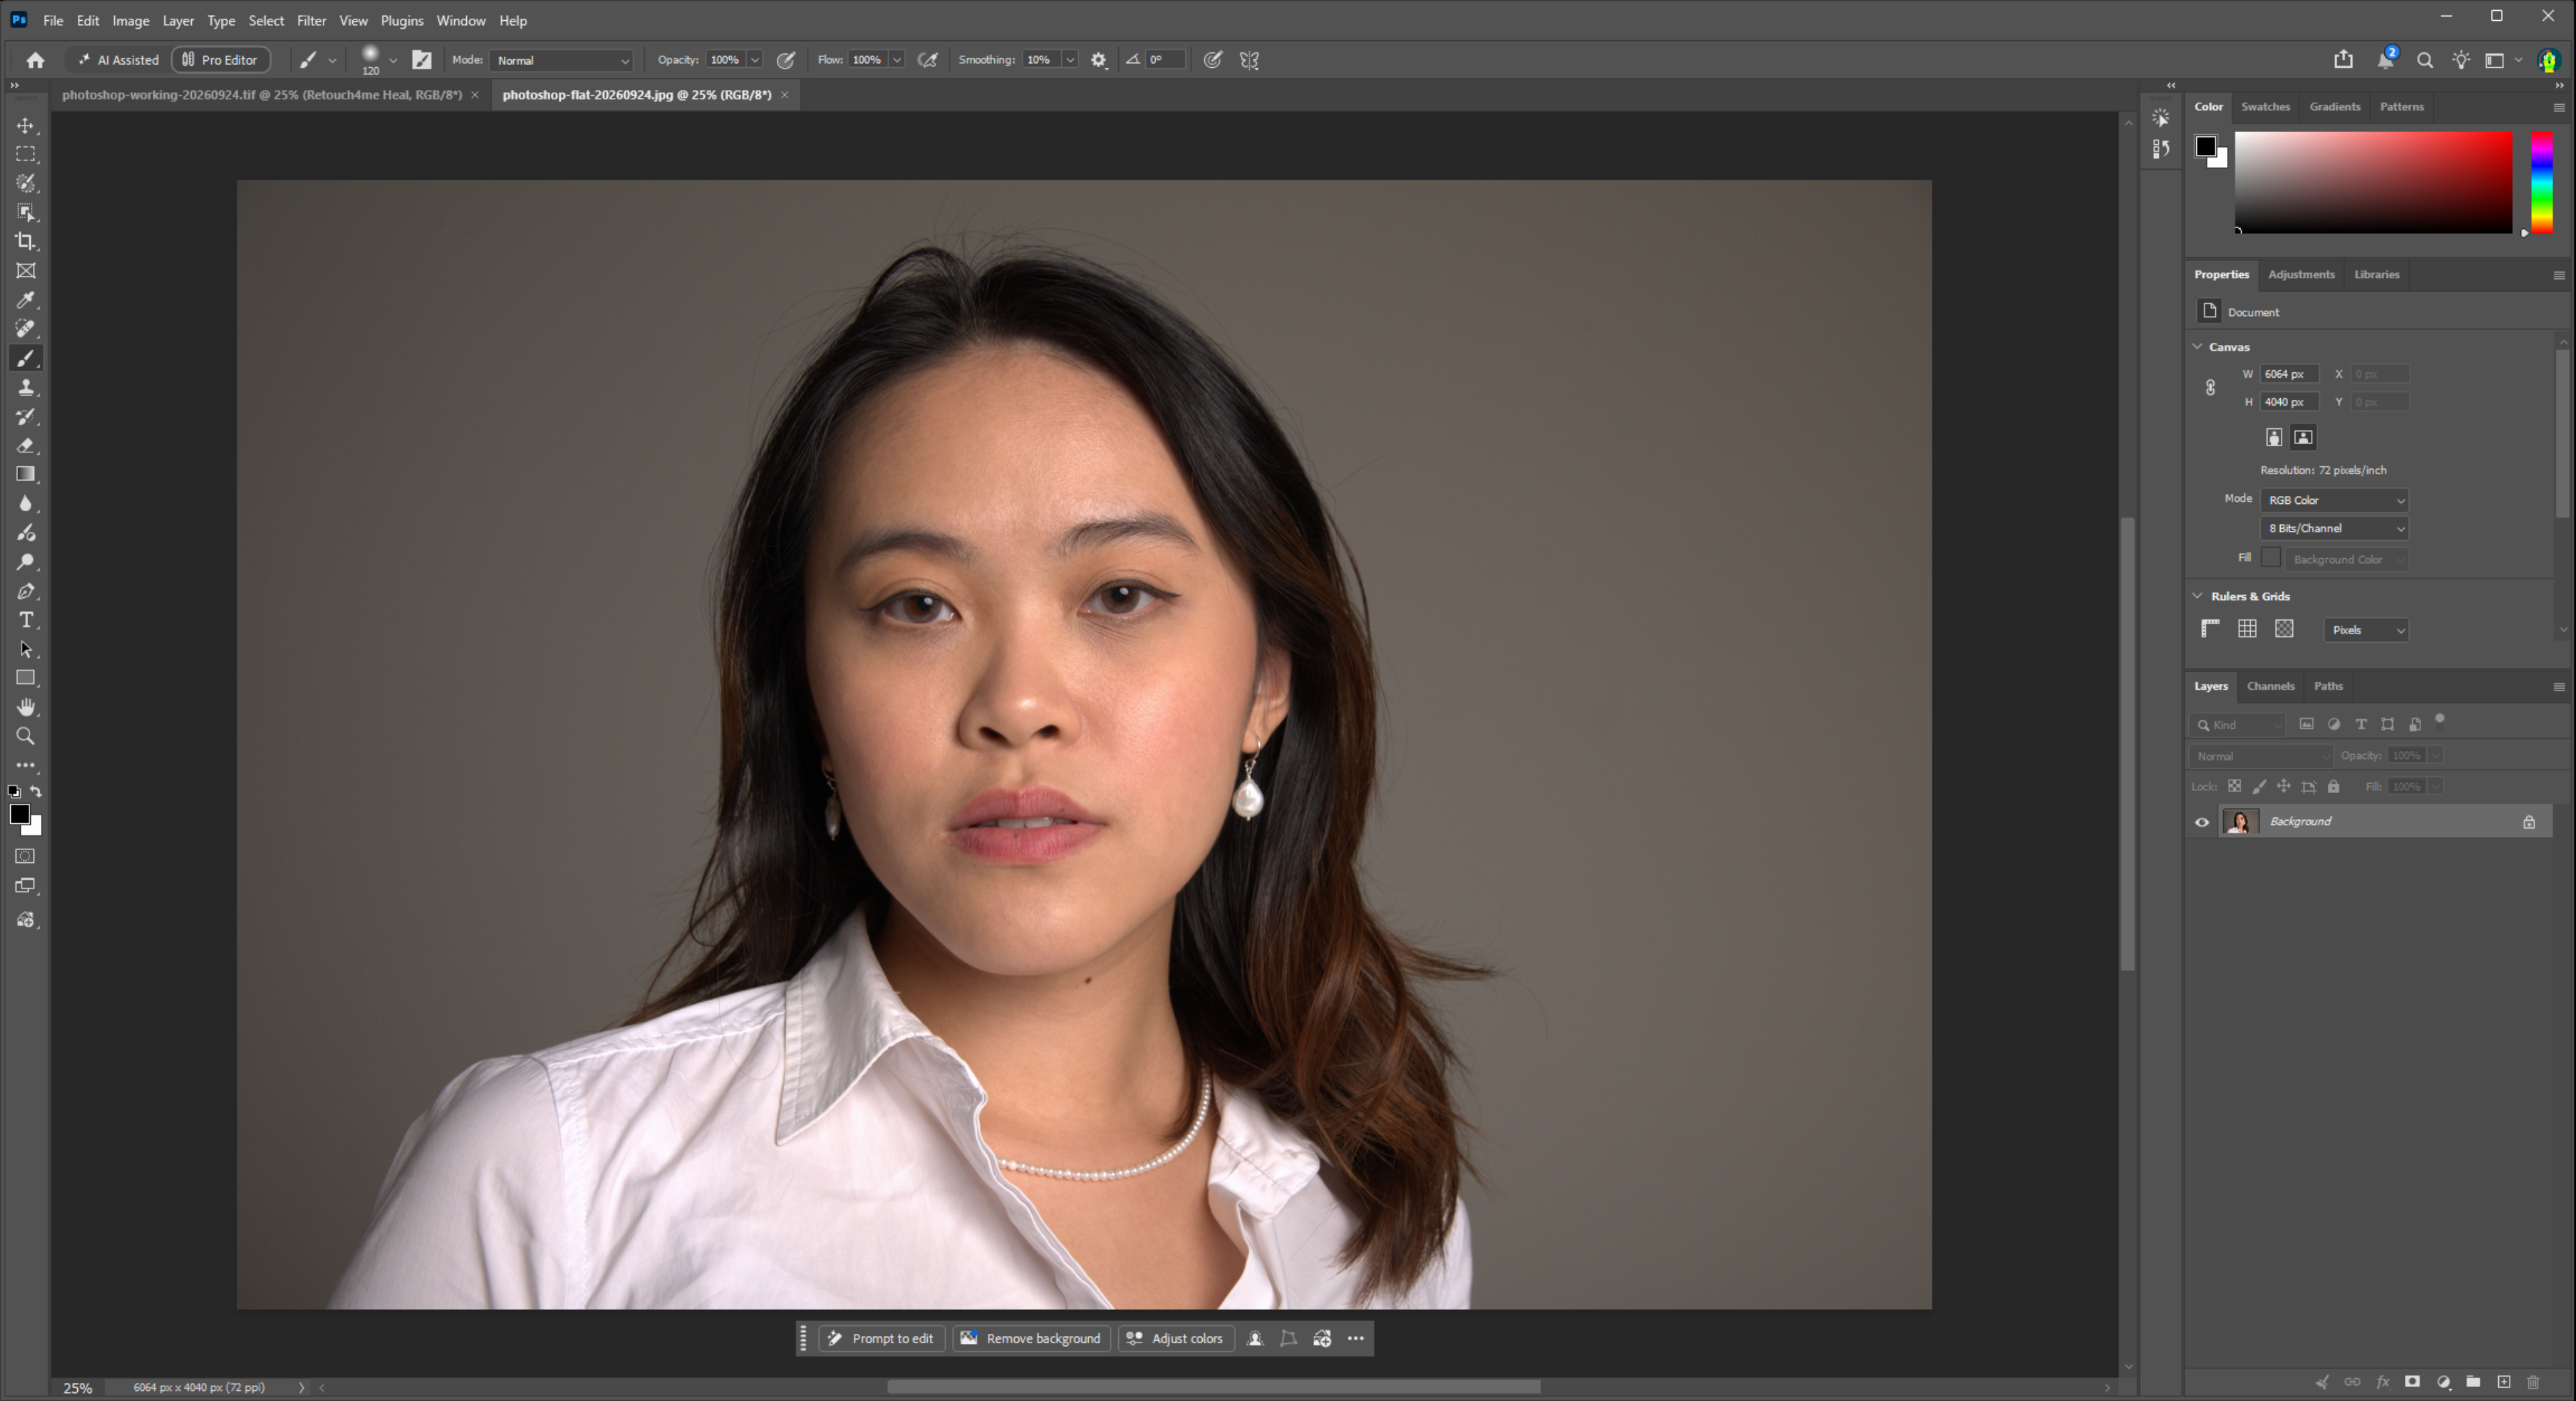
Section titled “Create a flattened delivery copy”- With the layered working copy open, use Save a Copy to create the format required by your client, lab, or delivery workflow. The illustrated example uses JPEG; choose quality and color-profile options appropriate to your destination.
- Give the delivery copy a distinct name. Do not save it over the layered TIFF.
- Open the delivery copy and inspect the final appearance, dimensions, and color before sending it.
- Return to the working TIFF and make sure its editable layers are still present.
Check the result
Section titled “Check the result”You should now have:
- the original photograph, unchanged;
- the TIFF exported by Arams, kept as a fallback;
- a Photoshop working TIFF whose layers, opacity adjustments, and manual masks remain editable;
- a separate flattened delivery copy with the intended appearance, dimensions, and color.
The names and number of retouching layers can vary. What matters is that you inspect the actual TIFF, preserve an editable copy, and judge the visible result on your photograph.
If the result does not match
Section titled “If the result does not match”- There is no layered-TIFF option in Arams: do not substitute an ordinary TIFF and expect editable retouching layers. Use another handoff method or revisit this workflow with a version that offers TIFF (Layers).
- The TIFF opens as one layer: confirm that you selected TIFF (Layers) and opened the exported file rather than a flattened delivery copy. Do not overwrite the Arams export while troubleshooting.
- A retouching layer has no mask: add a mask manually in Photoshop if you need a local adjustment. Not every exported layer is expected to include one.
- The working copy reopens flattened: return to the unchanged Arams TIFF and repeat Save As, making sure Photoshop preserves layers in the working format before continuing.
- The delivery copy replaced the layered file: recover the editable version from the unchanged Arams TIFF or another saved working copy. Use distinct filenames and Save a Copy for the next delivery export.