Inspect detected faces at useful resolution
Use the Details and Faces panel to review the faces Arams detects in your photographs. You can switch from compact face tiles to a larger preview when you need a closer look at eyes, skin, or expression, then move through the rest of the shoot.
Before you start
Section titled “Before you start”Choose photographs with clearly visible faces. Automatic face search must be enabled before you import them. Face search uploads selected images to Retouch4me servers for cloud processing, so use photographs you are authorized to send.
Enable automatic face search and import your photographs
Section titled “Enable automatic face search and import your photographs”- From the start screen, open Settings.
- In General, turn on Automatic face search if it is off.
- If Arams displays a consent dialog, read it and click I Agree to allow the upload and cloud processing.
- Return to the start screen using the back arrow.
- Create a project, then import your photographs by dragging their files into the empty project.
- Wait for the thumbnails and filenames to appear. Face search runs automatically; you do not need to use Analyze or Retouch preview to inspect detected faces.
Find the detected face
Section titled “Find the detected face”- Click a photograph once to select it.
- Click the face-outline icon in the narrow toolbar at the far right. The Details and Faces panel opens.
- Wait for the Faces heading to show the number of detected faces.
- If the face preview is collapsed, click the Faces heading to expand it.
- Click the four-square icon beside the heading to use the tiled face view.
Each detected face appears as a crop in the right panel. Use the minus button below Show frames to make the tiles smaller when you want to see more faces at once.
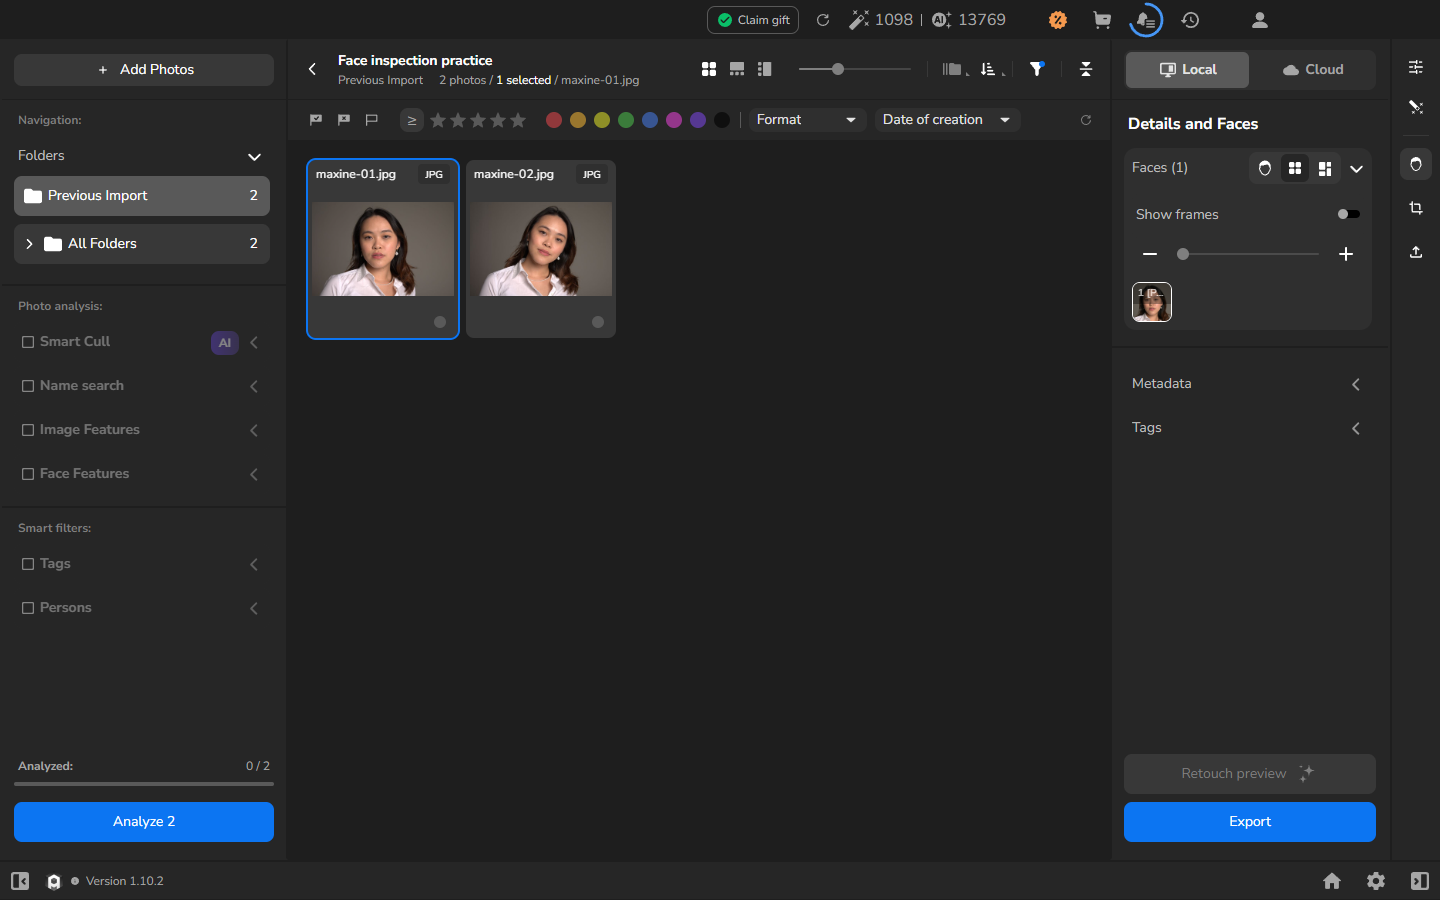
Switch to the larger face view
Section titled “Switch to the larger face view”- Click the split-rectangle icon immediately to the right of the four-square icon in the Faces header.
- Inspect the enlarged face in the right panel. Use the selected card and filename to keep track of which photograph you are viewing.
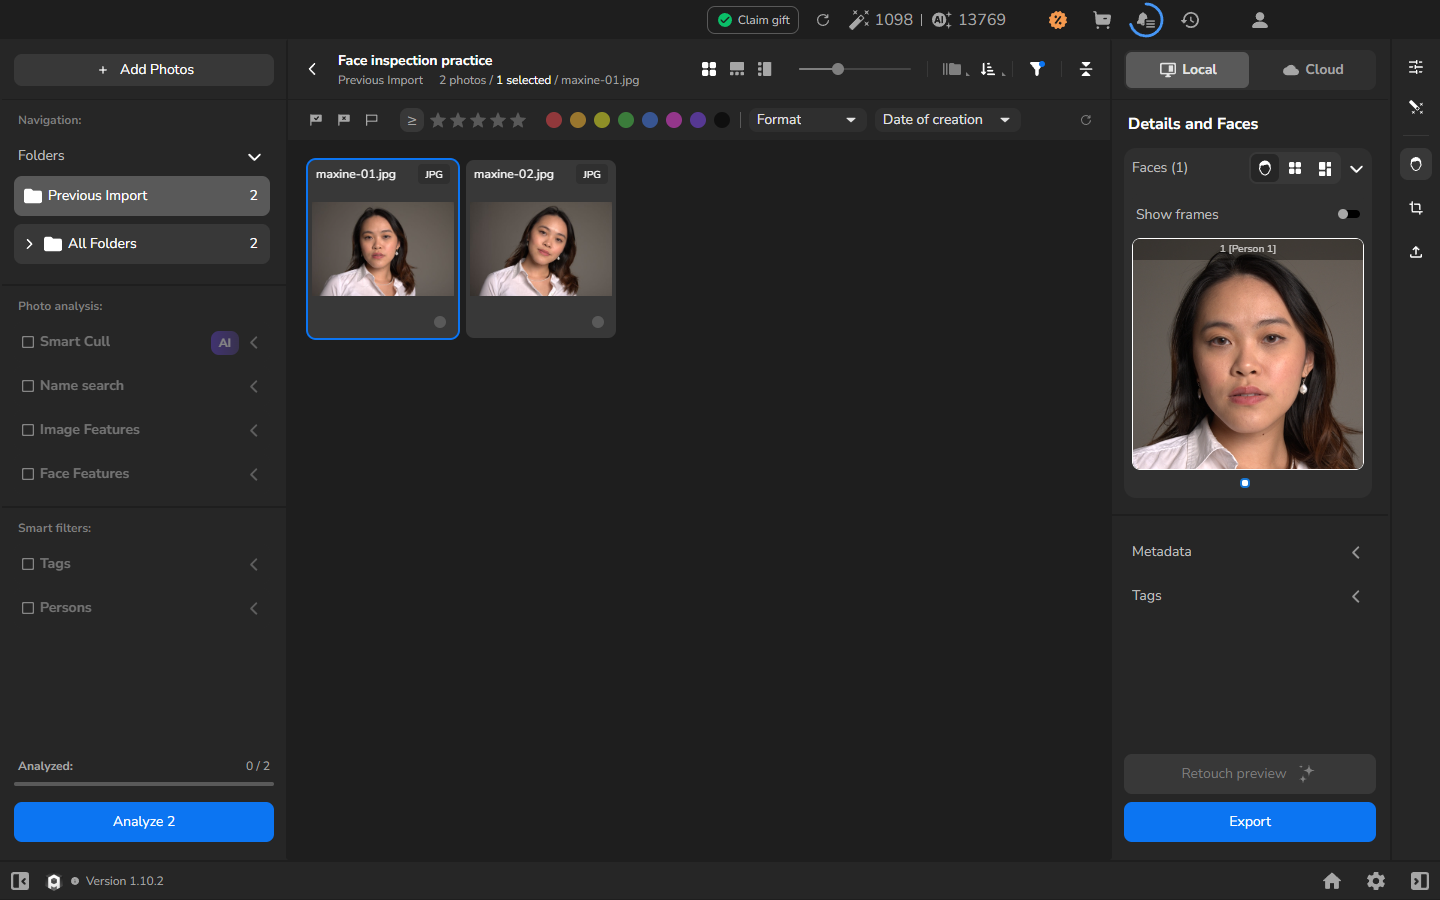
The larger preview makes the eyes, skin, and expression easier to see, but it is not a one-image-pixel-to-one-screen-pixel view of the original photograph. For a closer inspection of the photograph itself, use the photo viewer and zoom.
Inspect the next photograph
Section titled “Inspect the next photograph”- Click the four-square icon in the Faces header to return to the tiled view.
- Select another photograph in the photo grid.
- Wait for its detected faces to appear. Arams updates the filename and face crops to match the newly selected photograph.
If it does not work
Section titled “If it does not work”- Faces (face search disabled) appears: return to Settings → General and enable Automatic face search. If faces do not appear for photographs you imported while the setting was off, create a project and import them again.
- The face is too small to inspect: use the split-rectangle icon in the Faces header to open the larger preview.
- You see the wrong photograph: click the intended card and check the filename beside the photo counter before inspecting its faces.
- No faces appear: check that the photograph contains a clearly visible face. If necessary, confirm that Automatic face search is still enabled, then import the photograph again.