Deliver separate selections for different people
What you will do
Section titled “What you will do”Create a separate JPEG folder for each person from one shoot. You will review the people detected by Arams, combine a person filter with your star ratings, and export each final selection to the correct folder. A group photograph can belong in more than one person’s folder.
This workflow creates local folders only. It does not send files to either person, upload a gallery, or publish photographs.
Before you start
Section titled “Before you start”- Sign in to an account that can use Automatic face search.
- Import the shoot and rate the photographs you want to deliver. Decide the ratings from your own edit, independently of face detection.
- Decide which shared or group photographs each person should receive.
- Choose a different export subfolder for each person.
Automatic face search sends photographs to the Retouch4me server for analysis. It is separate from automatic image tagging. Use it only when server analysis is appropriate for the photographs.
Prepare the delivery edit
Section titled “Prepare the delivery edit”- Open Settings and enable Automatic face search. If Arams displays the server-analysis notice, read it and continue only when that processing is appropriate.
- Return to the project and wait for the imported photographs to appear.
- Review the shoot and assign your delivery rating to every photograph you want to include. Give lower ratings to photographs that should stay out of the delivery.
- Note any shared photographs that should appear in more than one person’s folder.
The stars in this procedure are your delivery decision. They are not an AI quality score.
Review detected people
Section titled “Review detected people”- In the left sidebar, expand Persons under Smart filters.
- Wait for the detected person thumbnails to appear.
- Select a thumbnail and review every visible photograph. Check both solo and shared photographs before treating the cluster as that person’s set.
- Reset the filters and repeat the review for the next person.
Arams labels detected clusters generically, such as Person 1. Do not infer a person’s identity from the cluster number or face thumbnail alone. If a cluster includes the wrong photograph or misses one, reset the filters and build the required selection manually before export.
Combine a person filter with the final rating
Section titled “Combine a person filter with the final rating”- Reset any previous filters.
- Select the detected-person thumbnail whose visible photographs match the first person.
- Set the rating comparison to ≥ and choose the rating you use for delivery.
- Review the filtered grid. If a photograph is missing or does not belong, reset the filters and build the final selection manually.
- Select all photographs in the final set and check that the selected count matches what you intend to deliver.
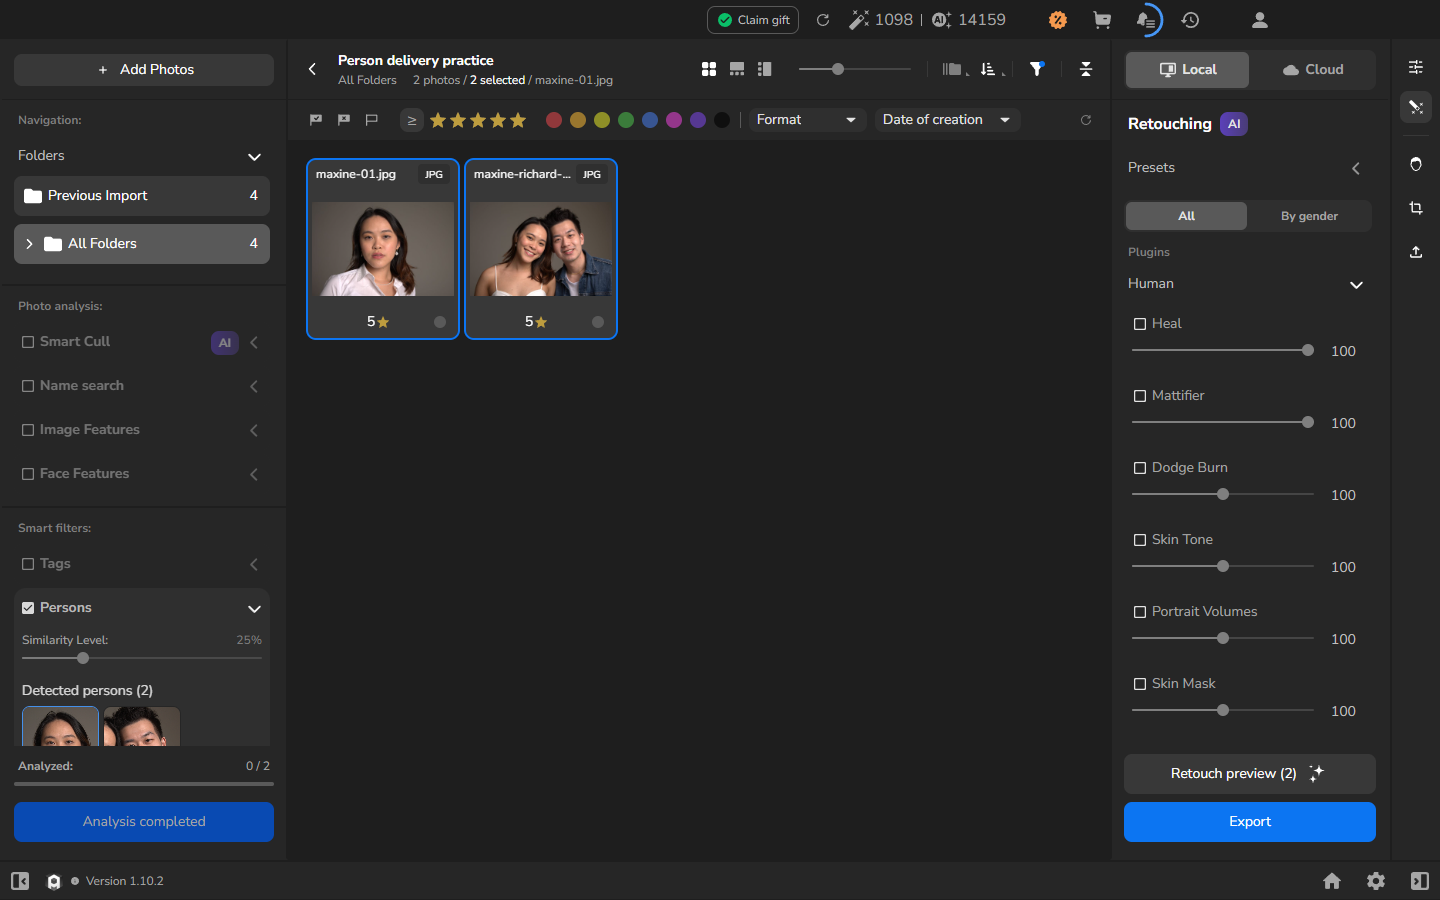
- Export the first set as described in the next section. Then reset the filters and select the thumbnail that matches the next person.
- Apply the same ≥ rating filter.
- Review the photographs, include any intended shared photographs, and select the final set.
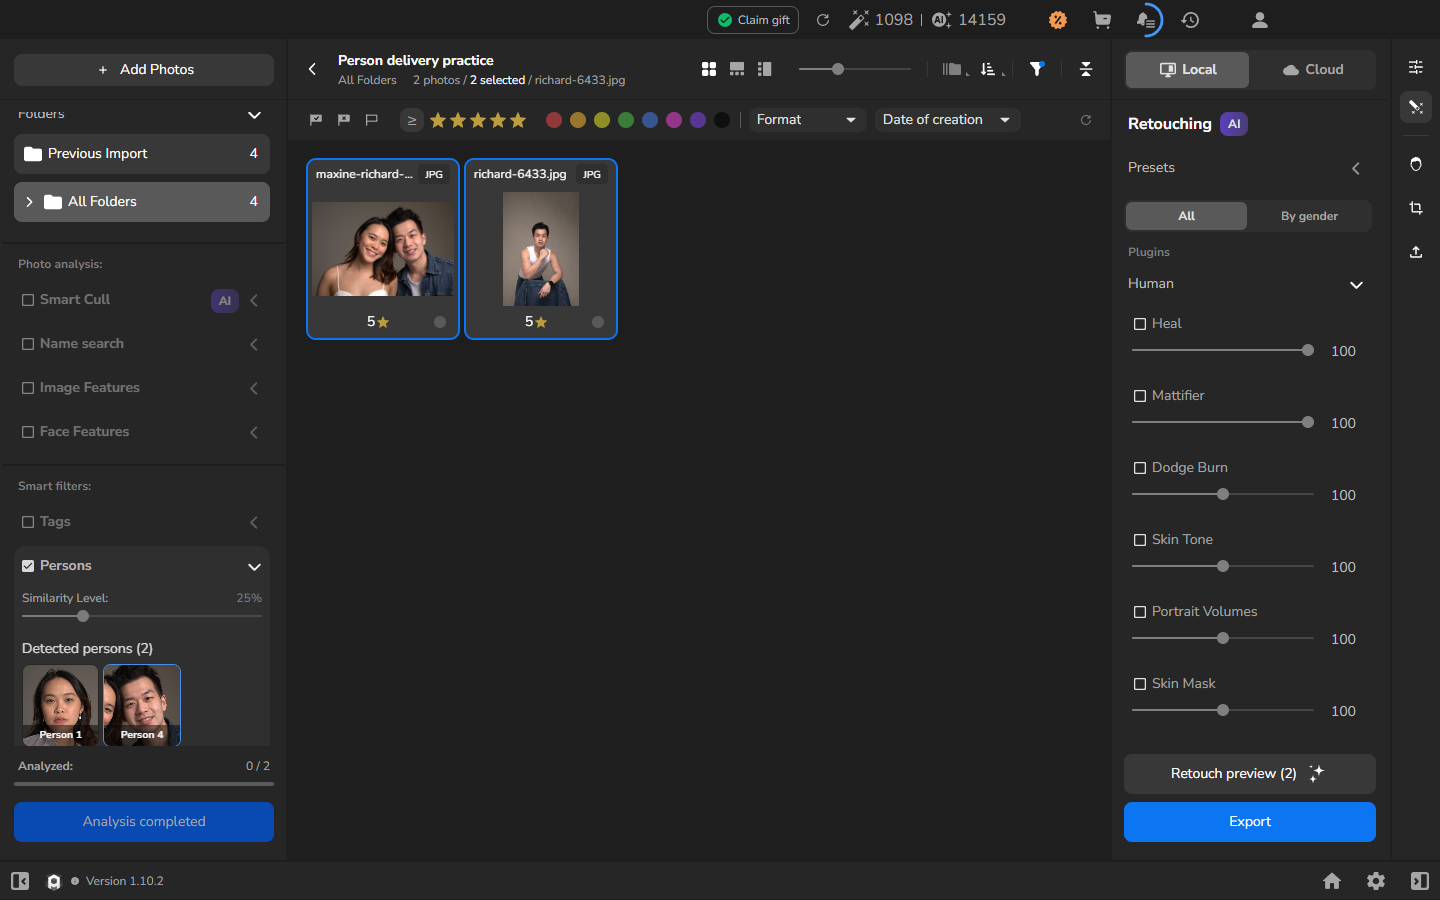
The person filter finds the candidate recipient set; the rating filter narrows it to the final delivery decision. Neither filter removes photographs from the project.
Export two separate folders
Section titled “Export two separate folders”For each person, keep only that person’s reviewed photographs selected, then use the detailed settings in Prepare files for delivery. The choices below create JPEG copies without applying another round of retouching or resizing:
- Open the export workspace, select Local, and leave every retouching tool switched off.
- Open Export settings.
- Under Export to, choose Hard drive — To computer.
- Under Photos to Export, choose the selected photographs and confirm that the Selected count matches the set you reviewed.
- Choose Original Files Folder, turn on Put in Subfolder, and enter a new recipient-specific folder name.
- Under Naming and Overwriting, choose Add to the Name: -retouched.
- Leave Add to Current Project off and Resize to fit off, then choose JPEG.
- Recheck the person, the visible filenames, the selected count, and the subfolder name before selecting Export.
The first settings view shows the selected photographs beside their destination. Using a subfolder and adding a suffix keeps the exports separate from the source files.
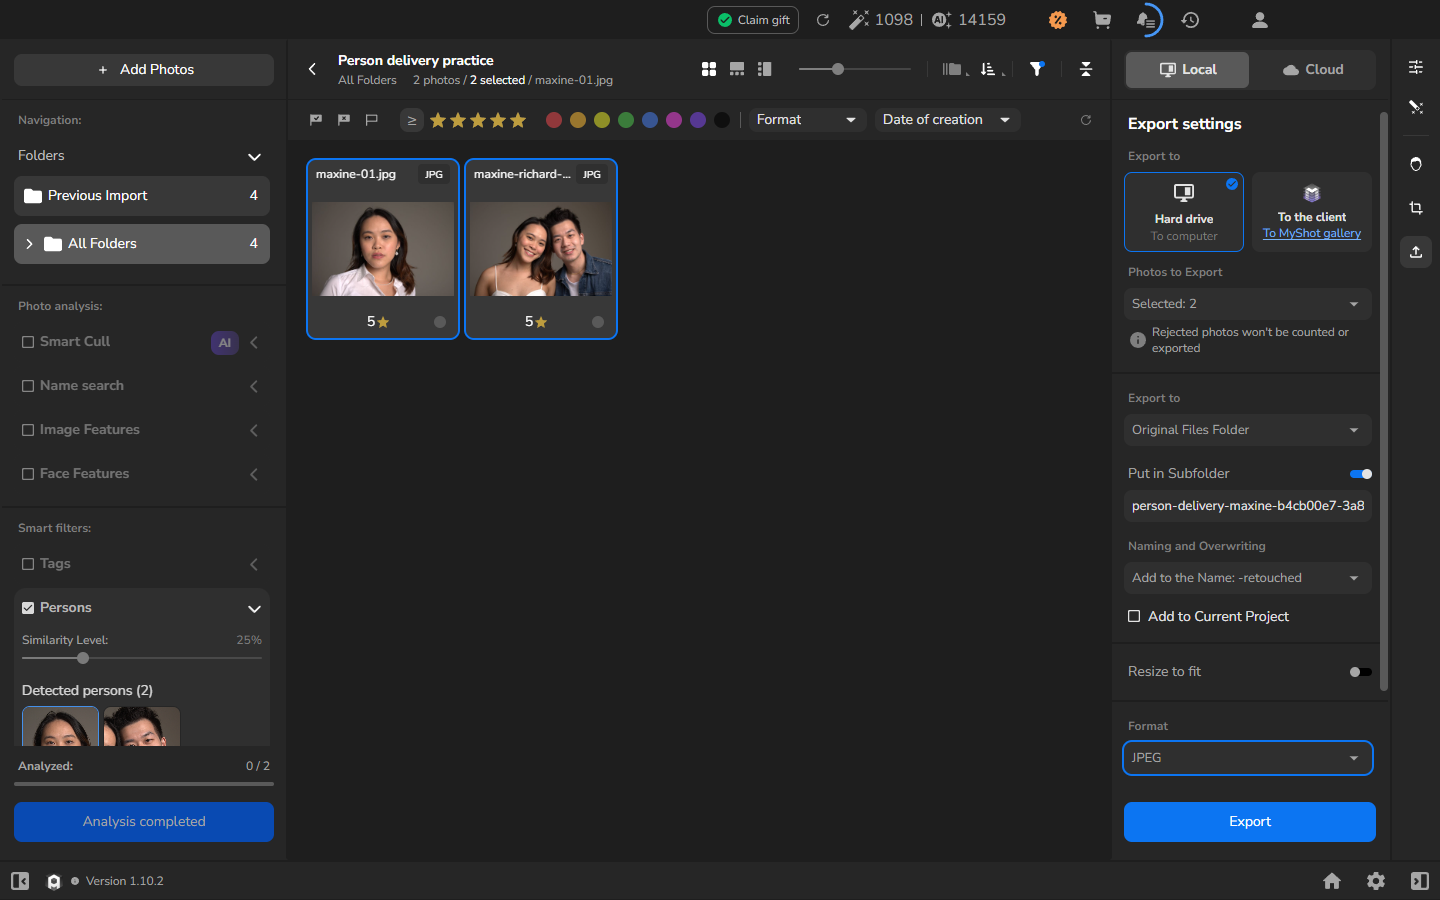
Repeat the same check for the next person. The visible photographs and subfolder must both belong to that person before you export.
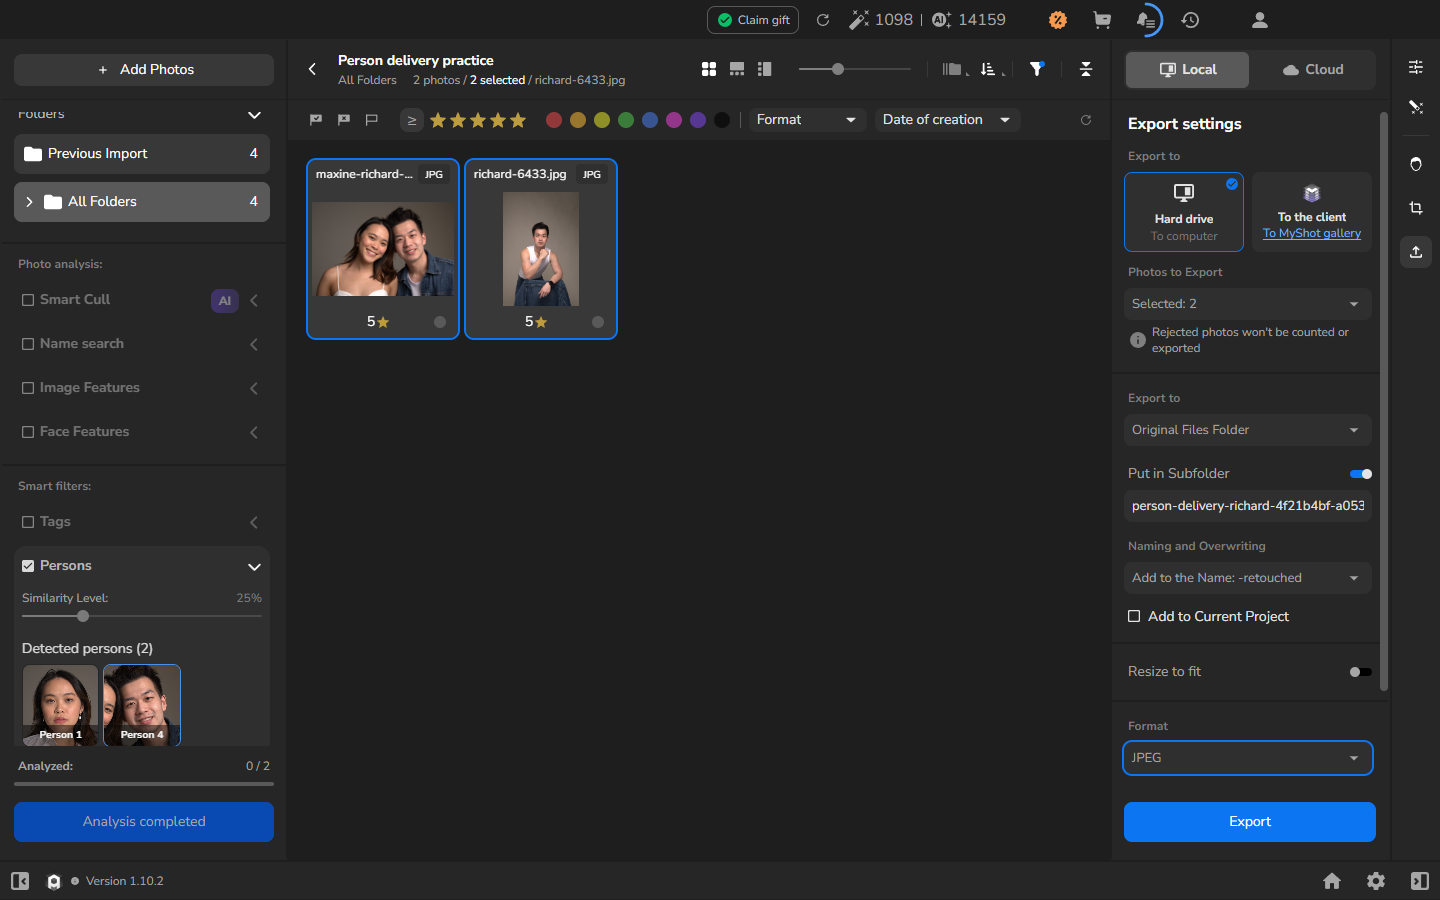
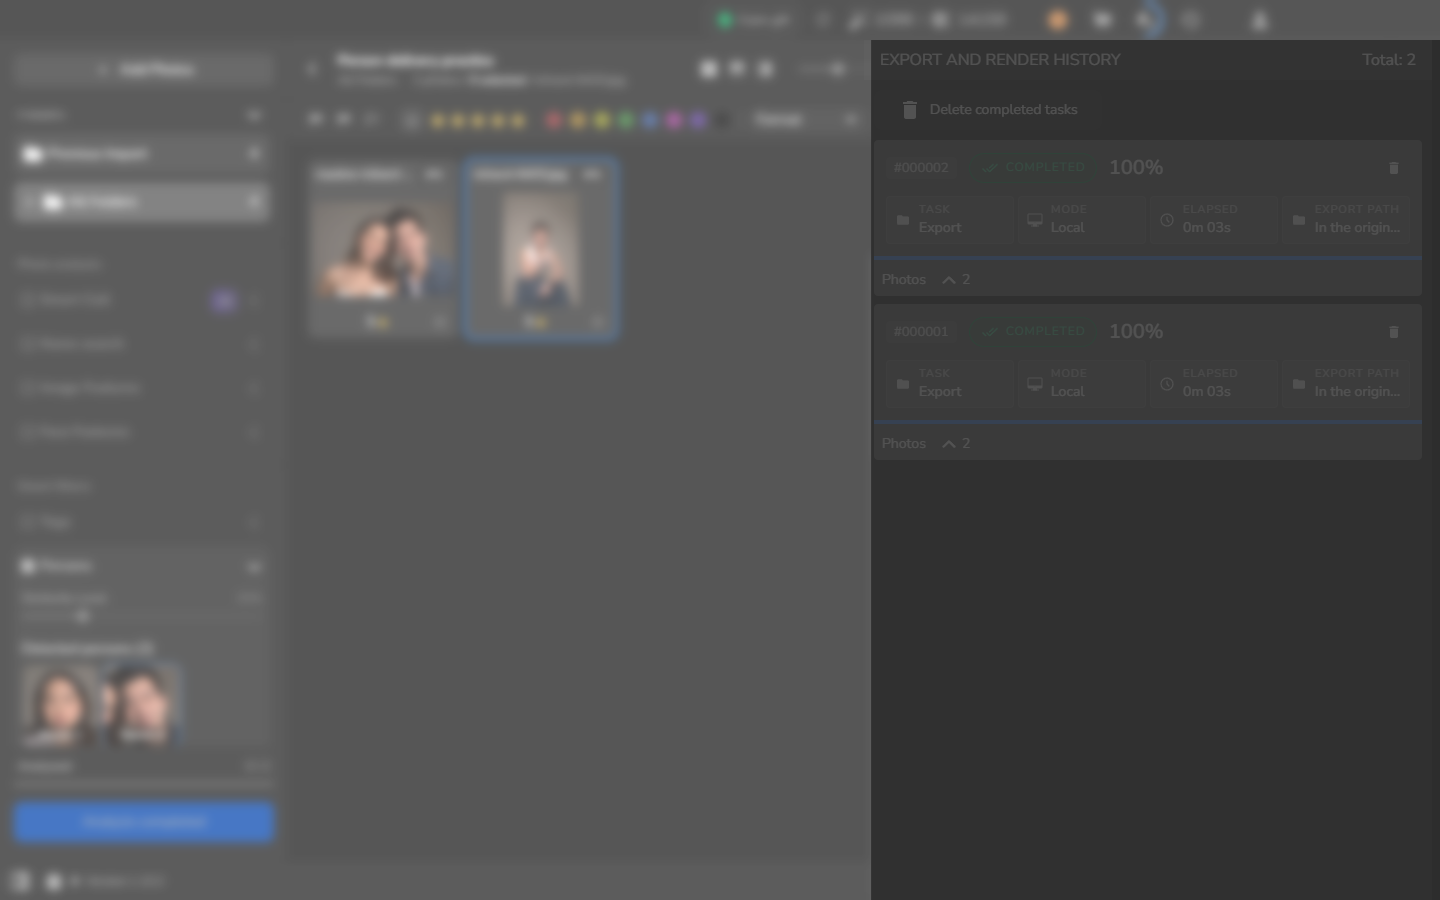
Complete one export for each person, using a different folder each time. Open the export history and wait until every task reports Completed and 100%.
Check the result
Section titled “Check the result”Open each folder on disk before you send it:
- Confirm that the folder contains only photographs intended for that person.
- Confirm that every intended shared photograph appears in each relevant folder.
- Open a few exports, including a shared photograph, and check that they show the expected people and look ready to deliver.
- Confirm that your source files still have their original names.
If it does not work
Section titled “If it does not work”- Persons is empty: confirm that Automatic face search is enabled and that server analysis has finished. Do not confuse automatic tagging progress with face analysis.
- A detected person shows the wrong files: review the grid yourself. Reset the filters and select the required files manually; do not deliver from an unreviewed cluster.
- A shared photograph is missing from one set: stop before export. Add it to that person’s selection manually, then review the visible filenames again.
- The rating filter hides an intended file: check the photograph’s assigned stars and confirm that the comparison is ≥ rather than another mode.
- The selected count is wrong: do not export. Reset the filters, rebuild that person’s selection, and review the filenames and counter.
- Two folders contain the same solo portrait: check the active person thumbnail and the subfolder name before repeating either export.
- A task says Completed but a JPEG is missing or will not open: do not send that person’s folder. Keep the folder and task details for diagnosis.