Take camera RAW files through to a finished export
What you will do
Section titled “What you will do”Use this workflow when you want to adjust camera RAW files in Arams without first converting the whole shoot. You will check that Arams can decode files from your camera, adjust a photograph, and export a full-size JPEG while keeping the camera original unchanged.
Before you start
Section titled “Before you start”Sign in to Arams and create or open a project for the photographs. The steps below cover Sony ARW files. RAW support varies by camera and format, so begin with a few files that represent the range of your shoot before importing everything.
Import a small RAW set directly
Section titled “Import a small RAW set directly”- Open the project.
- In Windows File Explorer, select the RAW files you want to check.
- Drag the files into the central photo area in Arams.
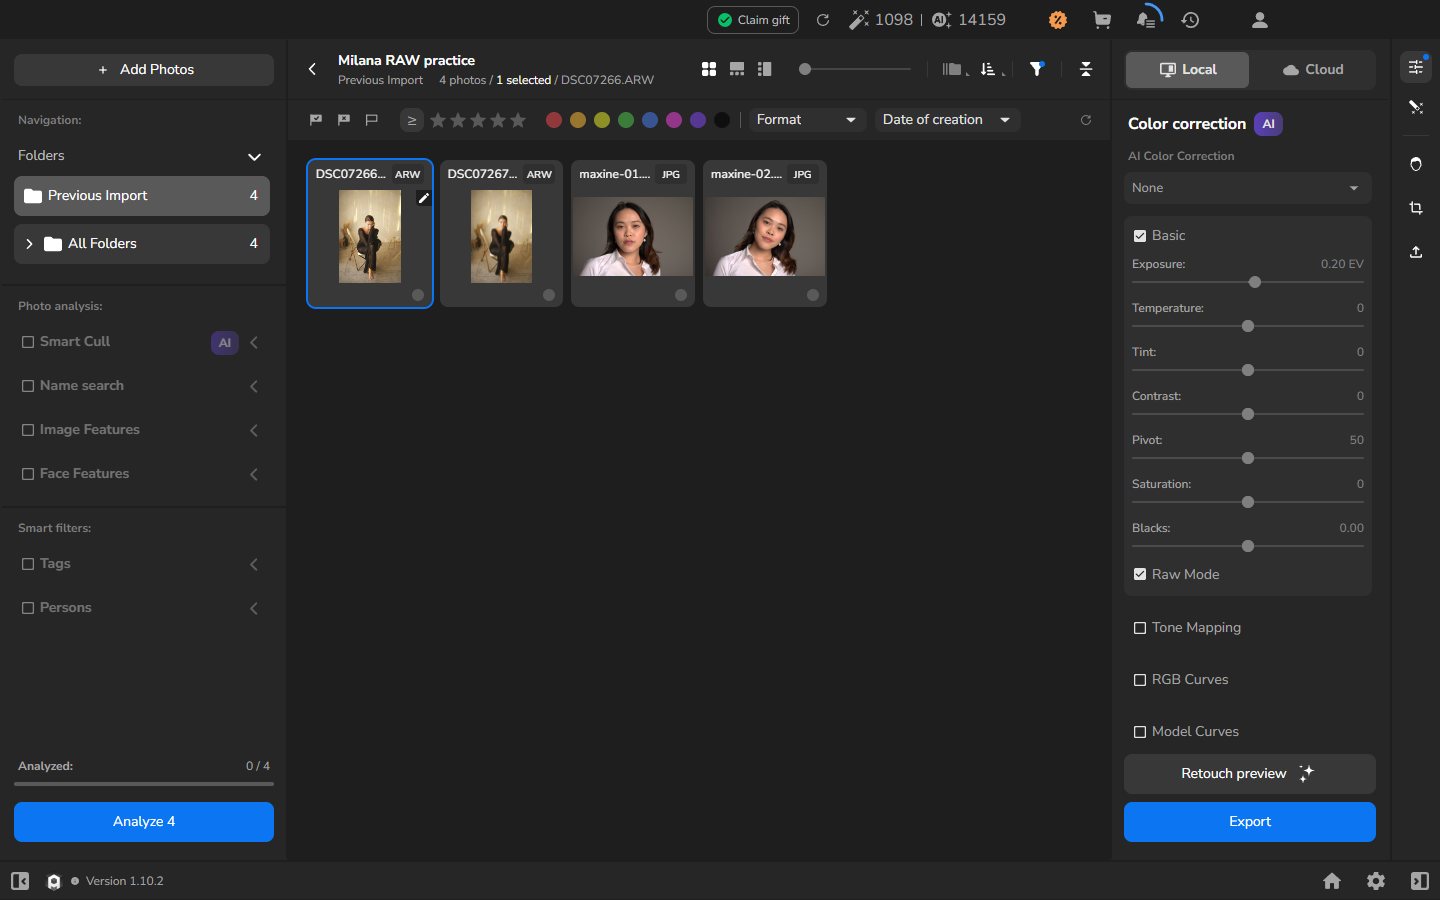
- Wait for the filenames, format badges, and thumbnails to appear. For a Sony ARW file, look for the ARW badge.
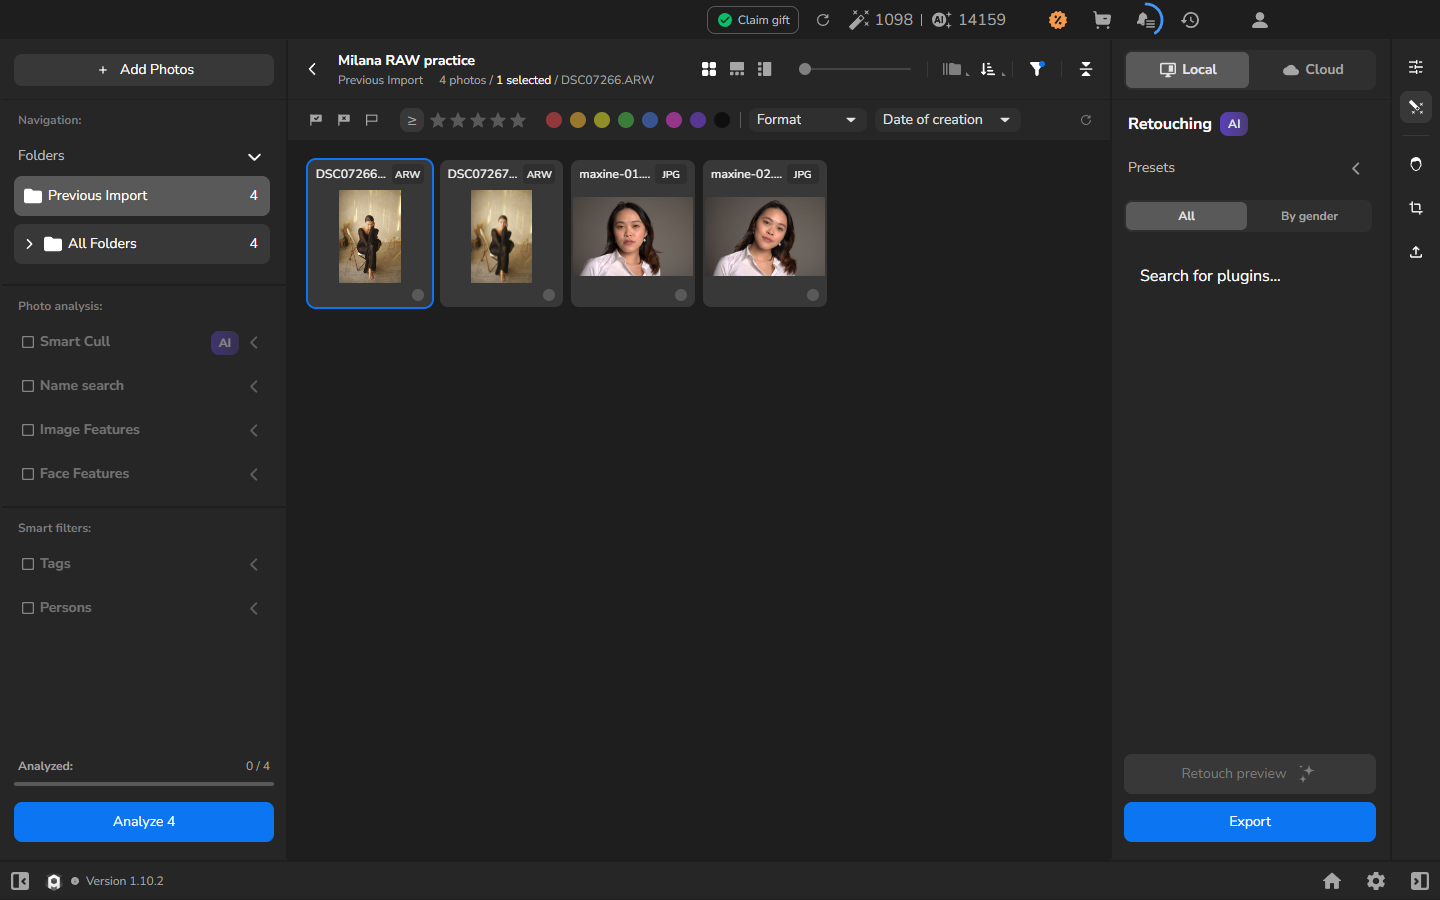
A thumbnail shows that Arams has added the file to the project. Open the photograph before you edit or export it, because the thumbnail may be an embedded camera preview.
Distinguish the preview from the decoded photograph
Section titled “Distinguish the preview from the decoded photograph”- Double-click one of the imported ARW files.
- Wait for Loading… to disappear.
- Inspect the photograph at a useful zoom. Check its orientation, fine details, shadows, and highlights for blank or corrupted areas.
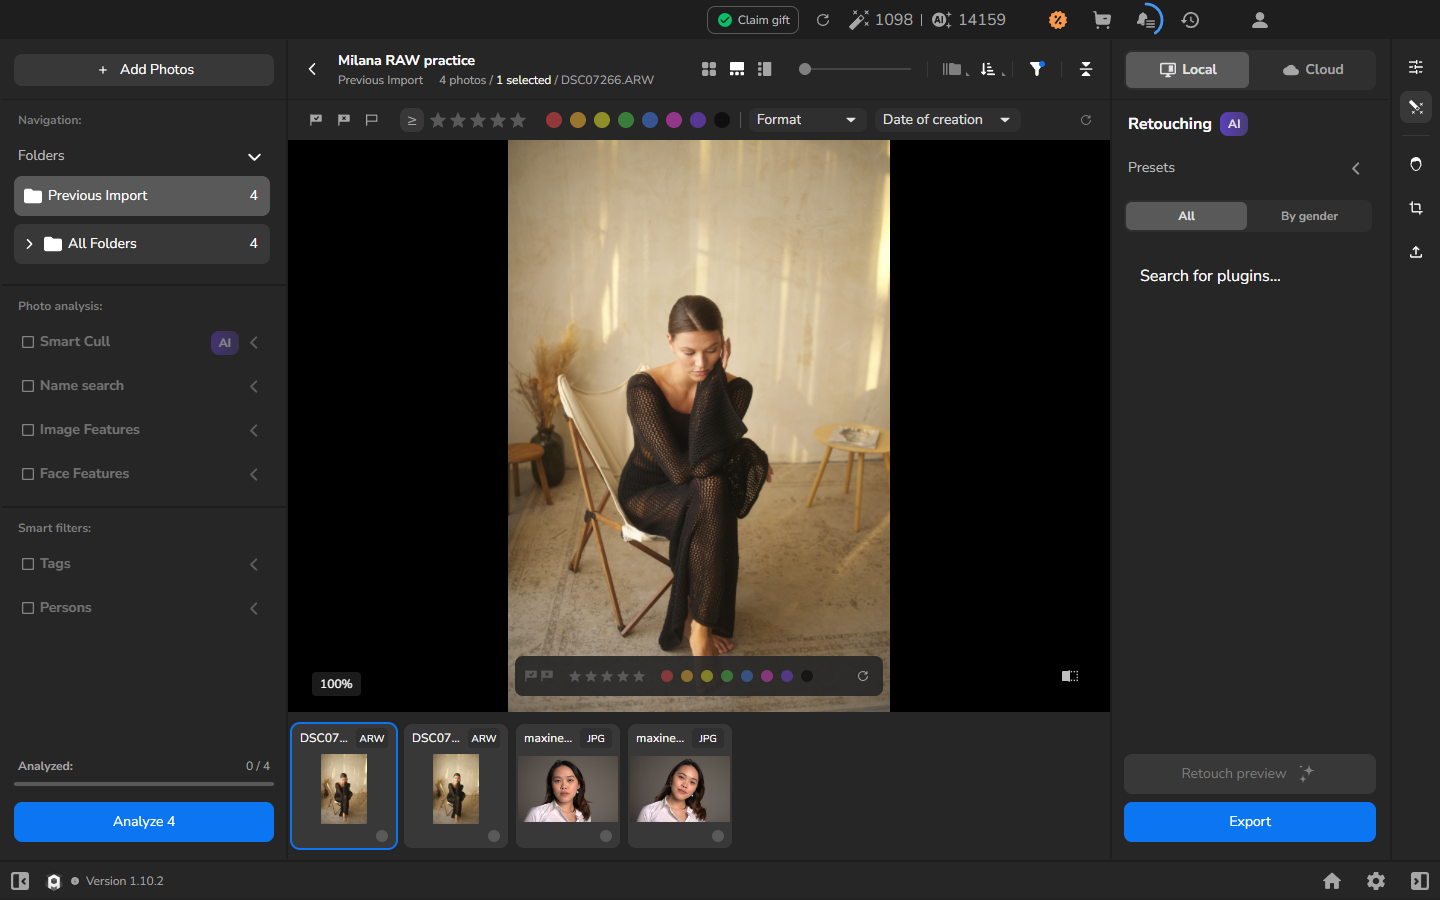
If the full photograph appears correctly after Loading… disappears, continue with the adjustment. The thumbnail alone is not enough because it may come from the preview embedded by the camera.
Adjust the decoded photograph
Section titled “Adjust the decoded photograph”- Open Color correction from the right toolbar.
- Enable Basic.
- Adjust only the controls the photograph needs. Watch the subject and the brightest areas as you change Exposure so that important highlights retain detail.
- Review the overall color, shadows, and highlights at a useful zoom before you export.
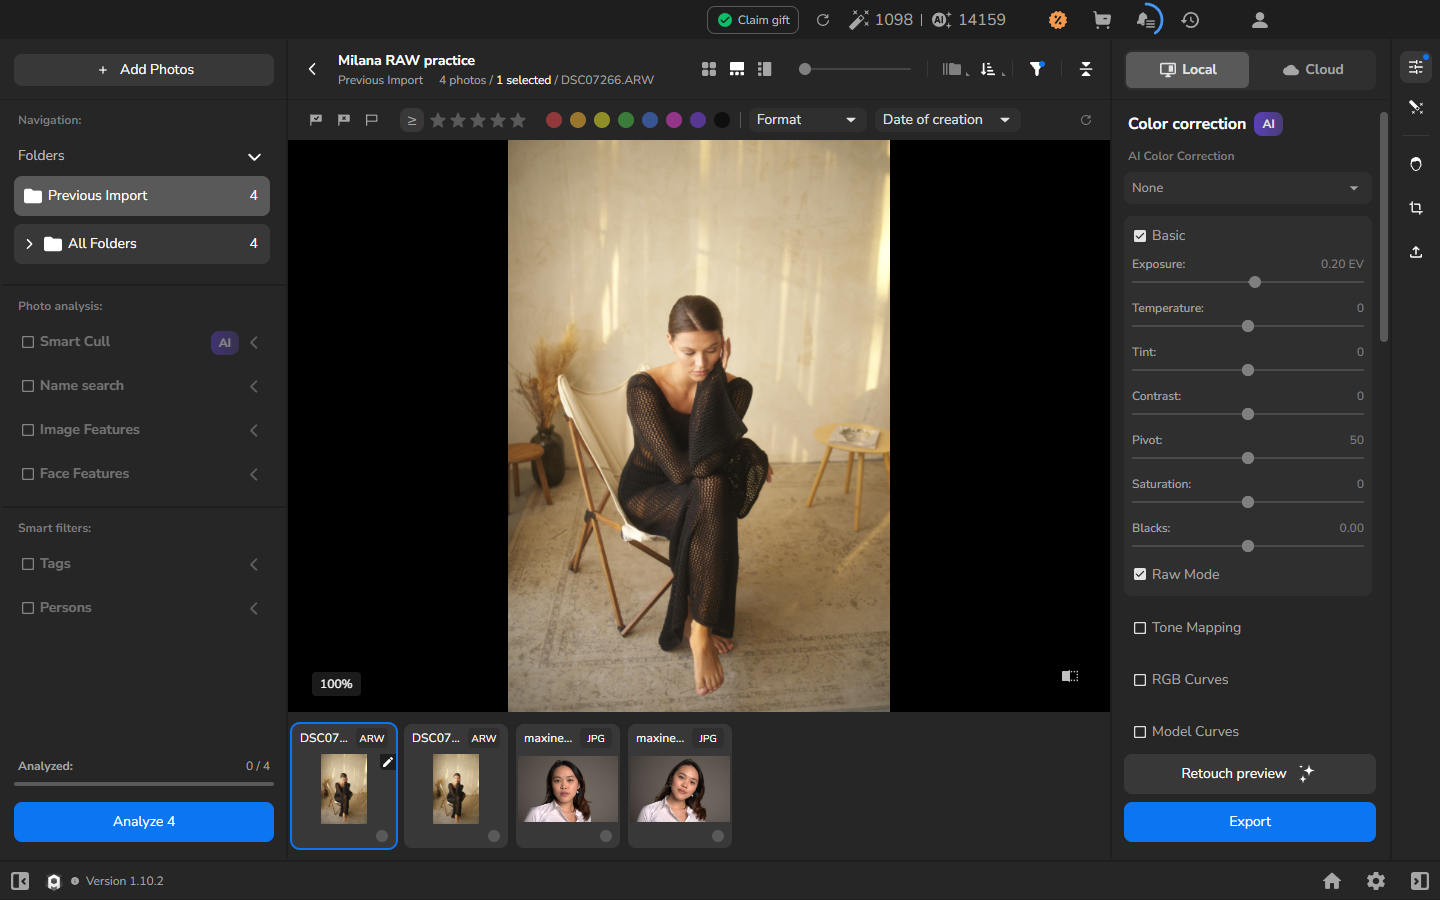
Do not use Raw Mode to decide whether Arams recognizes a camera RAW file. In this release, Raw Mode converts a JPEG to virtual RAW for color correction; it does not identify the source as a supported camera RAW.
Export a full-size JPEG
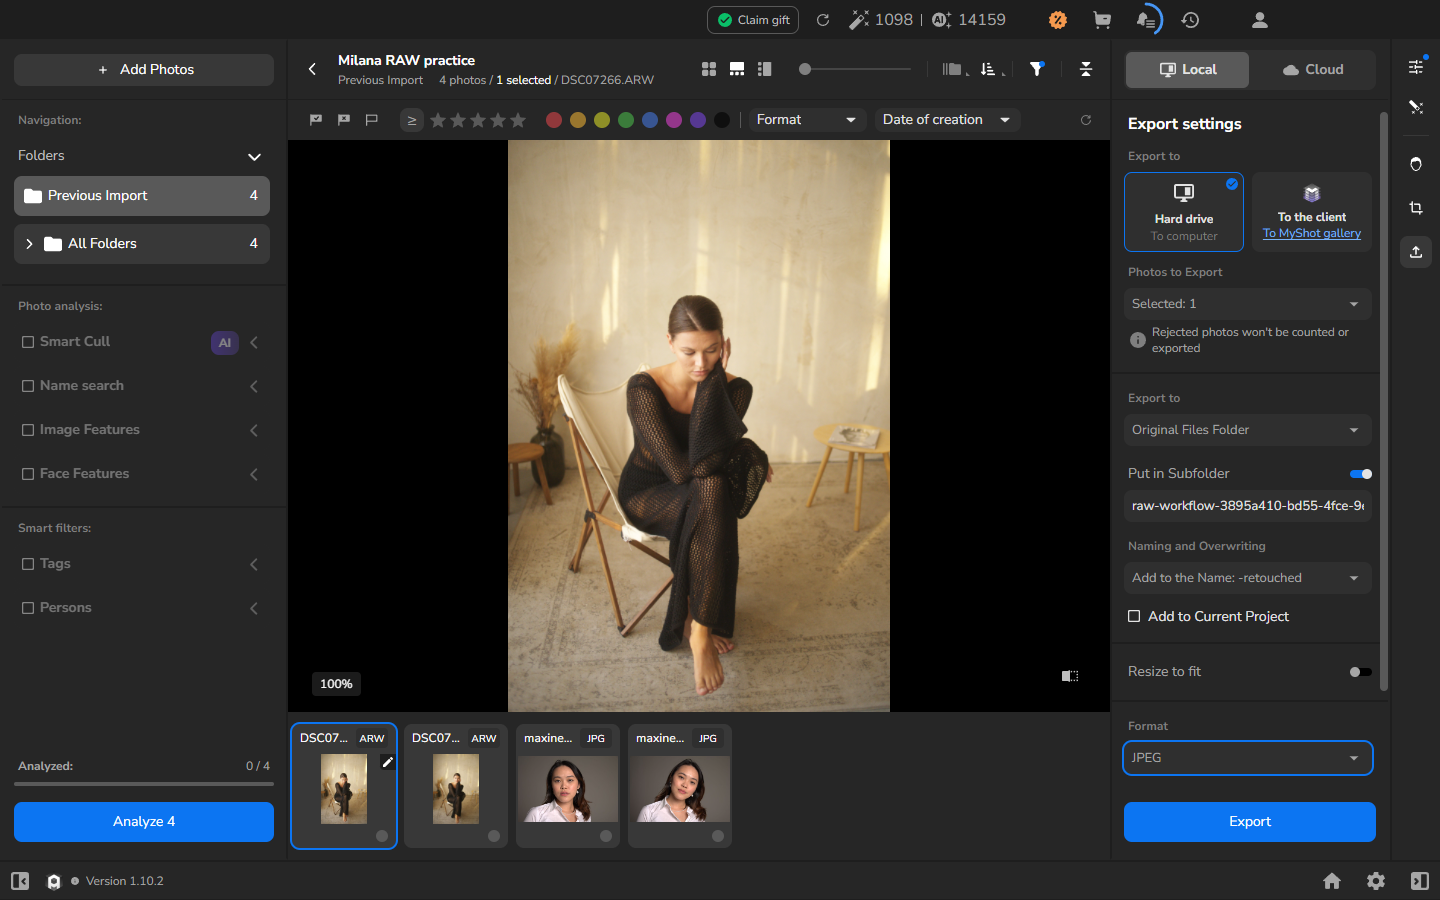
Section titled “Export a full-size JPEG”- Keep the adjusted ARW selected and open Export settings.
- Under Export to, choose Hard drive.
- Under Photos to Export, choose the selected photograph.
- Choose the output folder. Use Original Files Folder with Put in Subfolder to keep the JPEG near the shoot but separate from the camera original. Choose another destination if you organize finished photographs elsewhere.
- Under Naming and Overwriting, choose a rule that creates a distinct filename, such as adding -retouched.
- Leave Add to Current Project off unless you specifically want the exported JPEG added to the project.
- Turn Resize to fit off to retain the source dimensions.
- Set Format to JPEG, then select Export.
Open Export and Render History and wait for the task to show COMPLETED and 100%.
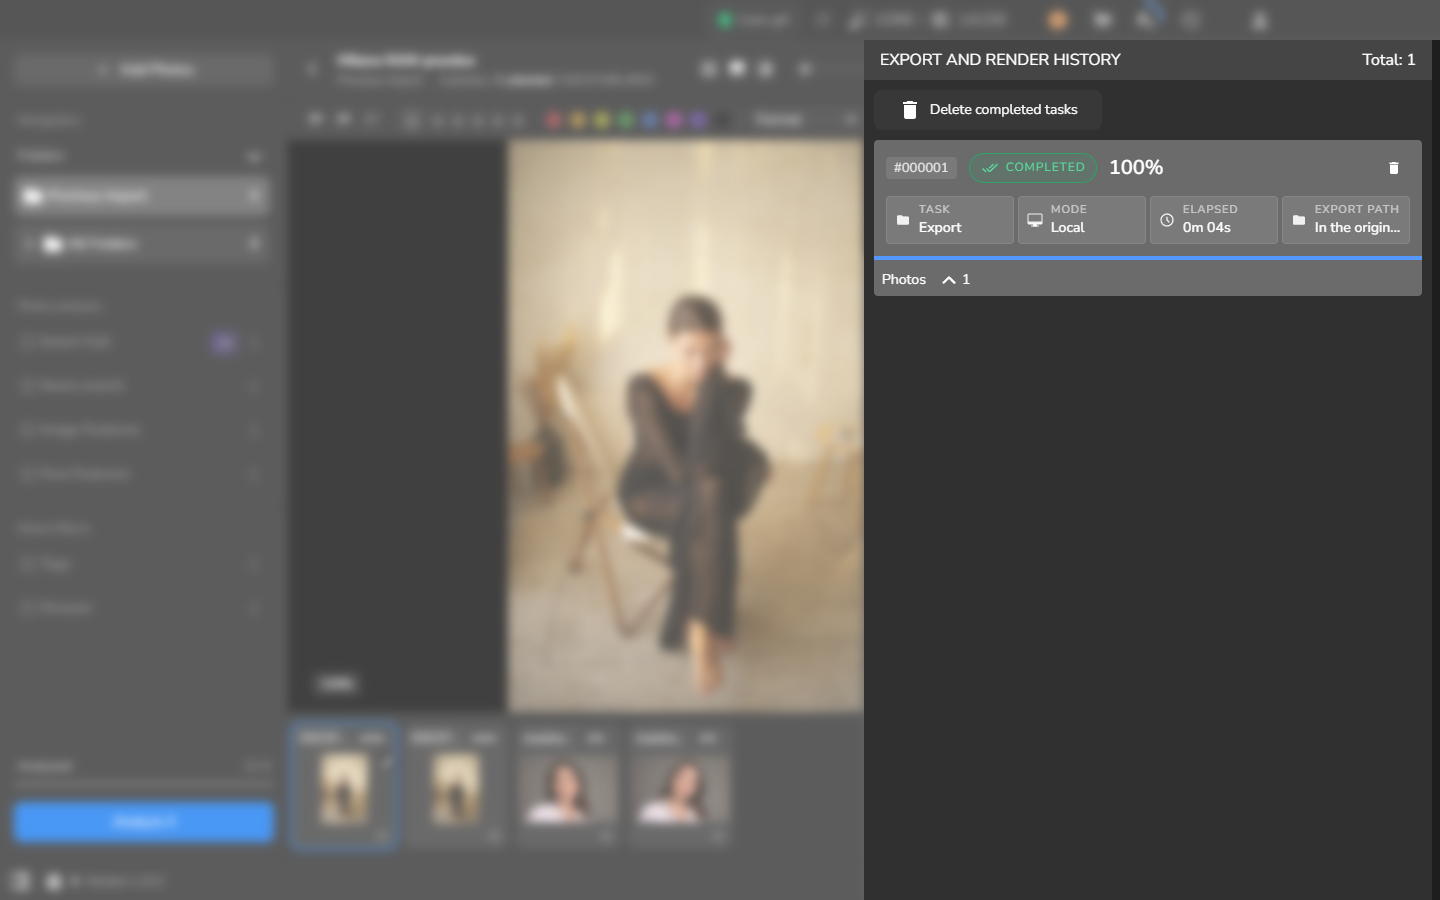
Open the saved JPEG outside Arams. Check that its orientation, color, highlights, and shadows match the adjusted viewer and that its pixel dimensions match the source when Resize to fit is off. Keep the RAW file as your camera original; the JPEG is the finished copy for delivery or further use.
Reopen the project
Section titled “Reopen the project”To continue editing later, return to the Arams home screen and open the project again. Select the RAW photograph and open Color correction to continue from the saved adjustment. Keep the source files in their original location so Arams can find them.
Check the result
Section titled “Check the result”You now have a full-size JPEG exported from a directly imported RAW file, with the camera original kept separate. If the representative files from your camera decode and export correctly, repeat the workflow with the rest of the shoot.
If it does not work
Section titled “If it does not work”If the RAW filename or expected format badge does not appear after import, stop there. Keep the camera original unchanged and use a conversion workflow intended for that camera and format. Renaming a converted JPEG does not turn it into a RAW file.
If the large viewer remains on Loading…, or shows a blank, rotated, or damaged image, return to the grid, reopen the photograph, and wait for decoding. If the state does not change, keep the original and do not export from that file.
If the history does not reach COMPLETED and 100%, do not treat the destination file as finished. Review the export settings and run the export again to a new subfolder. Do not overwrite the RAW source.