Use retouching presets
What you will do
Section titled “What you will do”Save a combination of retouching tools and settings as a named preset so you can give other photographs the same treatment without rebuilding the configuration each time. This example saves Heal with Sensitivity set to 75 as Portrait Heal 75, then applies it to another photo.
Applying the preset changes retouching settings. Generating a retouched preview or exporting a processed photo is a separate action.
Before you start
Section titled “Before you start”Open a project with the photograph whose settings you want to save and at least one photograph you want to treat the same way. If needed, import the photographs first. This example uses Cloud and Heal, so they must be available in your workspace.
Prepare the settings to save
Section titled “Prepare the settings to save”- Select the photograph whose settings you want to save.
- Open Retouching using the magic-wand icon in the toolbar at the far right.
- Select Cloud at the top of the right panel.
- Select All below Presets.
- Select the checkbox beside Heal under Plugins → Human.
- Expand the Heal section if Sensitivity is hidden. Move the pointer over the section to reveal its expand control.
- Enter 75 in the numeric Sensitivity field and press Tab.
Choose the tools and values that suit your photograph. The value 75 simply makes this preset easy to recognize; see Choose retouching tools and settings for help judging the result.
Create a named preset
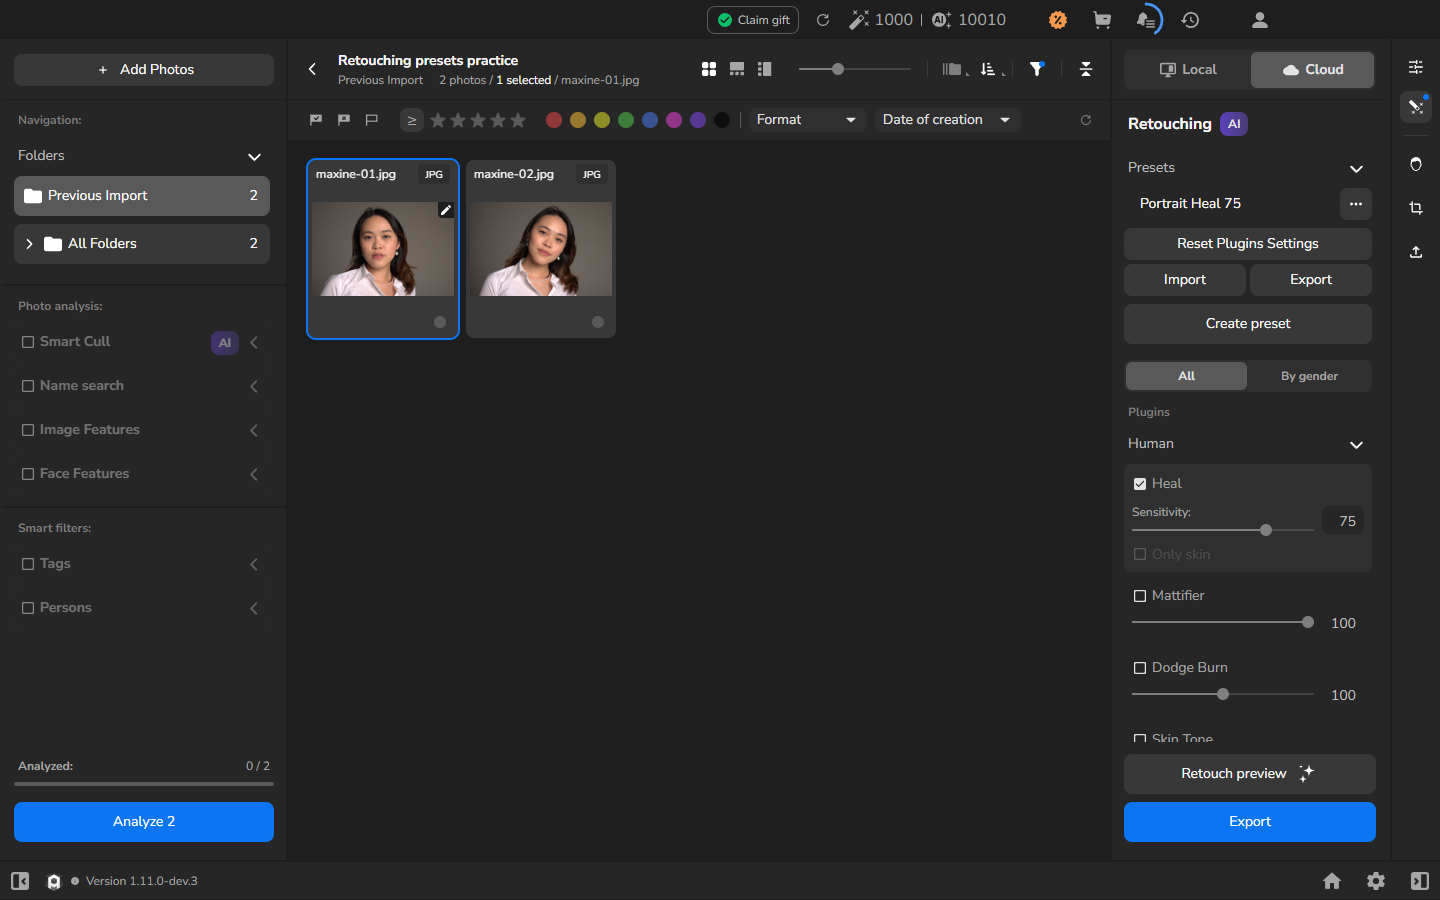
Section titled “Create a named preset”- Expand Presets using the chevron beside its heading if Create preset is hidden.
- Click Create preset.
- In the Preset name dialog, enter a name that describes the treatment, such as Portrait Heal 75. The Accept button is disabled while the name is empty.
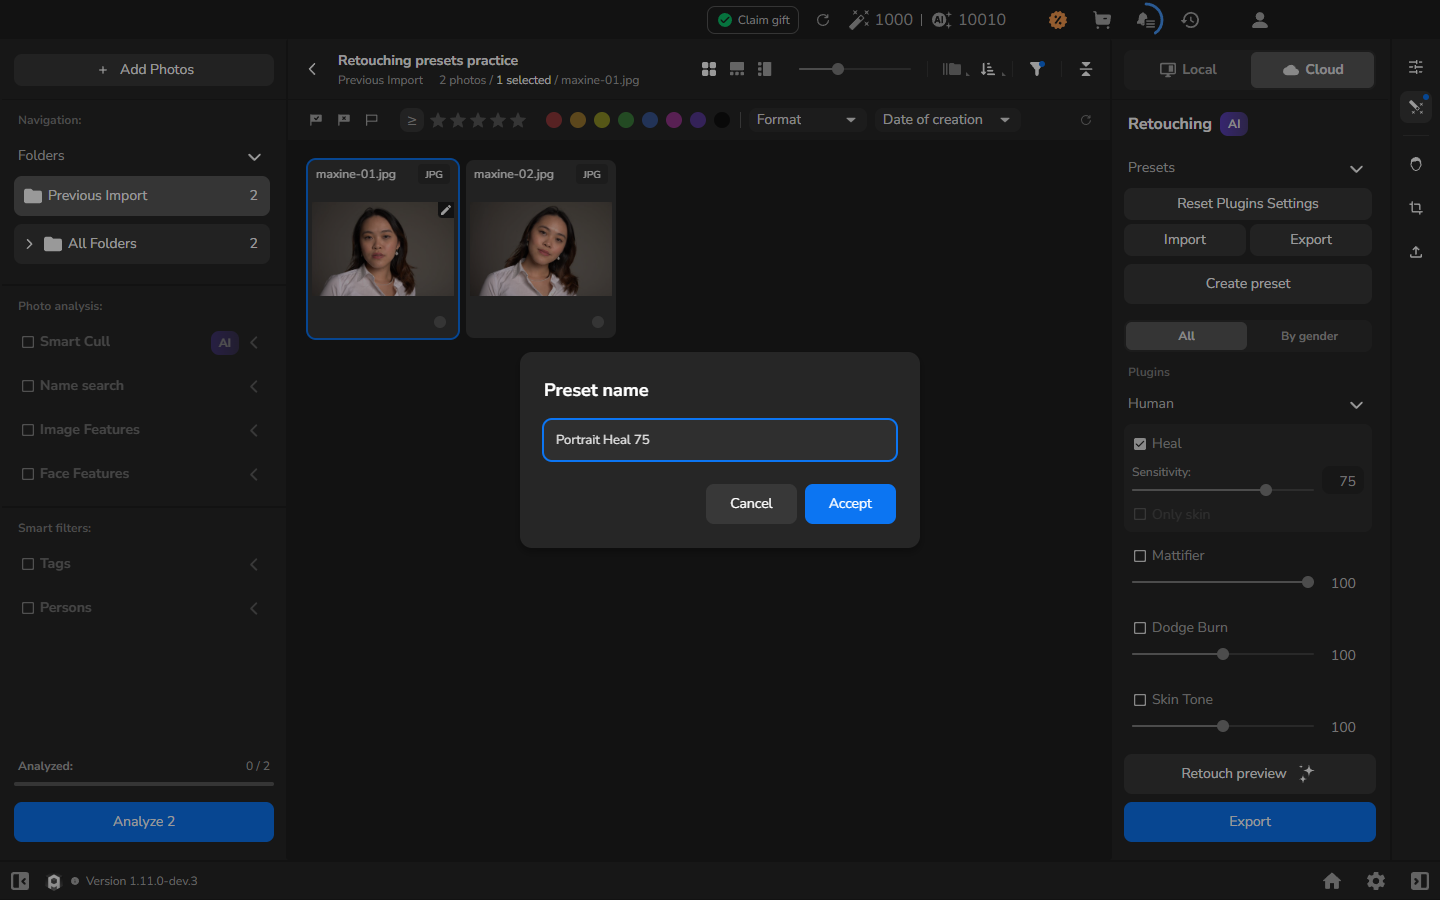
- Click Accept.
- Check that the dialog closes and Portrait Heal 75 appears under Presets.
Apply the preset to another photograph
Section titled “Apply the preset to another photograph”- Select the photograph you want to treat with the saved settings.
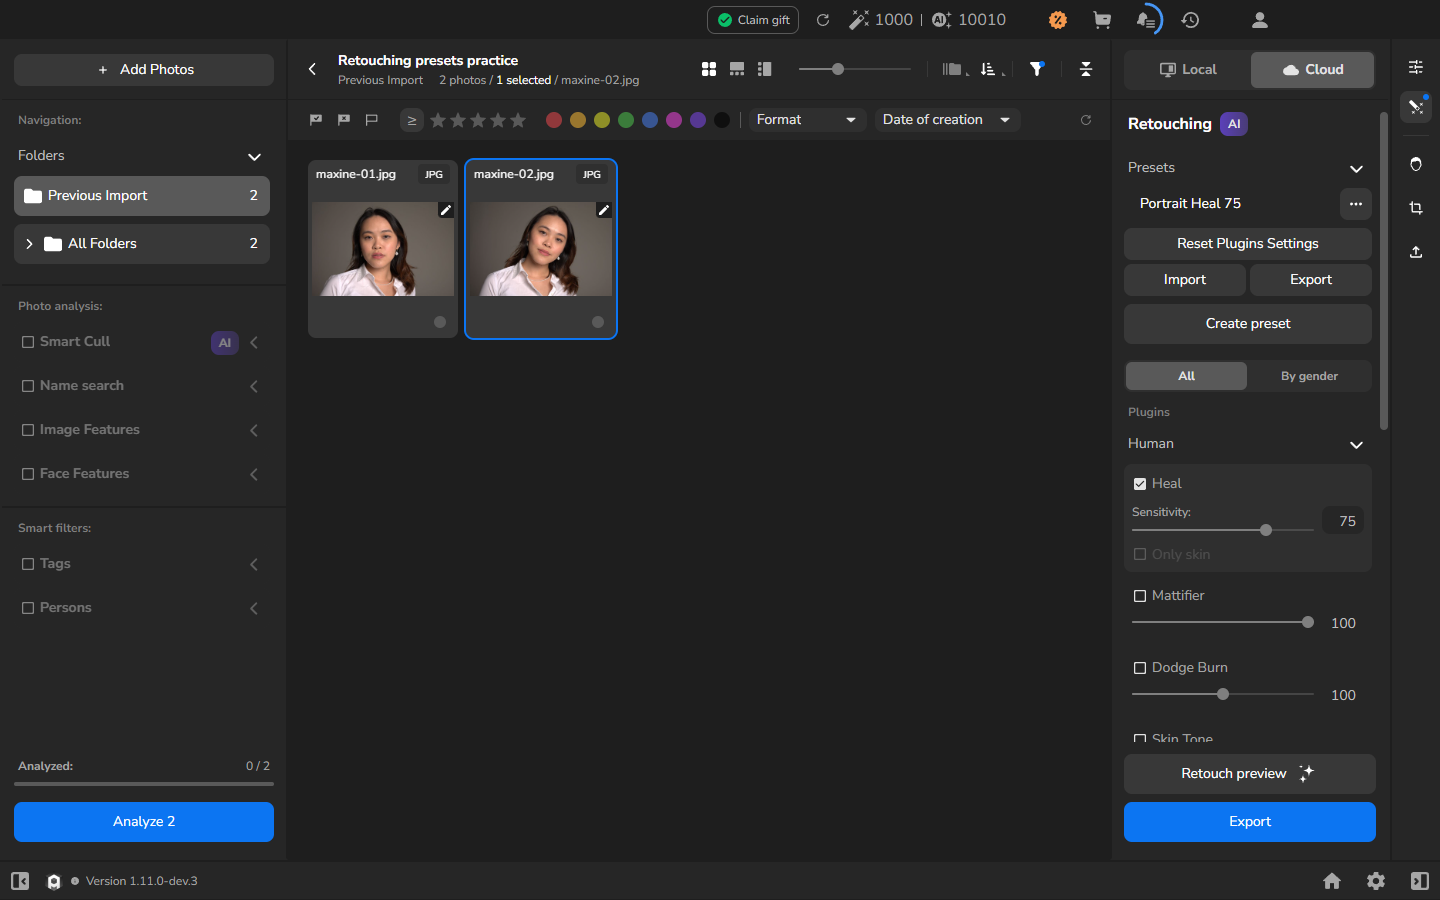
- Click Portrait Heal 75 in the Presets list.
- Expand Heal if needed. Its checkbox is selected and Sensitivity is set to 75.
Check the result
Section titled “Check the result”The right panel shows Heal enabled and Sensitivity set to 75 for the selected photograph. You can now continue adjusting the settings for this photo or apply the preset to another one. Use Retouch preview when you want to see the processed result, and Export when you are ready to create an output file.
If it does not work
Section titled “If it does not work”- Create preset is hidden: expand the Presets section using its chevron.
- Accept is disabled: enter a preset name; an empty name cannot be accepted.
- Sensitivity is hidden: expand the Heal section.
- The settings appear on the wrong photograph: check the filename beside the selection counter before applying the preset.
- Cloud or Heal is unavailable: choose an available retouching configuration, or resolve its availability before following this example exactly.